Kettenkrad riders

The Kettenkrad scene features four soldiers sitting on the back of the Krad, and on the trailer. These figures will be sculpted next. For the driver figure, I plan to use the converted driver from the Kettenkrad kit.

I start again with the armatures from brass wire, this time soldering the wires also together. Then I add some Milliput and the boots. The two figures that will be seated the lowest on the Krad have already been formed into their poses, with some Milliput used to stabilize the legs. The last pictures show how the two guys will be seated.

Progressing with the interior

The gearbox is now finished, and glued into the hull together with the engine. Adding all the small details was actually a lot of fun. I then pushed the bent side parts a bit apart using a piece ofthick styrene sheet, added the fasteners of the stowage boxes on both sides, and finally glued the bench on its place at the back. I also soldered together a frame holding the hatches that regulate the cooling air intake (located below the bench), and glued it into the hull. On the last pictures, the driver’s seat can be seen with its mount, also soldered together from scratch. The pin will be fitted into the lower part of the mount to fix the seat permanently later on.

Started to build the Kettenkrad

In the meantime, I started to work on the Krad. First, I collected some reference pictures from still existing vehicles, together with all wartime sources I could find.

Then I started to build the body. As the details of the Dragon kit are rather poor, there is some substantial detailing needed. I removed some parts on the back that will be recreated from brass rods, hollowed the fenders with my Dremel tool and put some parts together for the basic shape of the model. As can be seen from the picture taken from the front of the vehicle, the sides are bent a little, which will be corrected by adding the engine cover and the bench on the back. Also quite some filling and sanding will be needed:

The engine is fairly detailed, and as I will not leave the engine cover open, this should be ok. But the gearbox, the support for the seat and all the mechanical parts underneath the driver’s seat are very poorly modelled, i. e. most of them are completely missing. So I took my references, and started to build the gearbox from scratch:

New project – Kettenkrad Ukraine 1944

I have a Dragon Kettenkrad kit on the shelf (late version), using that I want to built a scene based on a historical picture:

Russland-Süd, Kettenkrad

The trailer (Sonderanhänger 1) has to be scratch built, as well as the figures riding the Kettenkrad. I have not yet decided whether I will build a Wehrmacht vehicle or one used by the Waffen SS.

The picture title dates the picture to the beginning of 1944, therefore the scene could have taken place on the retreat from Cherkassy.

Converting a SS soldier

The very last figure to add to the scene will be a SS tanker that is sitting on the scout car. I will use a figure from Alpine for this one, which has to be slightly converted:

The first picture shows the original figure that is standing upright.

I cut off the legs right under the uniform jacket, and also cut off the lower parts of the legs, so that I can reuse the boots and the lower part of the legs. Then I inserted an armature made from copper wire into the parts, that resembles the pelvis, the legs and a part of the spine.

The last picture then shows the legs bent into their position on the car.

Following that, I fixed the pose by adding putty to the wire armature. Not nice, but it works:

Finally, I added the new trousers legs and details like the flaps, and the braces. Now the figure is ready for painting:

And that is how the finished figure looks like:

Russian peasants

Looking back at my sculpted figures, I realized that I have to practice and to refine my skills there much more. I browsed through some war gamer sculpting web sites, looking at the different techniques used.

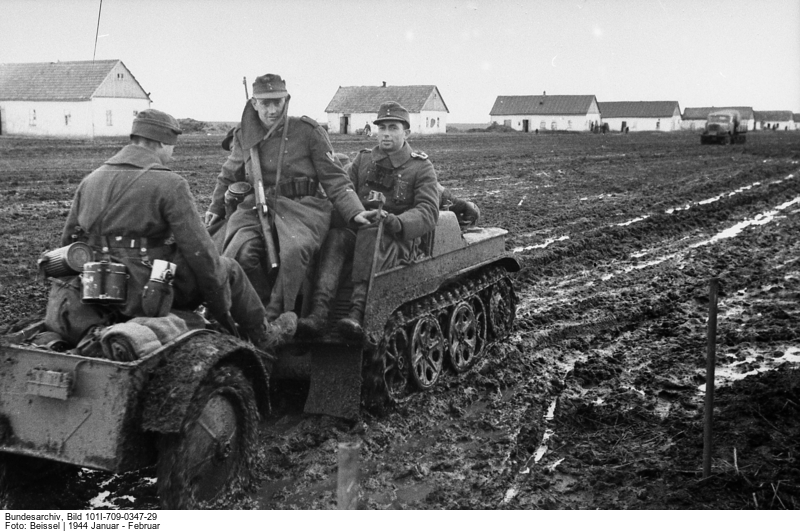
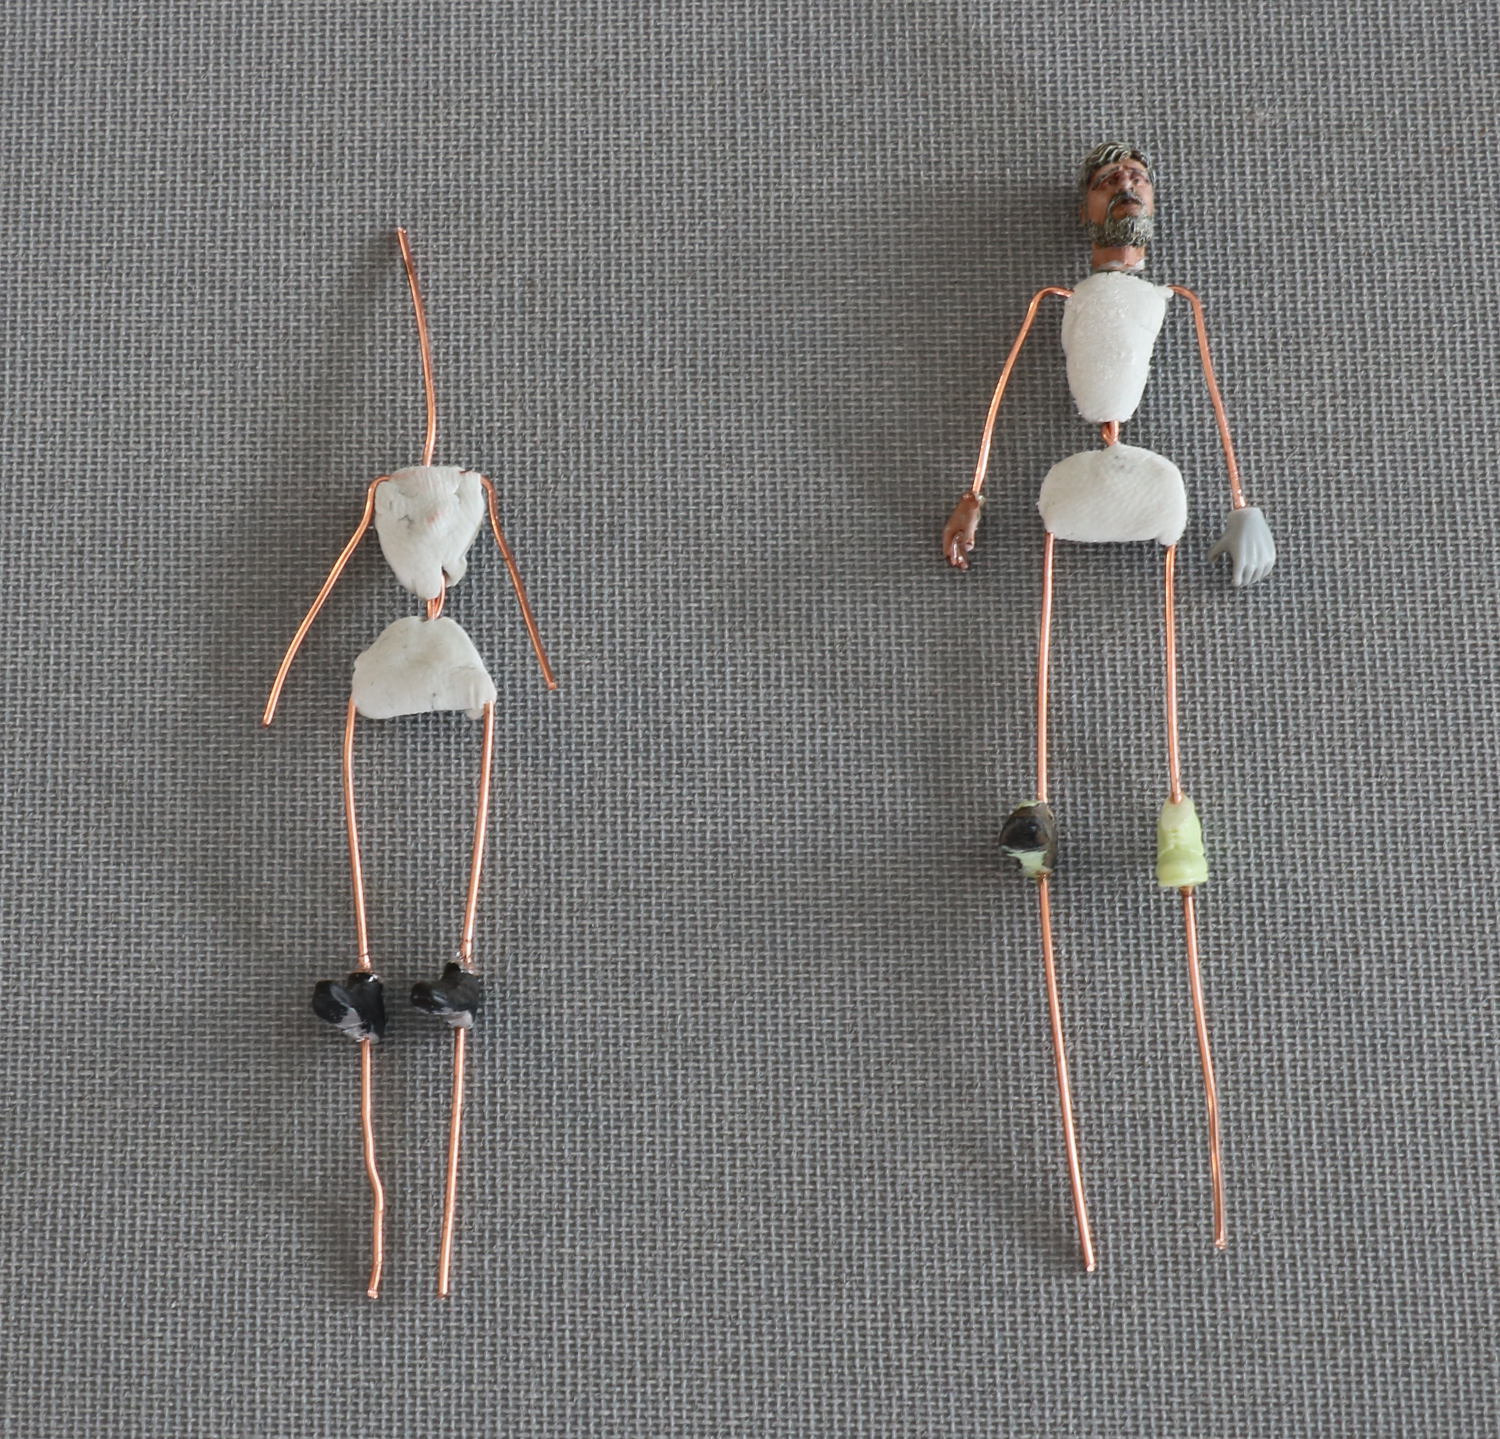
Then I decided to redo the Russian peasant couple from the Panzerbefehlswagen I scene. I started creating armatures using two pieces of intertwined copper wire, that was then strenghtened using putty  at the chest and the pelvis region. Then I added shoes and also a head (only temporary):

sculpting-armatures

I then bent the armatures to their respective poses, and fixed these by adding putty to the wires. It looks quite ugly, but it does the trick.

Then I added again some putty to build up the body proportions, and started with the clothing. The peasant has his trousers added, and to the female figure I added the upper part of  her dress, as well as some stockings (as far as the will be visible below the dress:

Now I have finished the two figures, but unfortunately I did not take any pictures while I was sculpting. So these are the finished figures:

Both were sculpted based on historical pictures, like the original figures I made. The guy got a cap, as I did not really like his original hair style. I also changed the legs of the peasant figure, as I had two nice legs available from another conversion project.

Now the figures are painted:

Some whitewash

I made quite some progress with the scout car. After priming and airbrushing the body of the car with Tamiya German Grey, I added some sponge chippings with red primer, which were then refined using a black brown acrylic color. Then I did some whitewash on top of that, using the hair spray chipping technique:

Finally, I added a pin wash, followed by some refinements using oils, pigments under the mud guards and some dark washes on the lower hull. I also lightened up the chipped whitewash using white enamel color (this is called mapping by Michael Rinaldi), which adds some nice contrast. The last picture then shows the wheels fitted with snow chains.

The hair spray chipping worked out quite well, as I practiced quite a lot using an old cheap kit.

Now I also finished the wheels, added snow made from soda and white glue to the lower parts of the hull and the wheels, and fixed the scout car to the base: