In the meantime I continued to work on the figures. The first figure is now finished and already fixed to the base:


I also finished scultping on the next figure and started painting:


In the meantime I continued to work on the figures. The first figure is now finished and already fixed to the base:
I also finished scultping on the next figure and started painting:
I built the road wheels and the lower part of the hull, and wanted to start constructing the interior. This was when I realized that Aber packed a wrong fret into my PE set, so I have to wait for a replacement from my retailer…
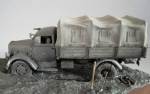
Now the Opel is finished! It went all quite well in the end: painting the tarp (base color with Tamiya mixture, then some pigments and pin washes), fixing the driver’s cab to the frame, and finally adding some more weathering (dirt splashes etc.) to harmonize the different parts of the vehicle.
I also added a towing cable to the front hooks, as this can be seen on almost all historical reference pictures in some form. And that is how the Opel looks now:

Now I will add another three figures. One is from Alpine, slightly reworked:


The other two figur are two guys originally rolling fuel drums, terribly sculpted and currently being strongly reworked:


Now the Alpine Figure is almost finished:


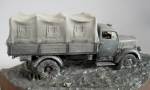
I added a tarp made from Milliput to the cargo bay. It could show more wrinkles, but apart from that I am happy with the result. To get such a large flat sheet of Milliput, I used two sheets of baking paper, a lot of baby powder and a rolling pin, which worked great.
The pictures below show the tarp almost finished, the straps of the side covers, the attachment to the holding loops and some seams are still missing.


I also mounted the cargo bay to the frame without any problem, and added some splashes from thinned oil paint.
While I am finishing the Opel Blitz, I also started to work on a new project. I want to add some more figures to the two guys from the Charkov 1943 vignette. I will add Max Wünsche as well as two grenadiers and a vehicle. The latter will be a SPW (SdKfz 250).
The SPW kit is from Dragon and resembles the /11 version with Panzerbüchse, which I will replace with a MG. I also have some PE sets from Aber in stock.
Until now, I started building the lower hull. I am excited to build this one, as I will first try a winter white wash with hair spray.
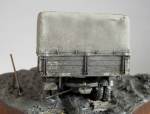
After a well deserved holiday break, I finished the cargo tray of the Opel Blitz. It was painted, chipped using a sponge, and then dusted using pigments with white spirit. This worked quite well, but the resulting dust layer is quite intense. But this should not be a problem, as it will be followed by a dark pin wash. And that is how the cargo tray looks like:


The wooden rod you can see on the pictures is fixed with a screw to a piece of sprue glued into the cargo tray to ease handling. As I intend to also add a tarp from putty, I do not care about the interior of the cargo tray…
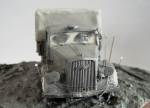
I also finished painting the drivers cab, chipped it and dusted it:


So from now on I can really enjoy weathering, weathering and even more weathering… 🙂
In the meantime I fixed the frame of the truck to the base, and added some touch ups with Celluclay. Then I added a pigment layer and a first oil wash (dark mud):


Besides the truck, I added two shovels. The smaller one is from the Opel, the other one from a resin tool kit.
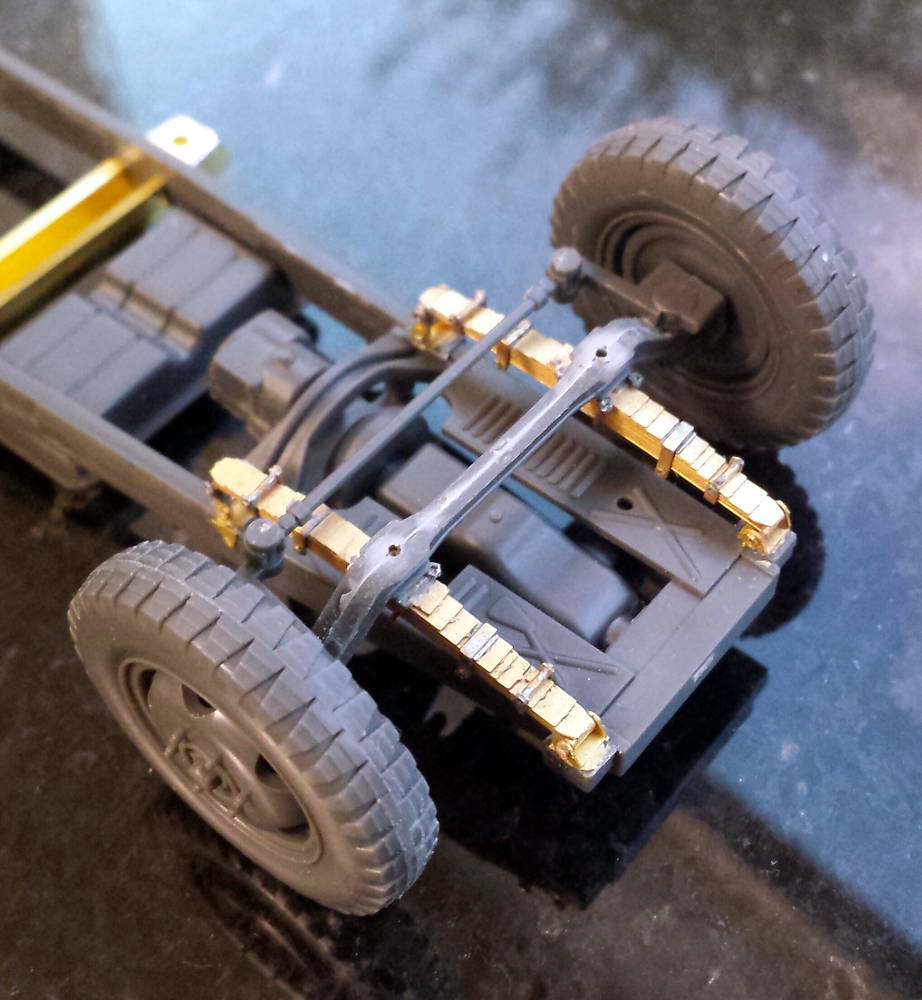
I also started to construct the cargo area. Using the PE set, it is built from a frame made from brass, and some styrene plates (included in the PE set), that have to be crafted to look like the original wooden parts. I decided to use the kit parts instead, as they have a very nice wood structure. I carefully removed all the molded parts like hinges, fixations etc. with a chisel. As the PE parts will be located at exactly the same places as the molded parts, this should turn out fine in the end.
The brass underconstruction is already soldered together, has a nice fit and is quite stable. Actually I am quite happy that I soldered all the parts together, as I have no idea how this should go together using only superglue.
This is real fun, but still enough work to do…
Meanwhile I did quite some work on this project. The frame has been painted and weathered:


The exhaust has been painted with the Lifecolor rust set, dust and dirt is applied using oils and enamels. I prefer enamels for dust, as they dry much faster and to a totally matte finish when thinned with white spirit. The subtle chipping was done using the good old sponge technique. The dust on the spare wheel is still a bit too bright, and the mud is completely missing.
The wheels were also painted and received a first dust layer:


The driver’s cab is now completely built and painted. Unfortunately I forgot to take a picture from the finished driver figure:


I have seen a cover on the searchlight on some historical pictures, so I decided to also cover the searchlight of the truck. I think it will look much better than the plastic lense from the kit. Please also note the cable running down from the searchlight. The decals are from the Tamiya kit. The trailer indicator (the yellow triangle on the roof) is folded down, as now trailer will be towed…
The complete weathering is of course still missing, as well as some touch ups.
Finally, a view on the base:
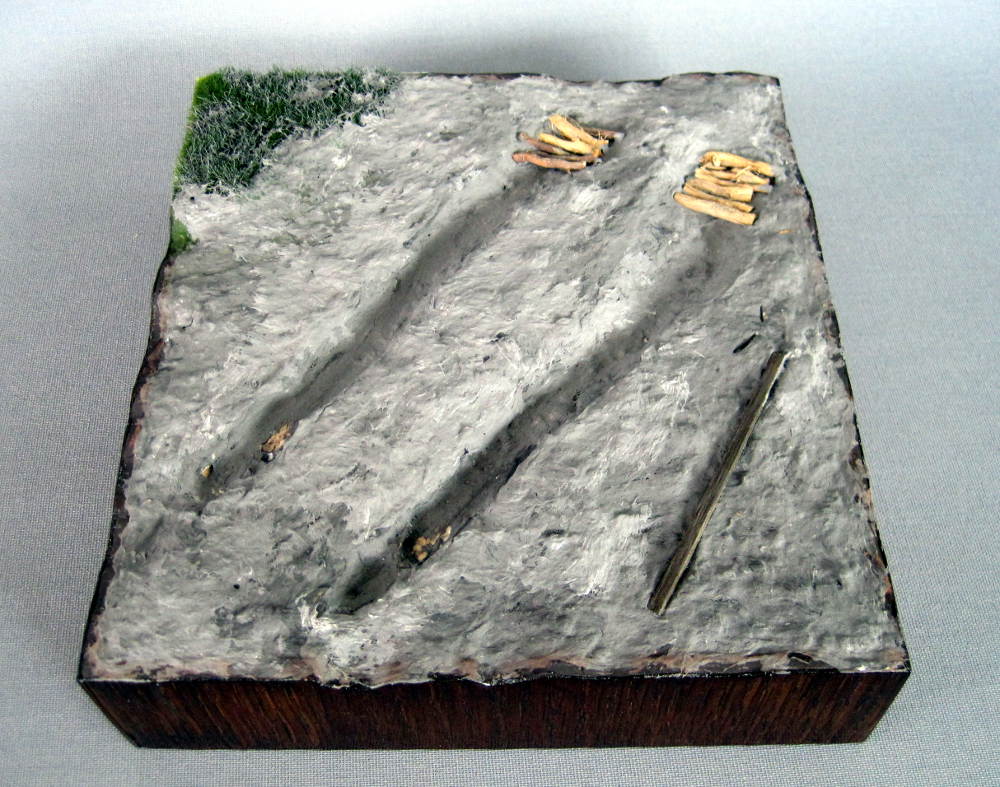
It is built the usual way from plywood and veneer, and then covered with Celluclay. The wooden beams (made from roots) will be located below / behind the rear wheels. I will continue with adding a pigment layer, much more painting and adding some more details (above the wood plank to the right you can see two holes, where two shovels will be attached).
Still some way to go…
I added dirt to the driver figure and the driver’s cabin:


The dirt is made from pigments, oils and enamels. I also like the look of the seat bench, the dust in the seams is made from enamels, and the patina from oils. The base color is acrylics.
Then I fixed the driver to the bench:


I also continued to paint the head:


The frame of the Opel is also finished. I added the rear leaf springs, and also snow chains on the rear wheels (this can often be seen on historical pictures of vehicles driving through mud):


In the meantime I finished the driver’s figure:


The boots and the trousers will be weathered with some mud, and the head (as well as the hands) only received the first layer of skin color. The head is from Hornet, and really very finely detailed.
The already built part of the Opel’s driver cab has been painted and the first weathering steps are also visible: some fading with oils, sponge chipping and added dirt on the floor. The dashboard is almost finished, the only things missing are the glass covers of the different displays and perhaps a piece of cloth in the tray.


The color is Tamiya German grey, on top of it I sprayed some acrylic varnish. The varnish is supposed to be matte, but to me it adds a very nice satin finish.
The leaf springs are also almost finished. They are quite good to build, and soldering most of the parts really helps. I already mounted the front axle to the frame: