Now the small scene featuring the Opel Blitz is finished. The last figure is also attached to the base:


Now the small scene featuring the Opel Blitz is finished. The last figure is also attached to the base:
As I enjoyed sculpting the other guys so much, I could not resist to add another figure that will be pushing on the Opel Blitz truck:


On the bread bag the canteen and the water bottle will be placed, as well as a Kar98 rifle over the shoulder.
Update: Now the figure is painted and fixed to the base:


I added the next soldier to the Opel Blitz cargo truck, which is now my second scratch built figure:


In the meantime I started to paint the pak. I started with primin using Gunze Resin Primer, and then coating the gun with a layer of Tamiya German Grey. This was followed by some subtle sponge chipping, showing red primer marks. These spots were then occasionally painted with a black brown color simulating bare metal.
Then I added a filer using a beige brown oil mixture, followed by a black brown pin wash. To ease painting, I still keep the upper part of the gun separate from the base:


For the pictures, the gun was put together on the base.
Update: Now the gun is finished, and I fixed it to the base. Currently I am still working on the grenade cases. Then the gun crew will be sculpted…


In the meantime I continued working on the Pak. I airbrushed the lower part, and I did quite some work on the gun itself:


I did use almost no parts from the Eduard PE set. And I am really looking forward to painting the whole thing.
After finishing the frame body of the third figure, I added the boots, building them up from the soles on with a lot of sanding in between. Then I added the trousers legs (as far as they will be visible), and started working on the coat:


Building the soles from putty is not that satisfying, so I will try using sheet styrene instead. The last picture shows one part of my work – in – progress sole stack.
I made quite some progress:


And I am not so sure about the soles. Perhaps it is better to use putty, but to start with the heels…
Meanwhile I added two soldiers pushing the Opel Blitz to the base:


In the meantime I have finished sculpting the first figure, and it is also almost completely painted:


The lower side of the hands is not worked out, as they will not be visible. The dirt on the coat will be refined with some more oil washes, and the skin parts need some more highlights.
I already started with the second figure. Currently I am working on the boots, they have to be sanded to shape, and then some more details will be added.


The sculpting is real fun, but also challenging. A lot to learn… For the buttons I use brass tubes of different sizes to punch them out of thinly rolled putty.
Now I finished the head of the first figure and mounted it onto the body (and do not mind the hands…):


And this is how the figure looks like on the base:


Actually I am not happy with the two figures still missing, so I decided to sculpt these figures from scratch. I started with the first figure:


I made a frame from two pieces of milliput (shoulders and pelvis) and some pieces of copper wire, forming the back and two legs. After bending this frame to the final pose, I fixed it using more Milliput. Then I sculpted the boots and the trousers legs, which are not that detailed higher up, as they will be covered with the coat later on.
The Warsaw street fighting scene will feature also a PaK 35/36 anti – tank gun together with the Panzer I. I have a spare one from a Dragon kit, and I bought the old Tamiya kit as well, as I like to convert the figures included to fit this scene. I added a turned barrel from Aber, and a PE set from Eduard.
Both kits are similar, the Tamiya gun has crisper details (but fewer), whereas the Dragon gun features more details, but the moulding is less crisp. The PE set is disappointing. Only a few parts can be used, and Eduard really missed the opportunity to add much more nice details.
As I have quite some reference pictures available, I will scratchbuild a lot of the missing details by myself. I started with the base of the gun:


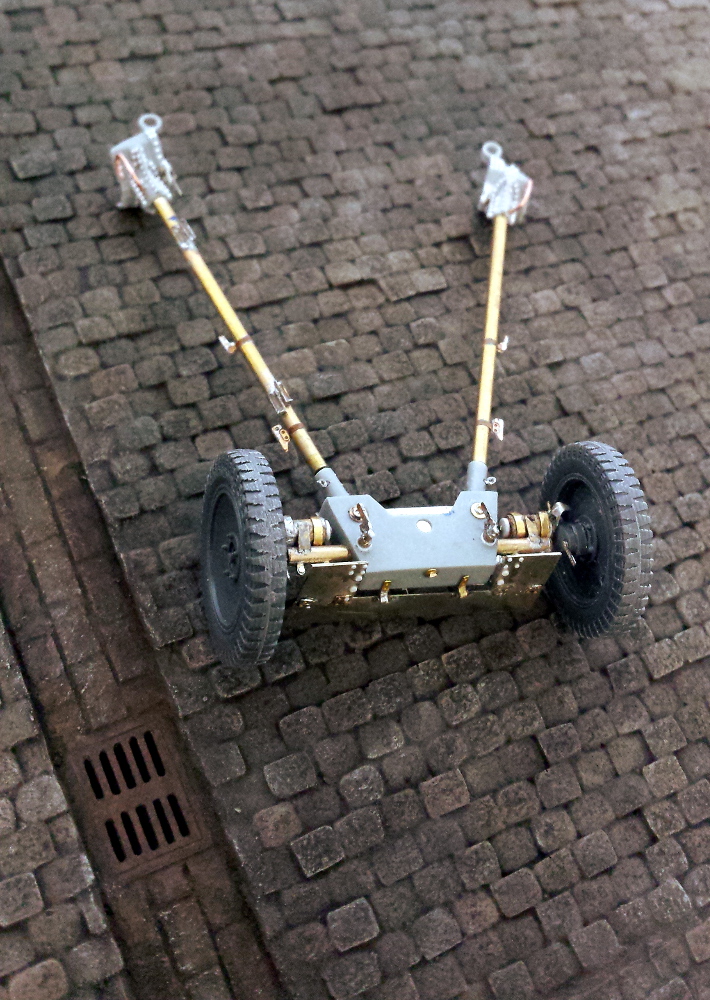
In the meantime I continued working on the Pak, and I have also finished the construction of the base, which is now ready for painting:


The lower part of the Pak is now ready to be painted, and the base is also finished: