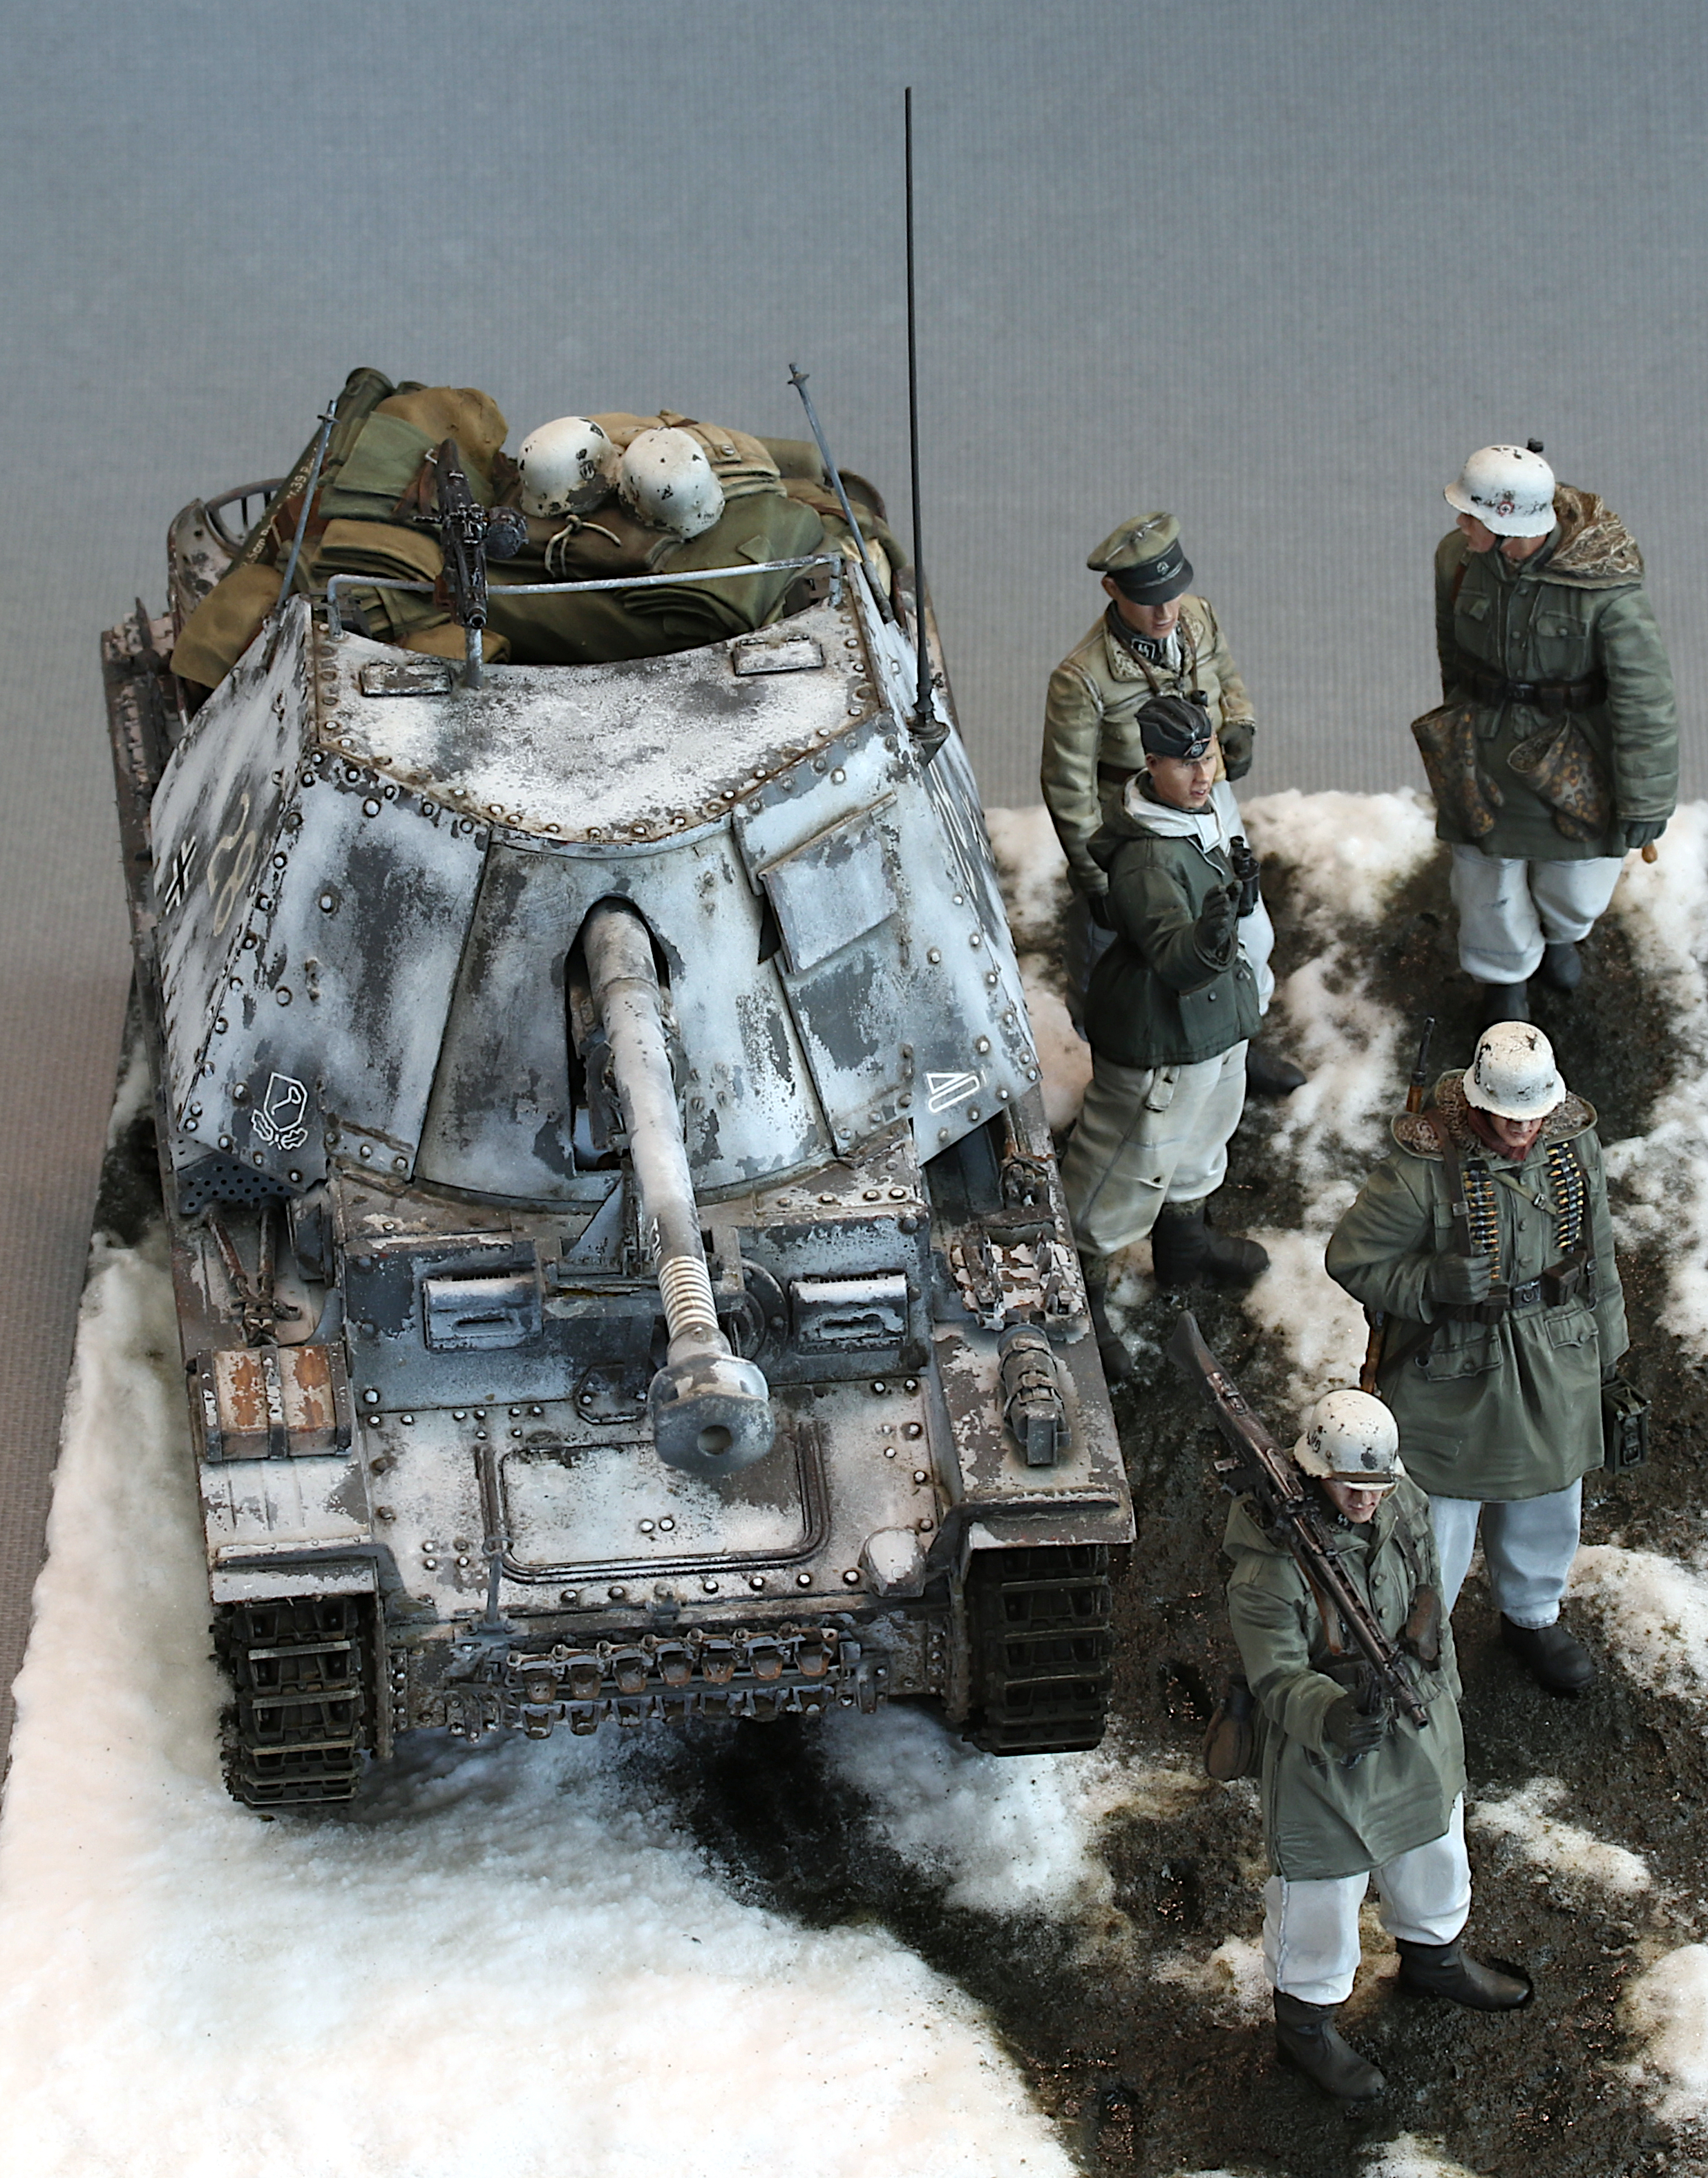
I again reworked the Charkow scene, taking out three of the figures and putting them on a separate base. After repainting…


I again reworked the Charkow scene, taking out three of the figures and putting them on a separate base. After repainting…
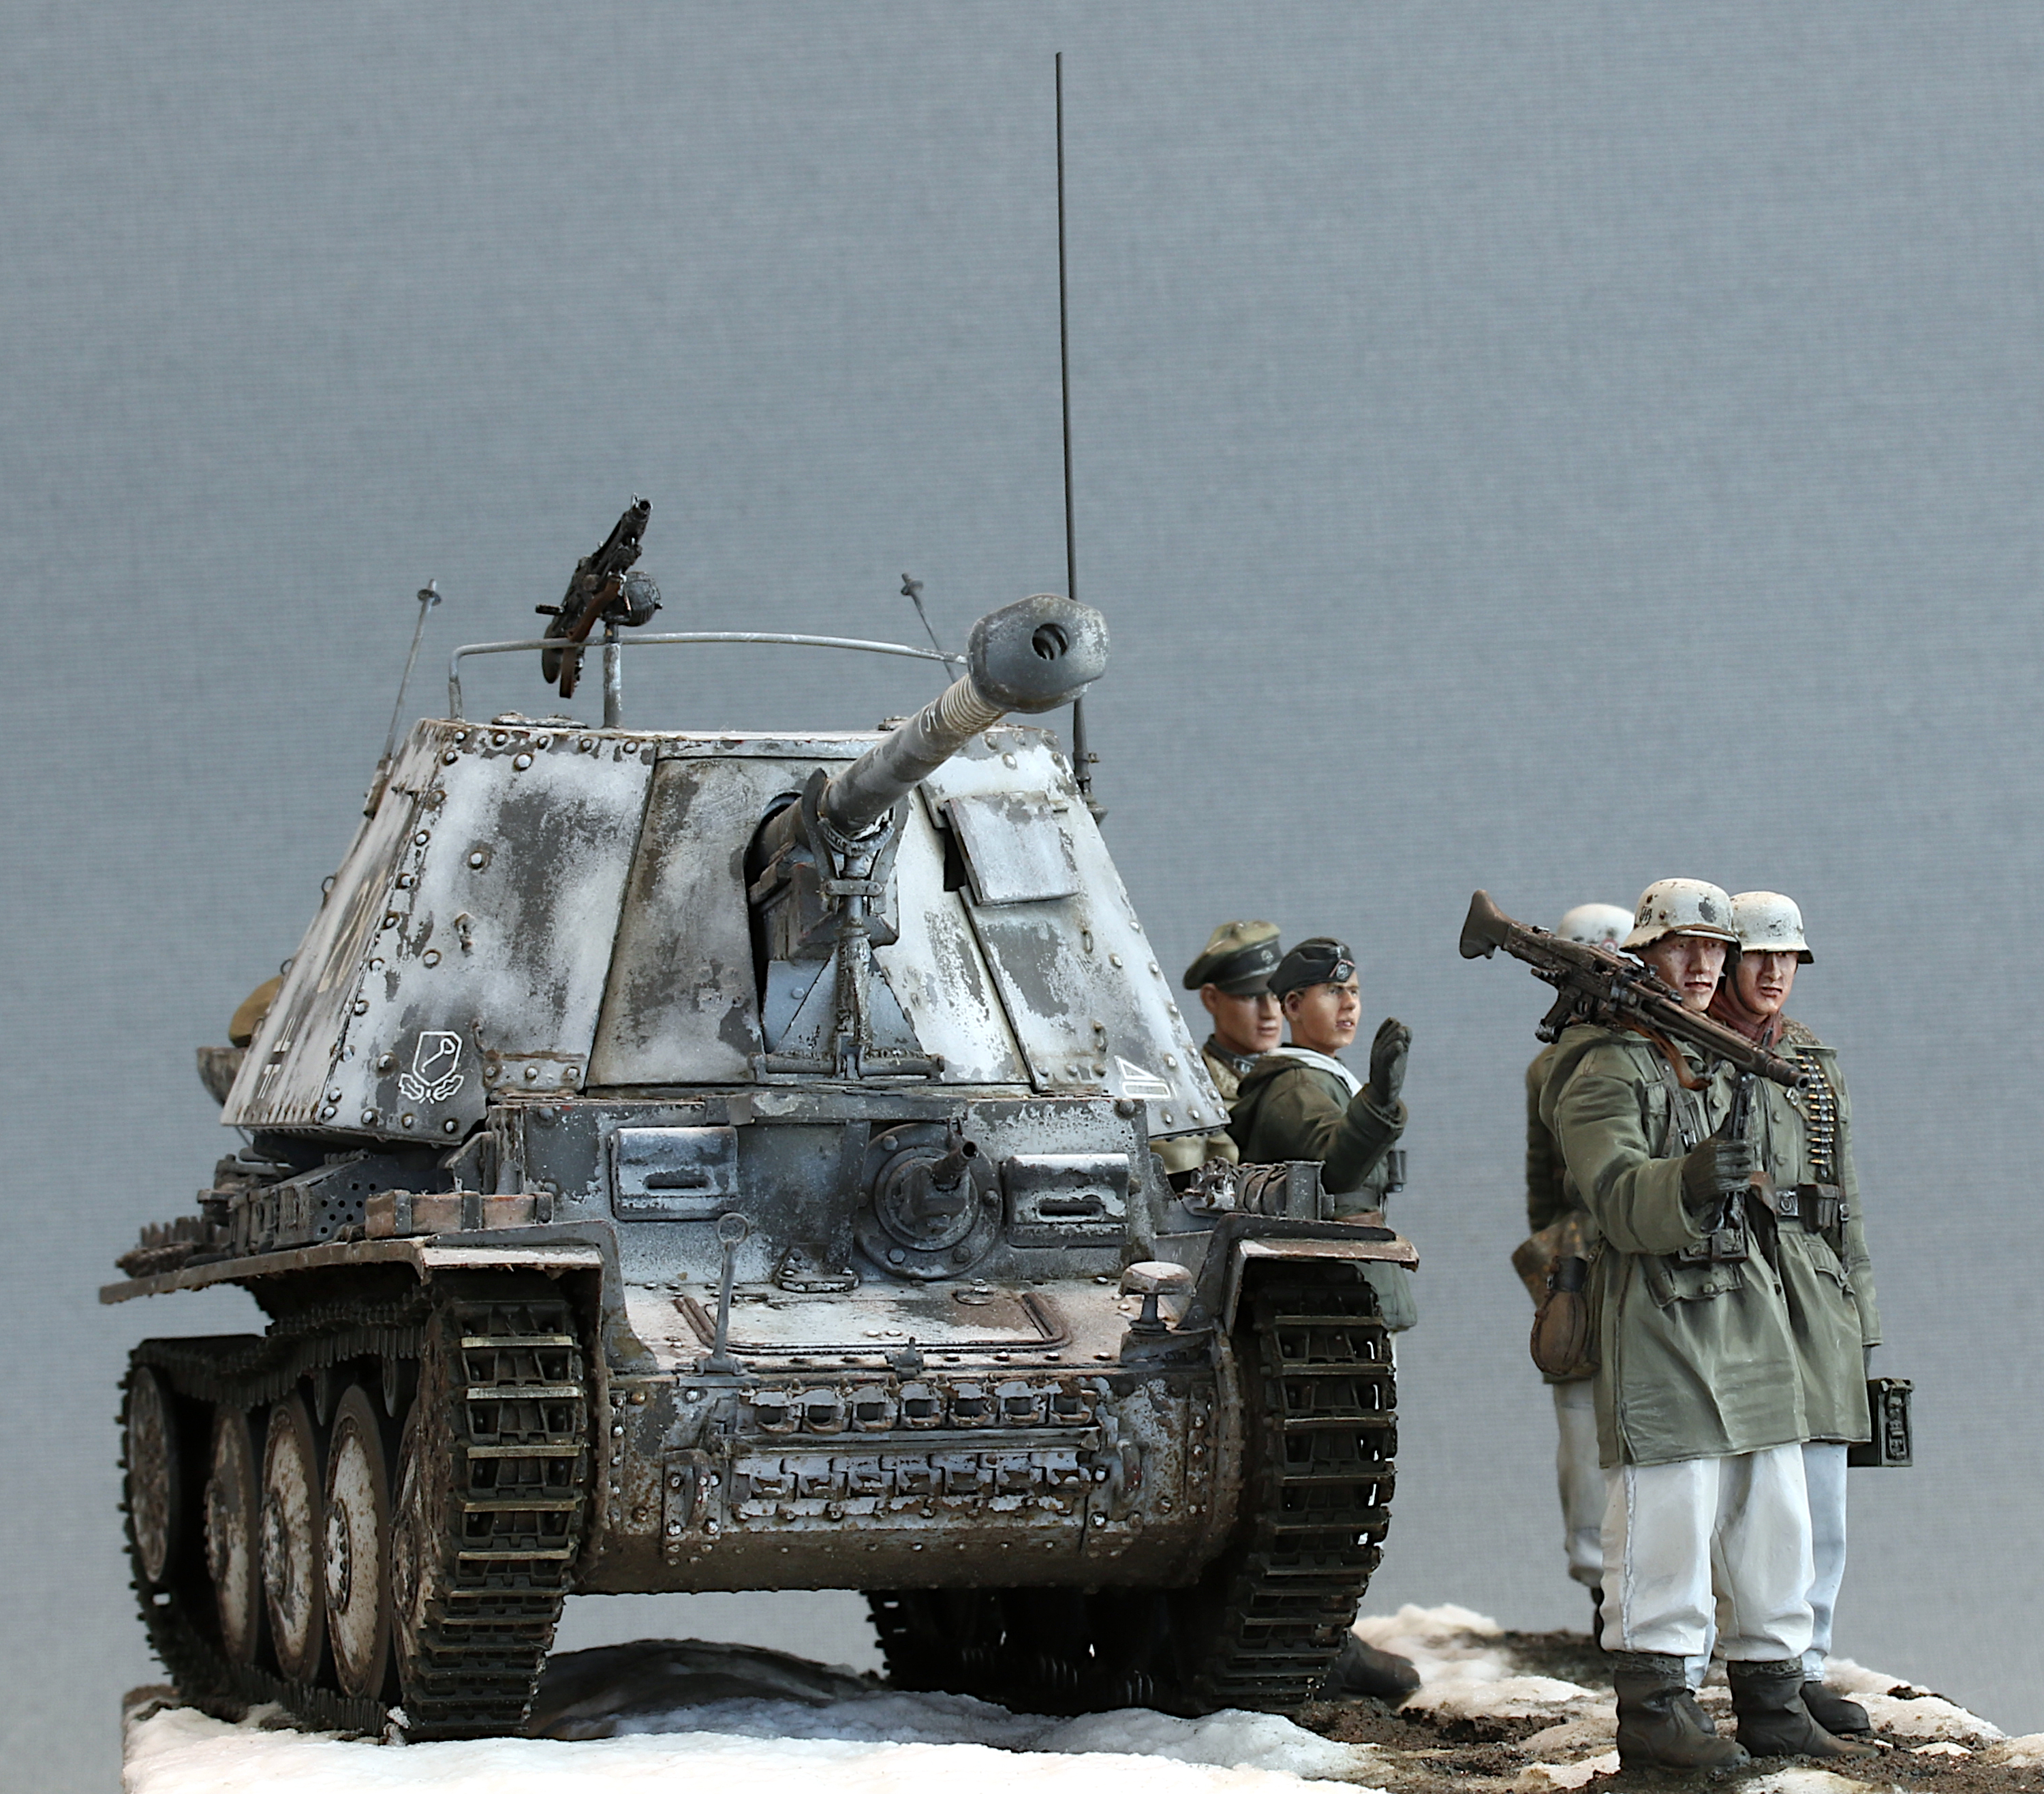
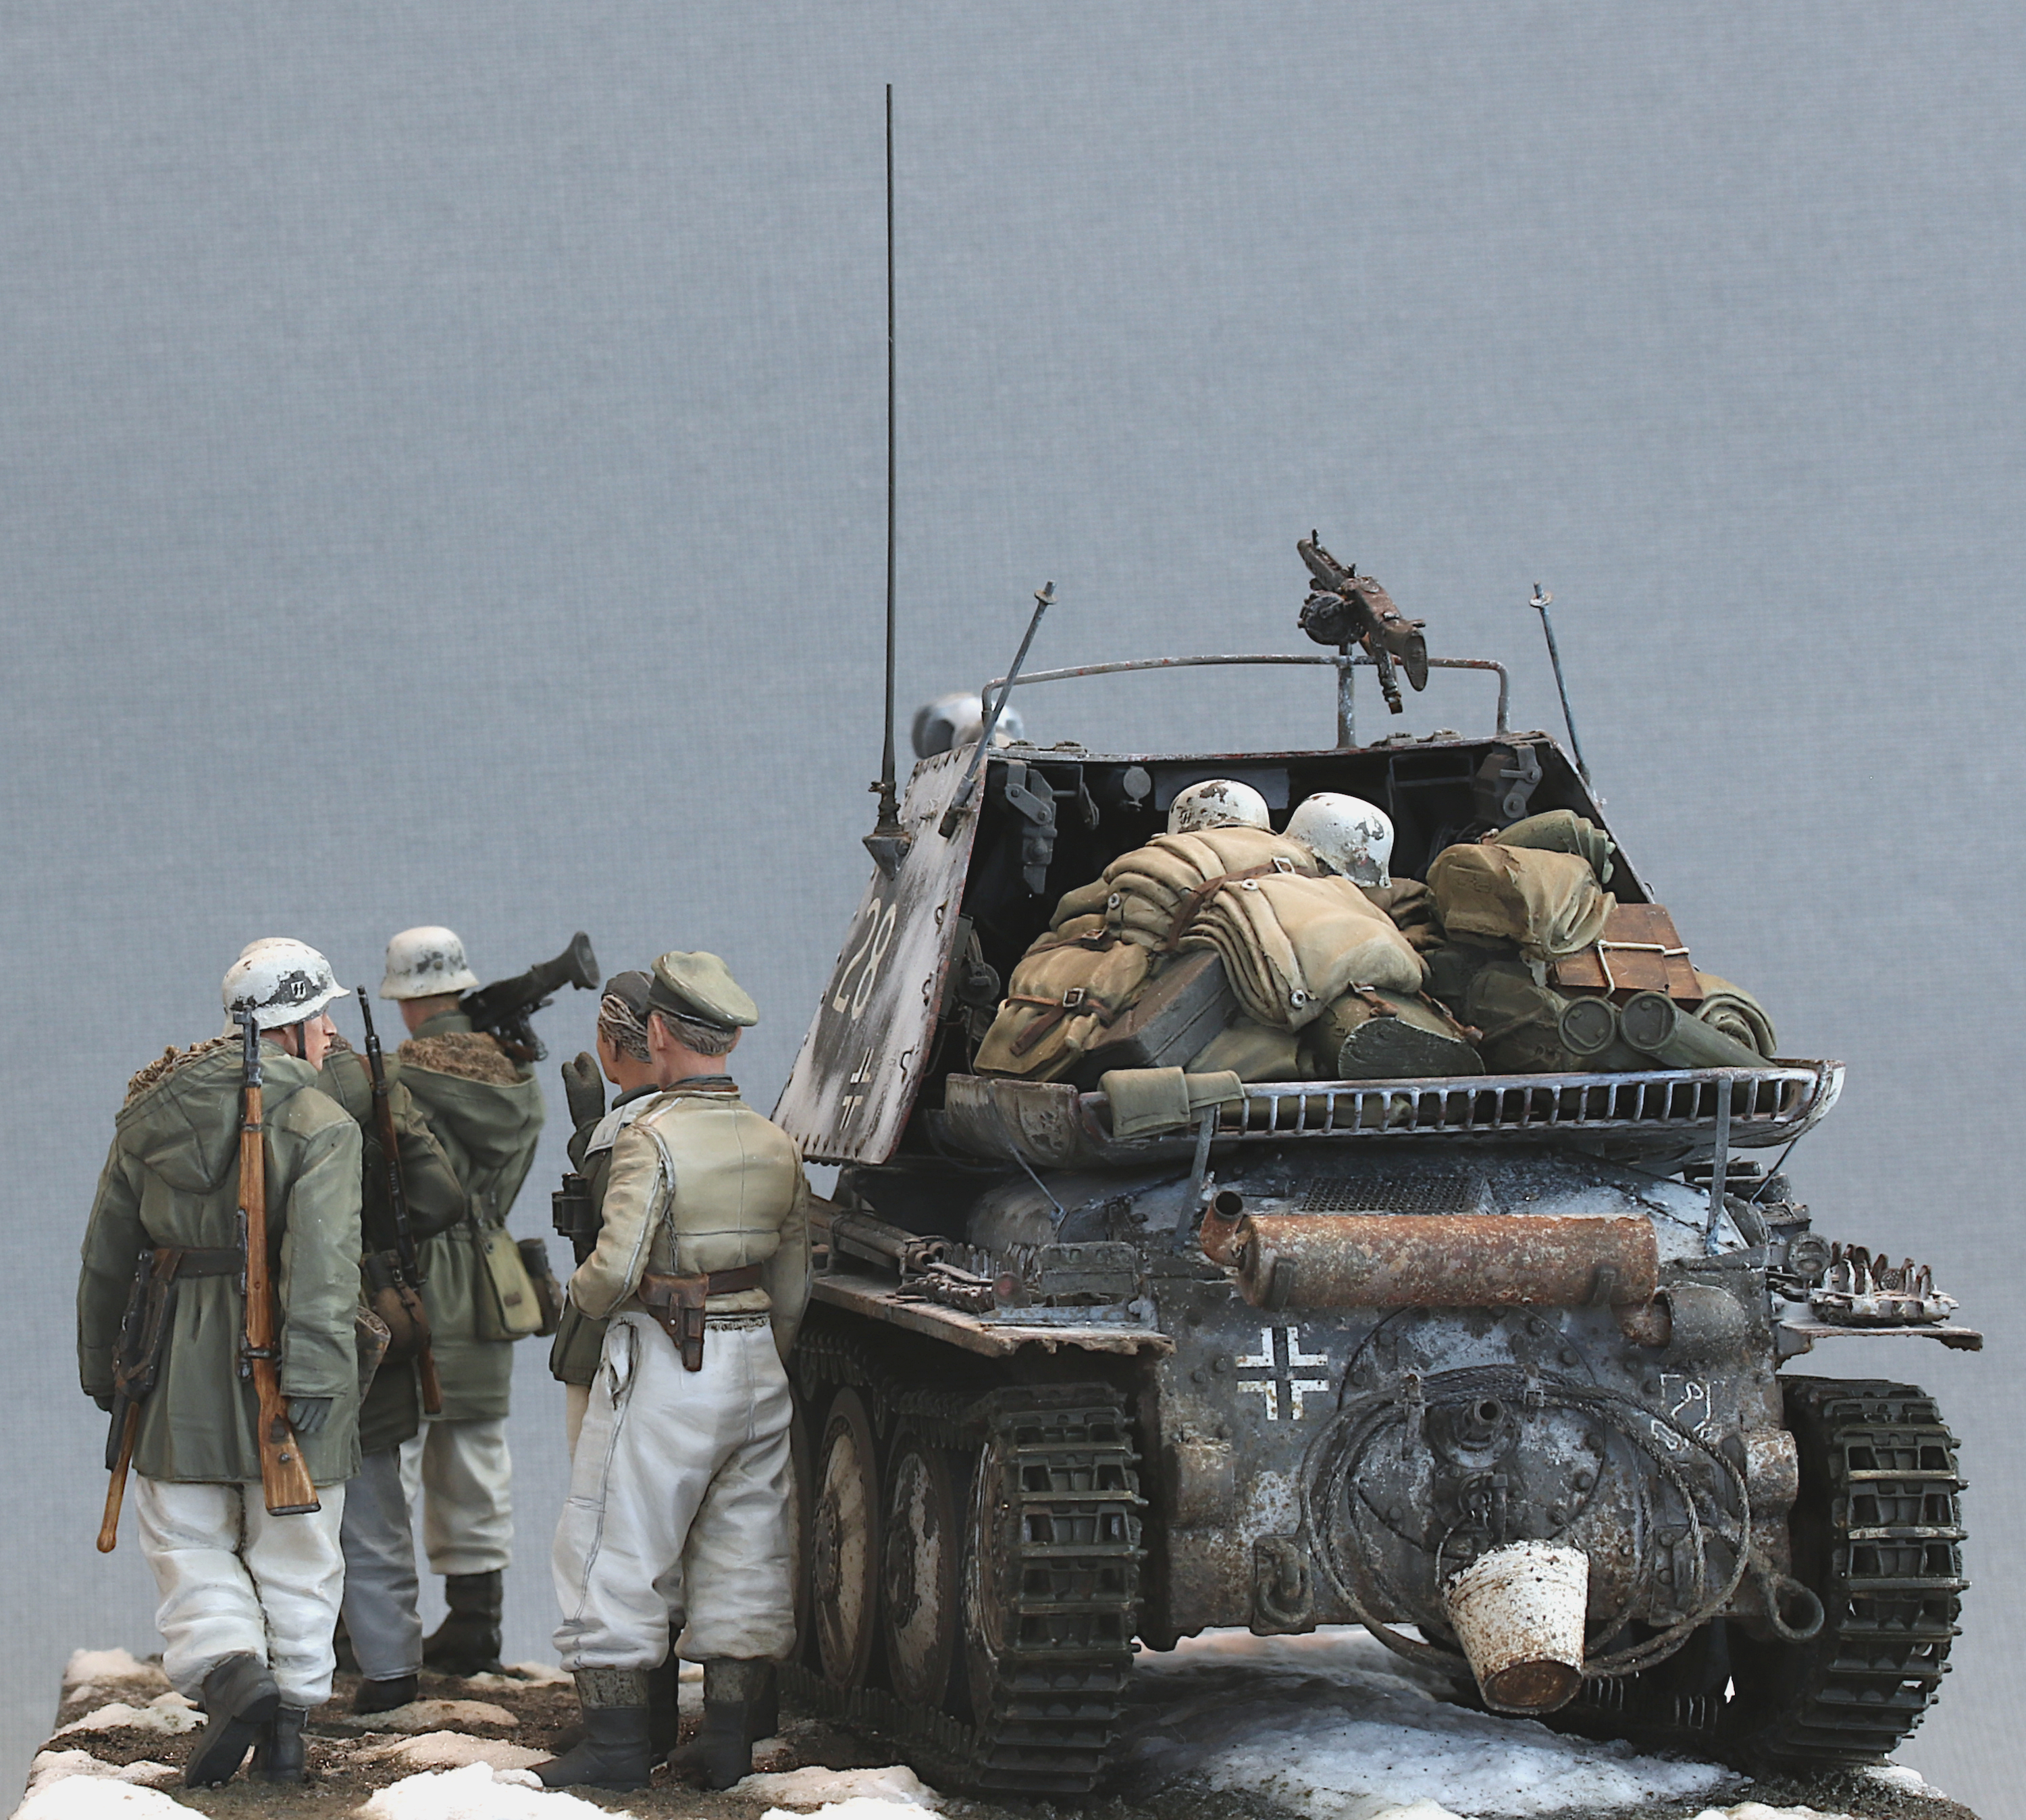
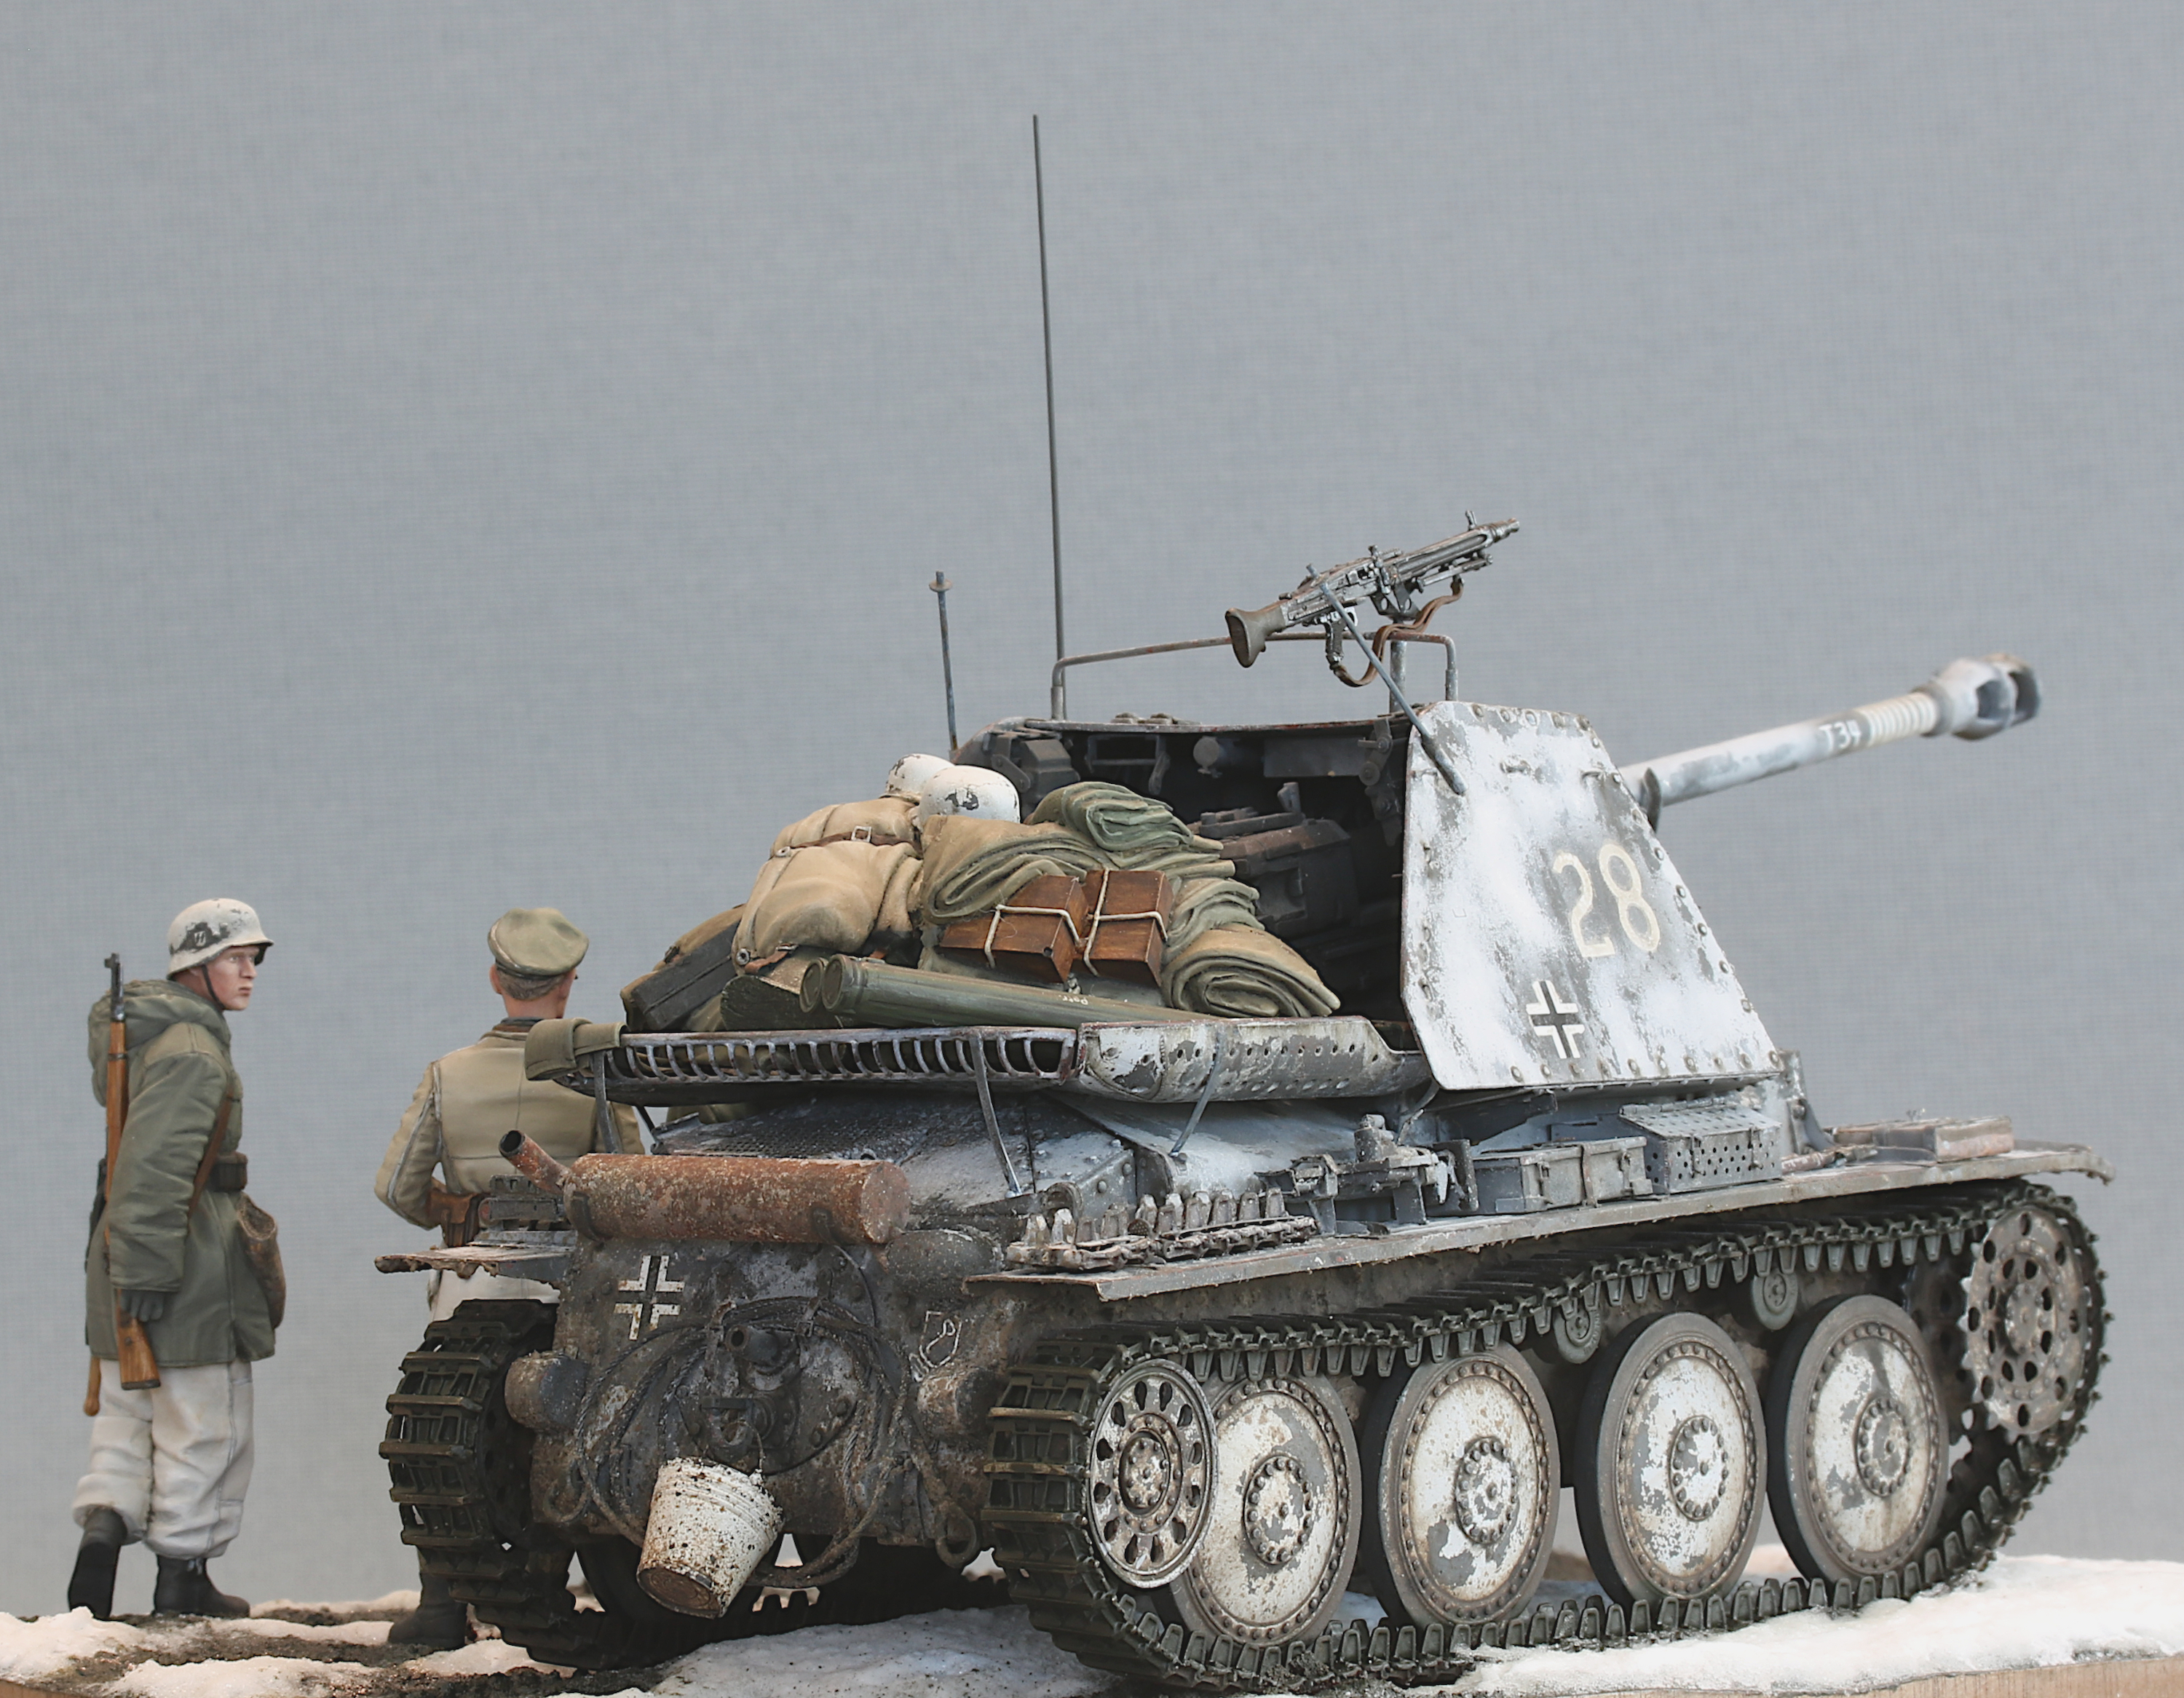
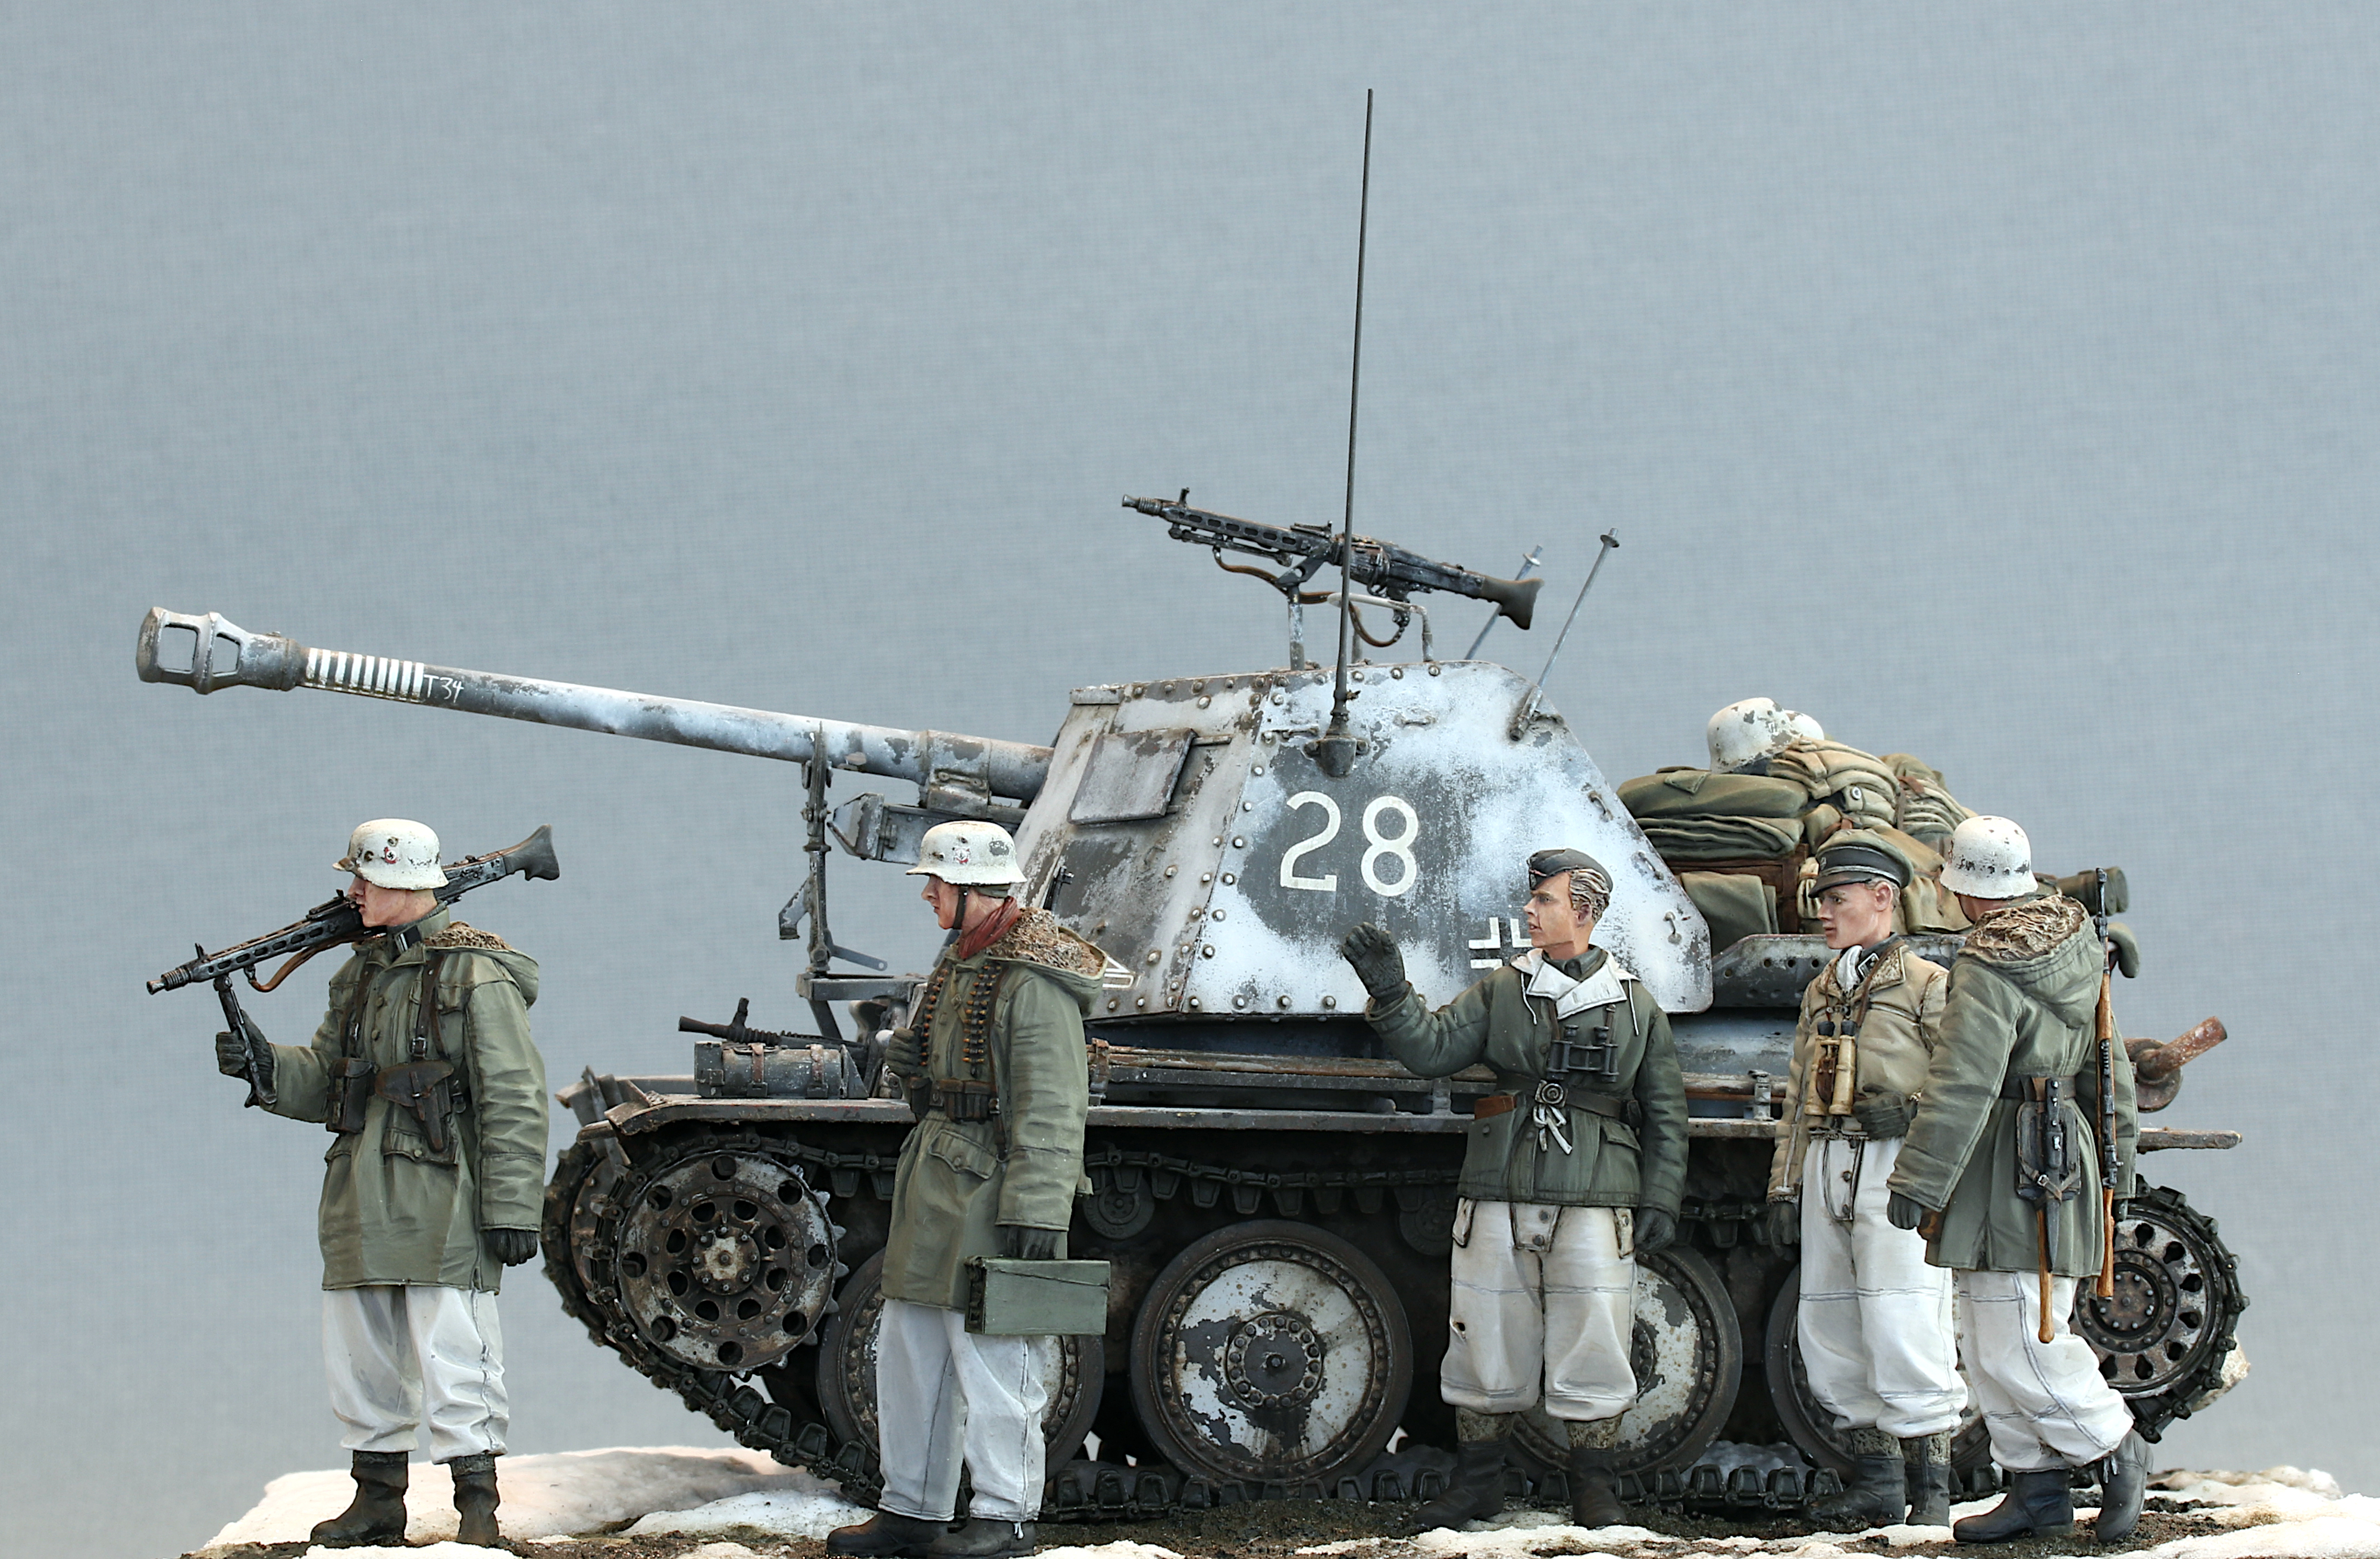
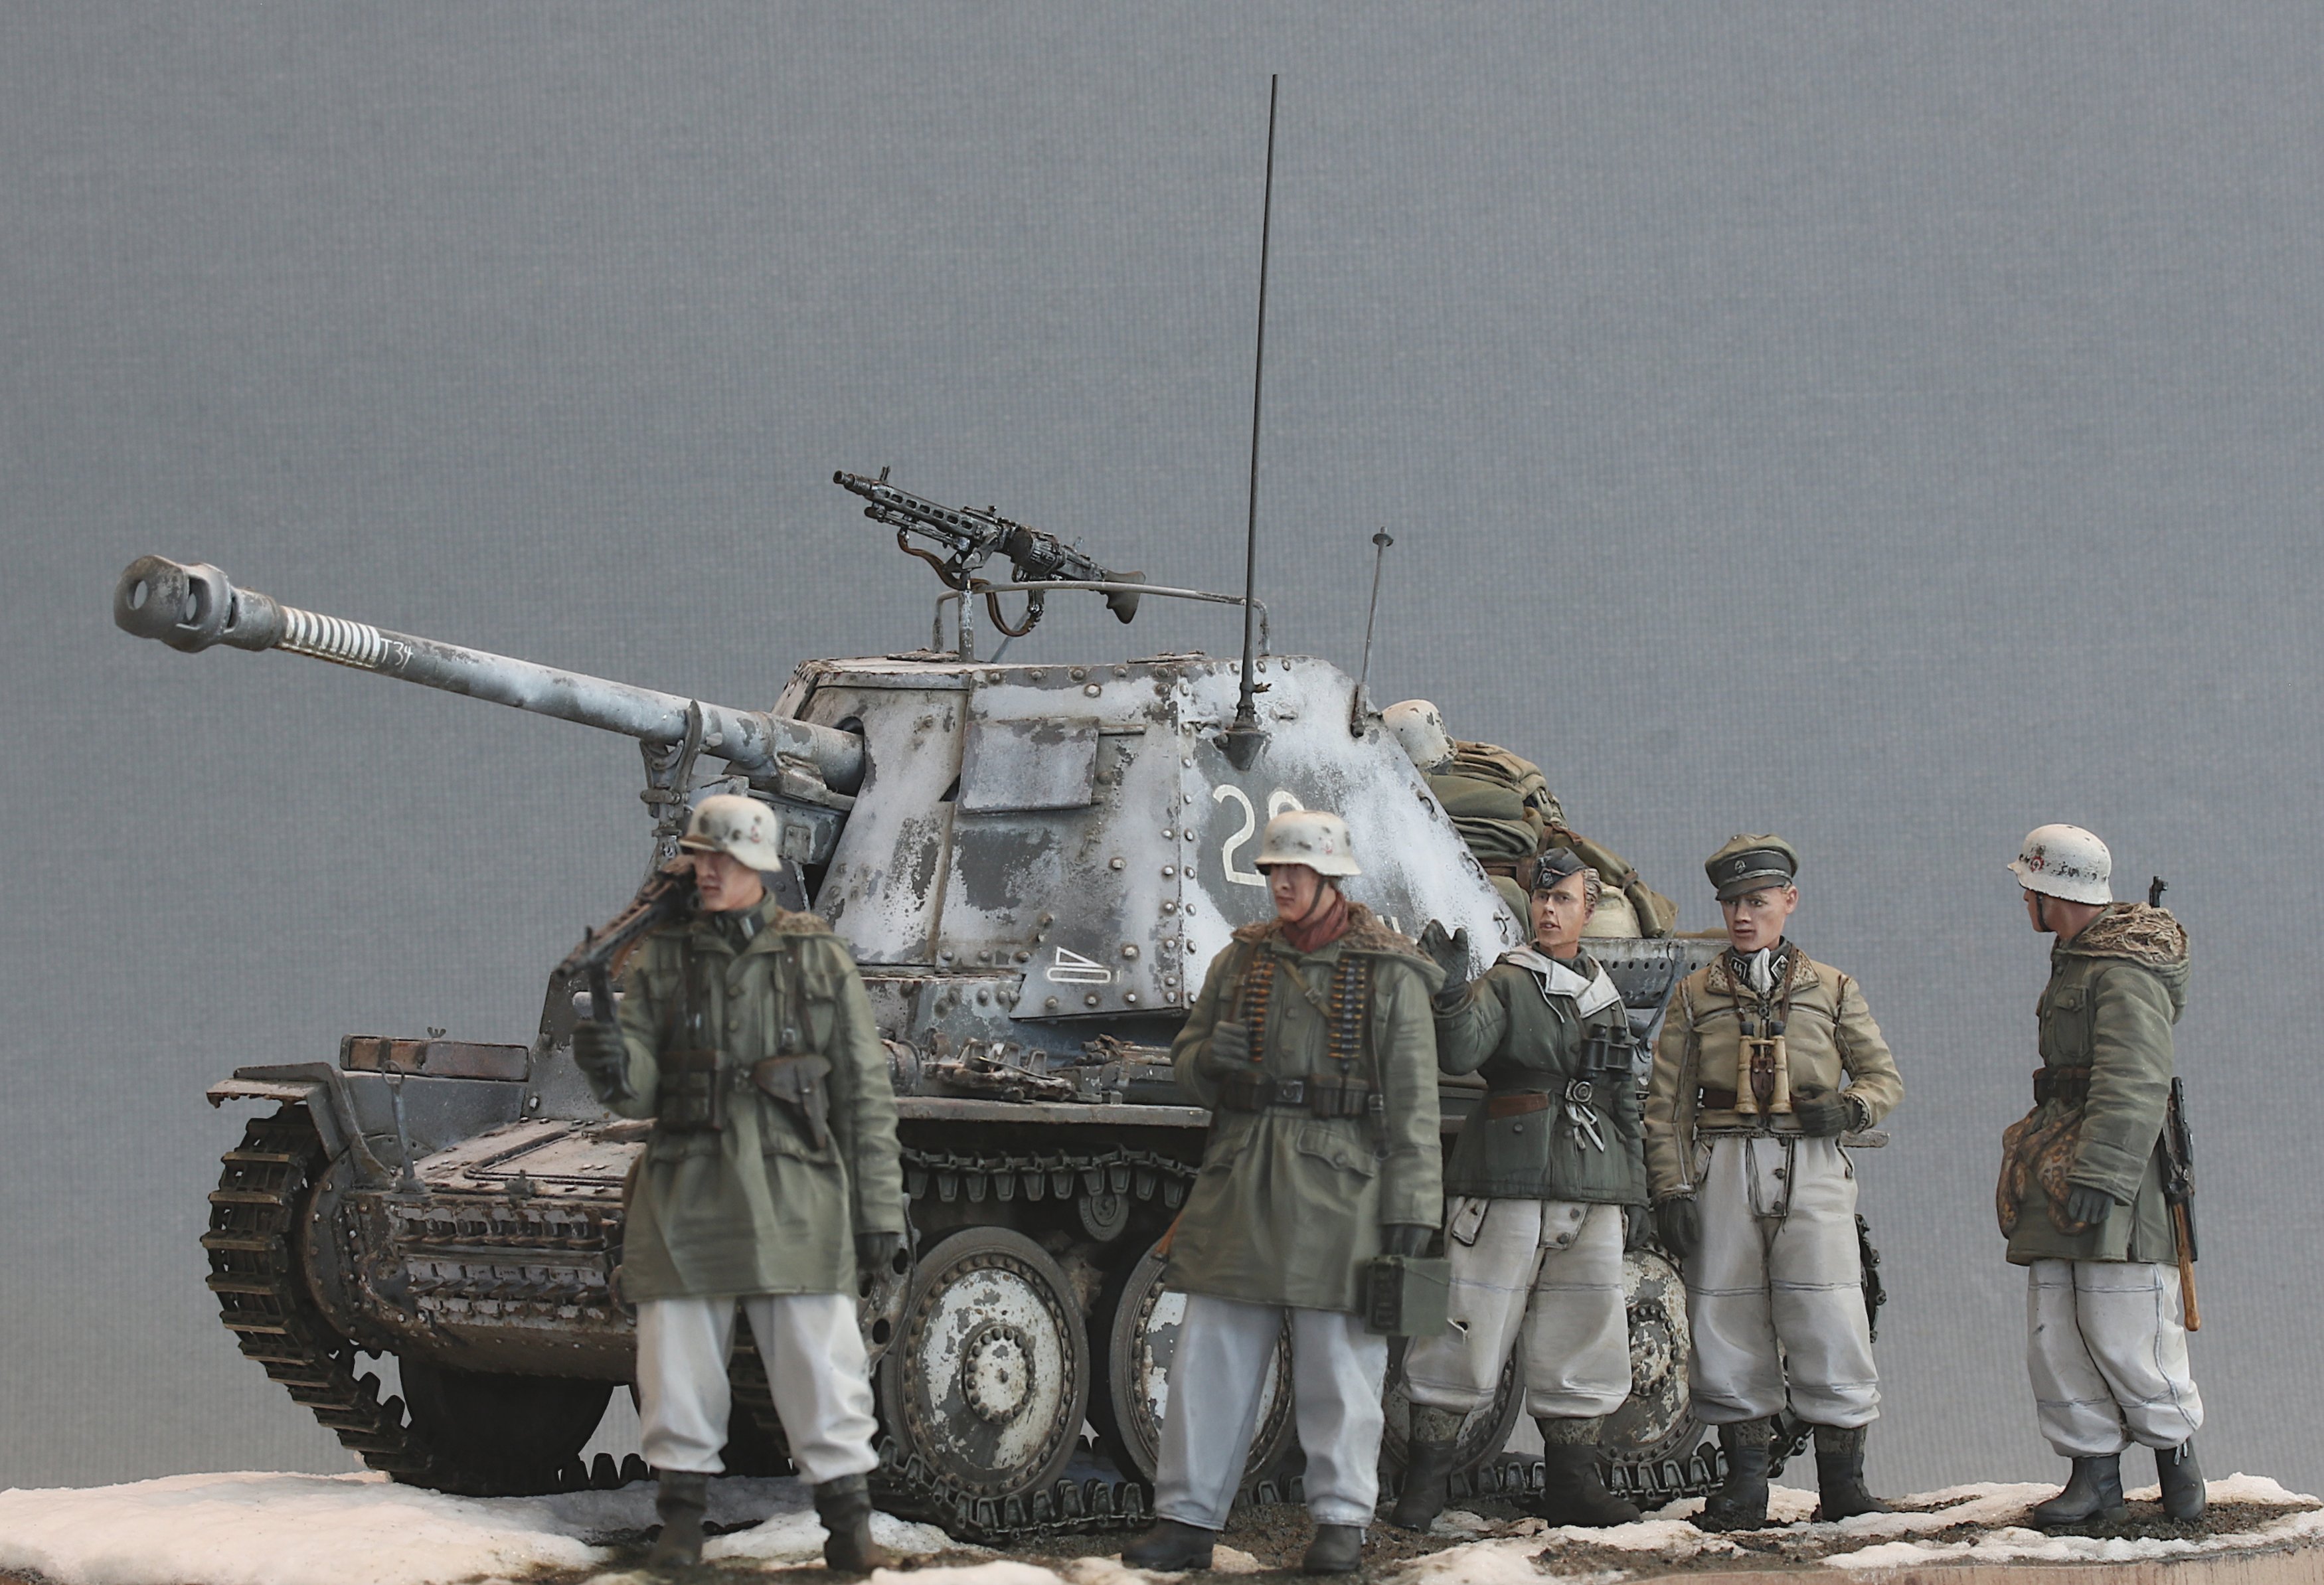
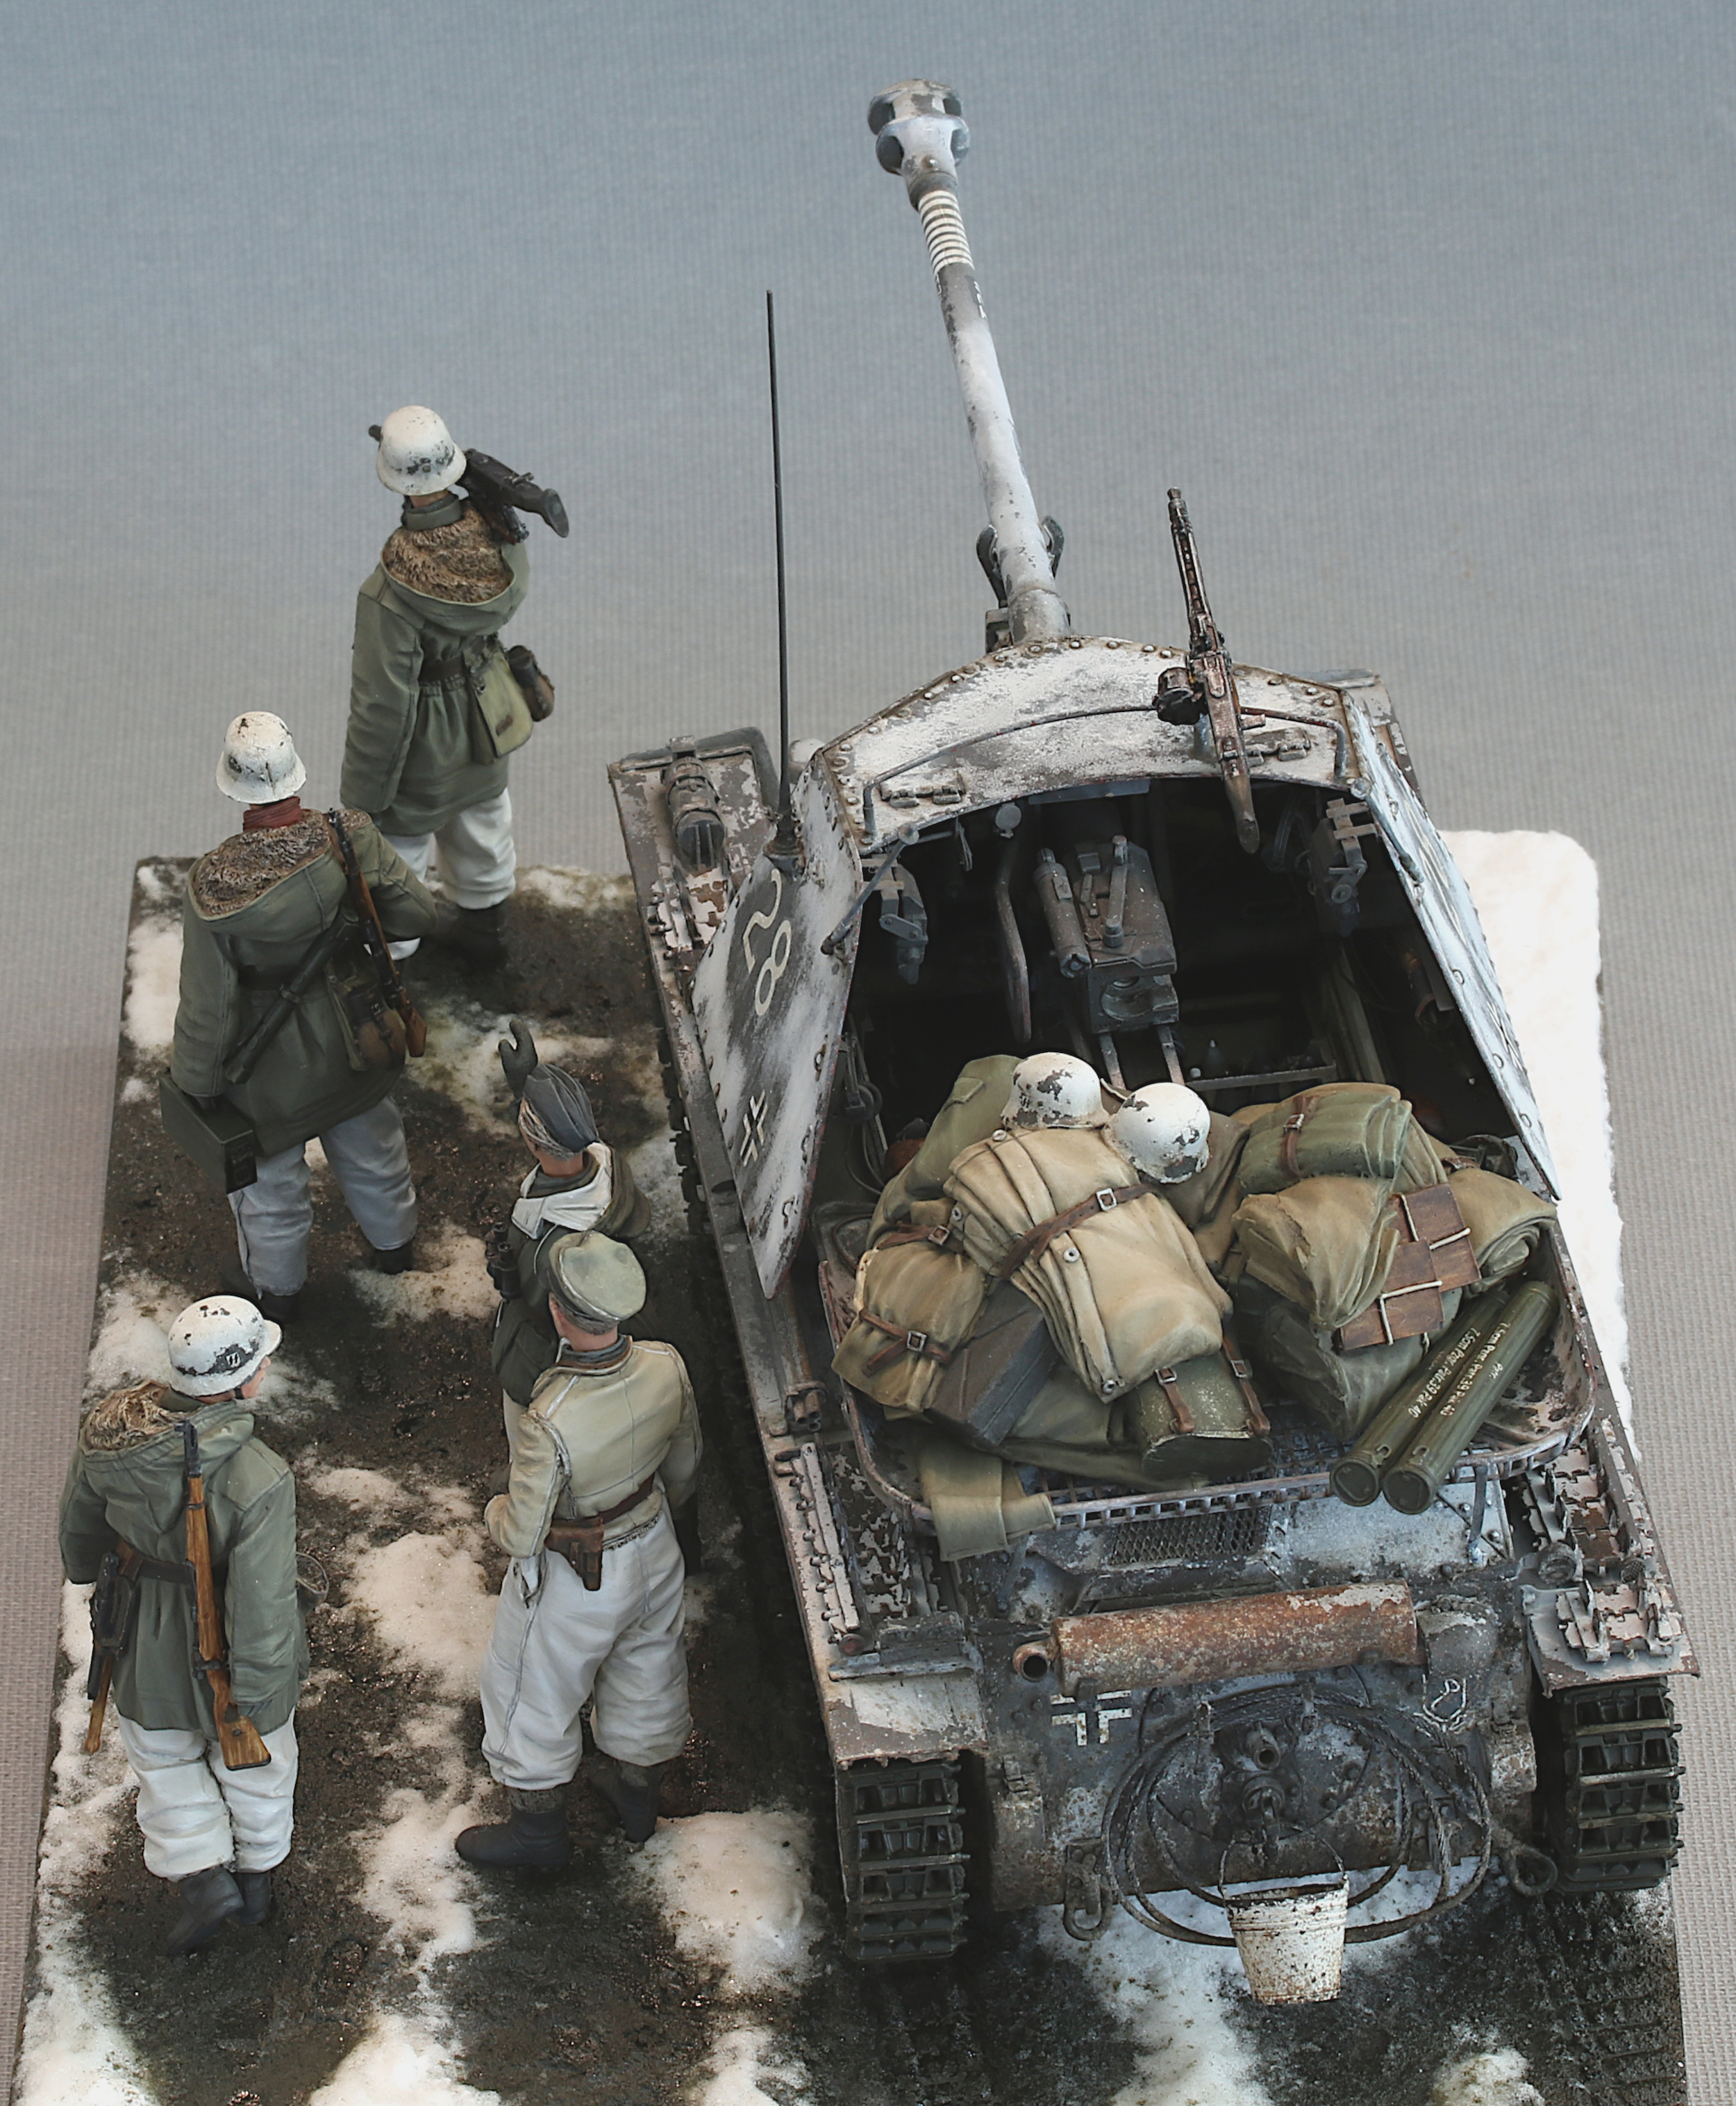
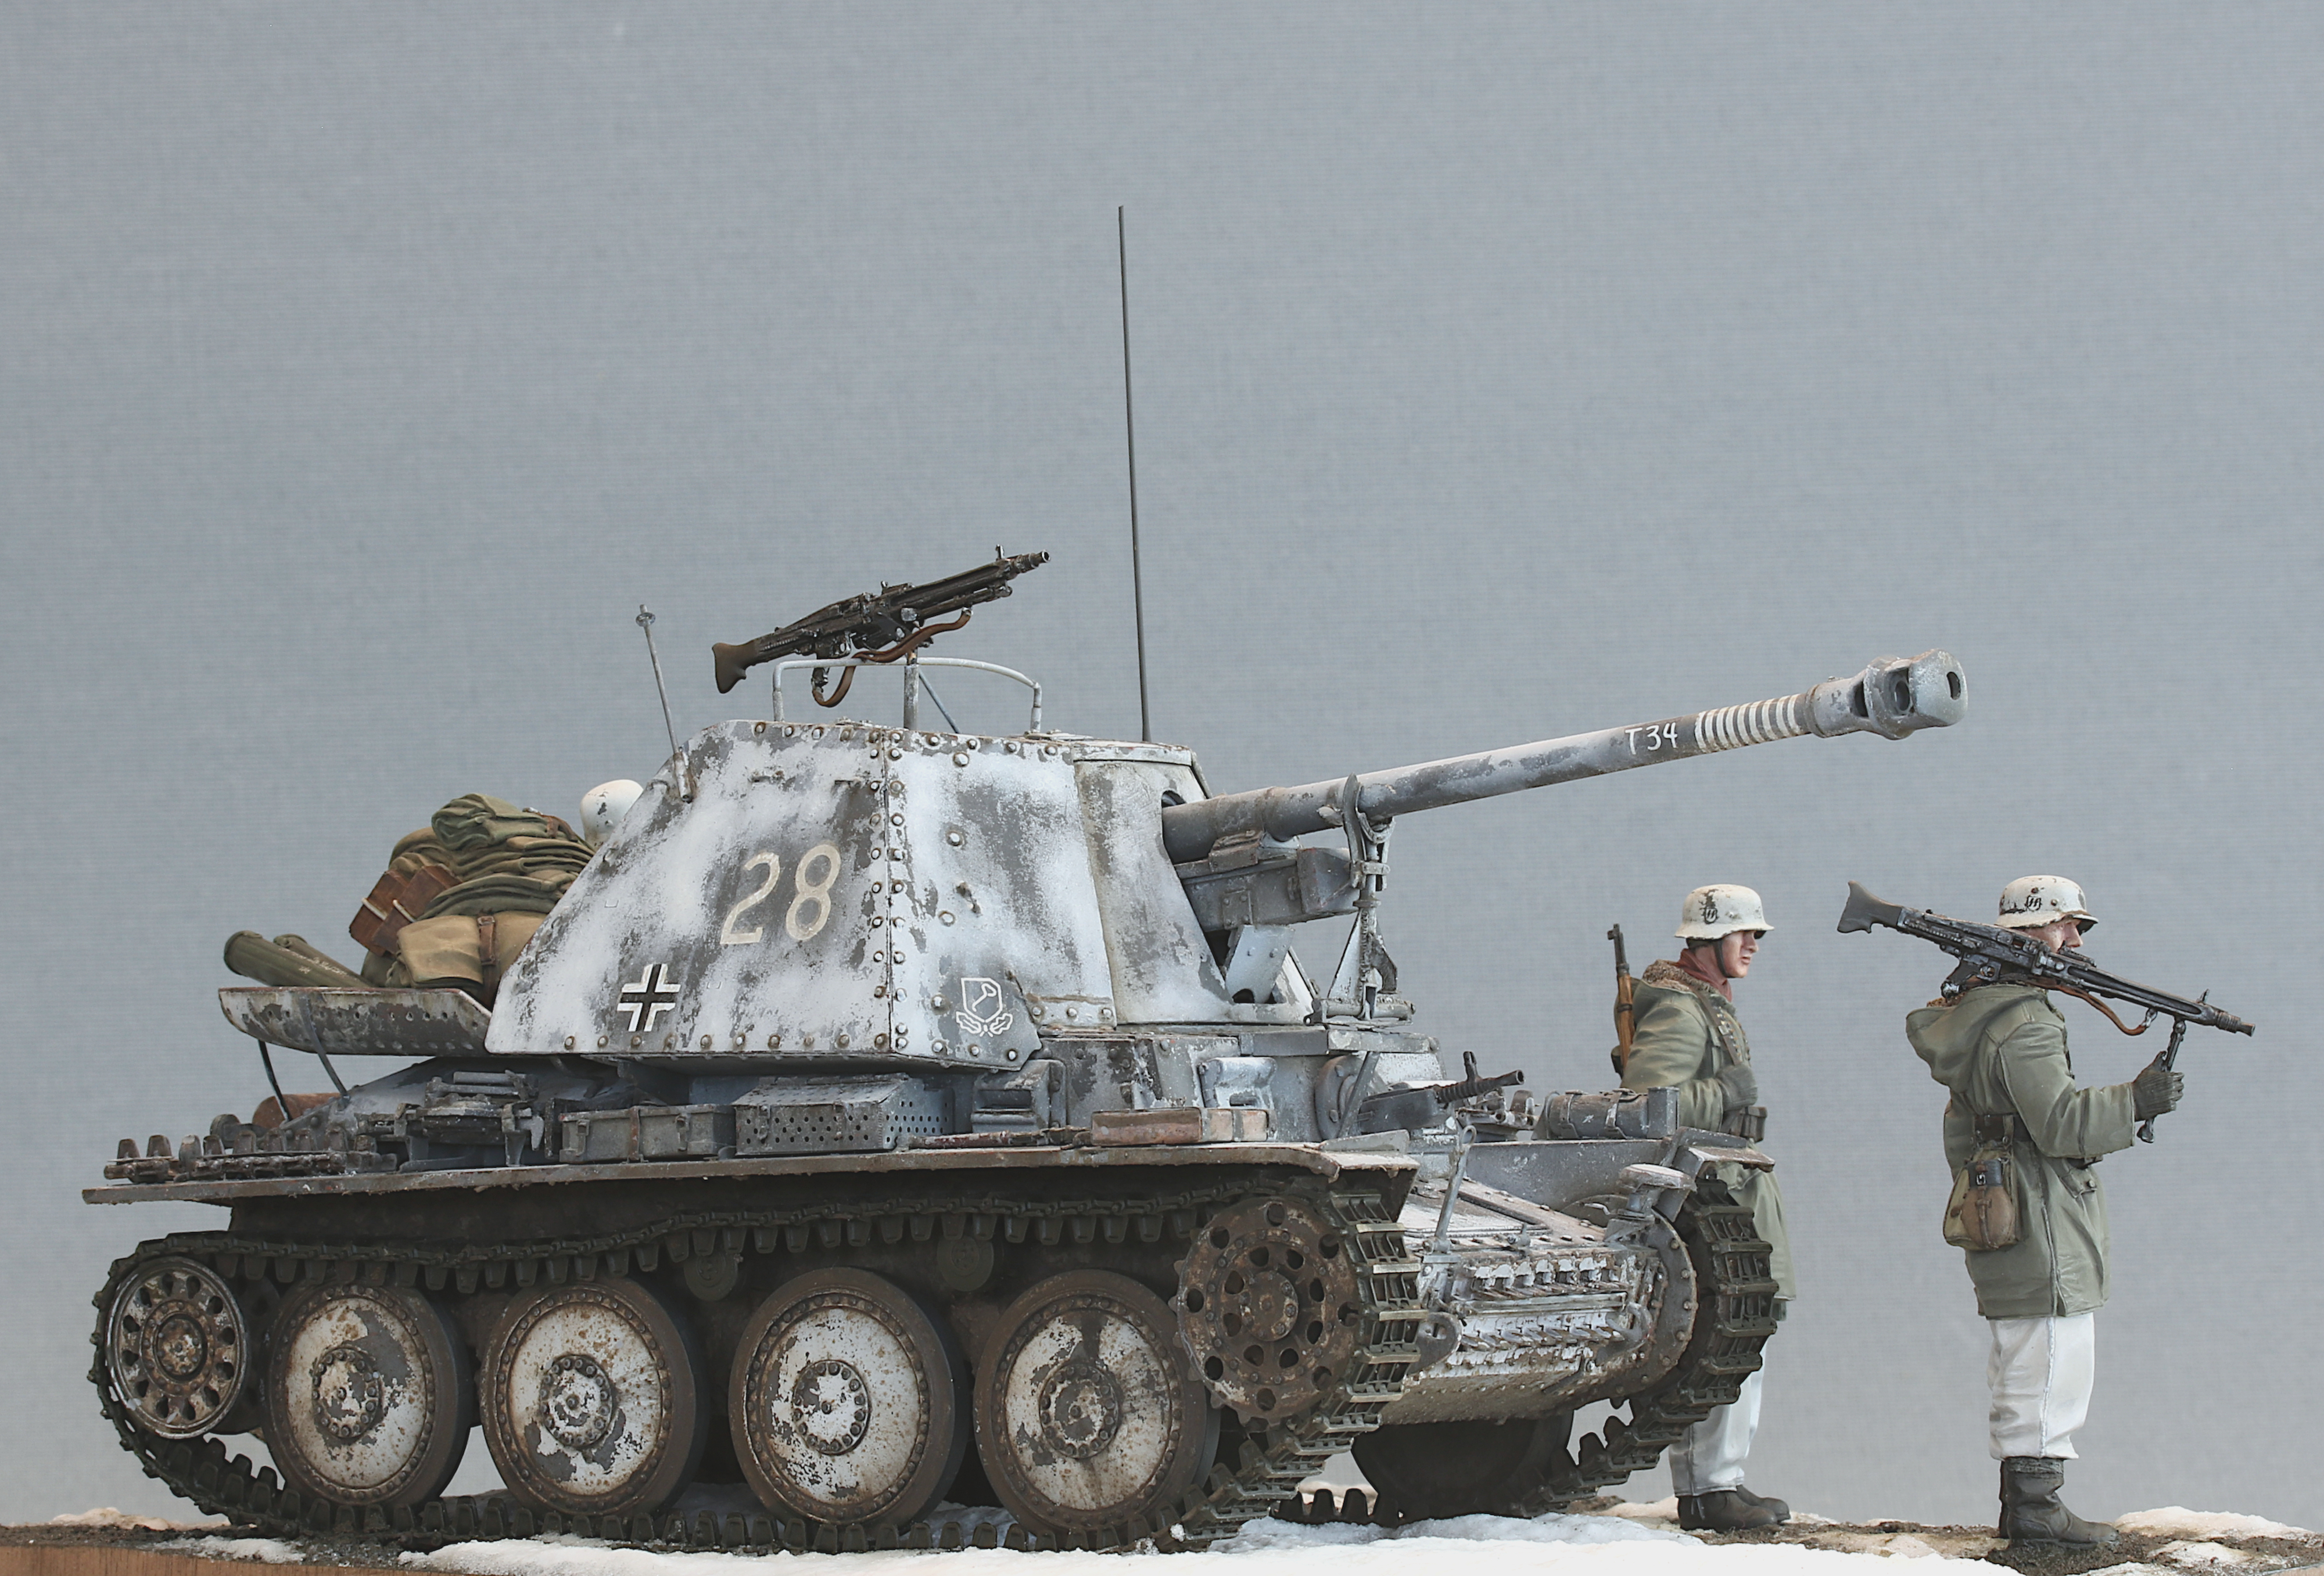
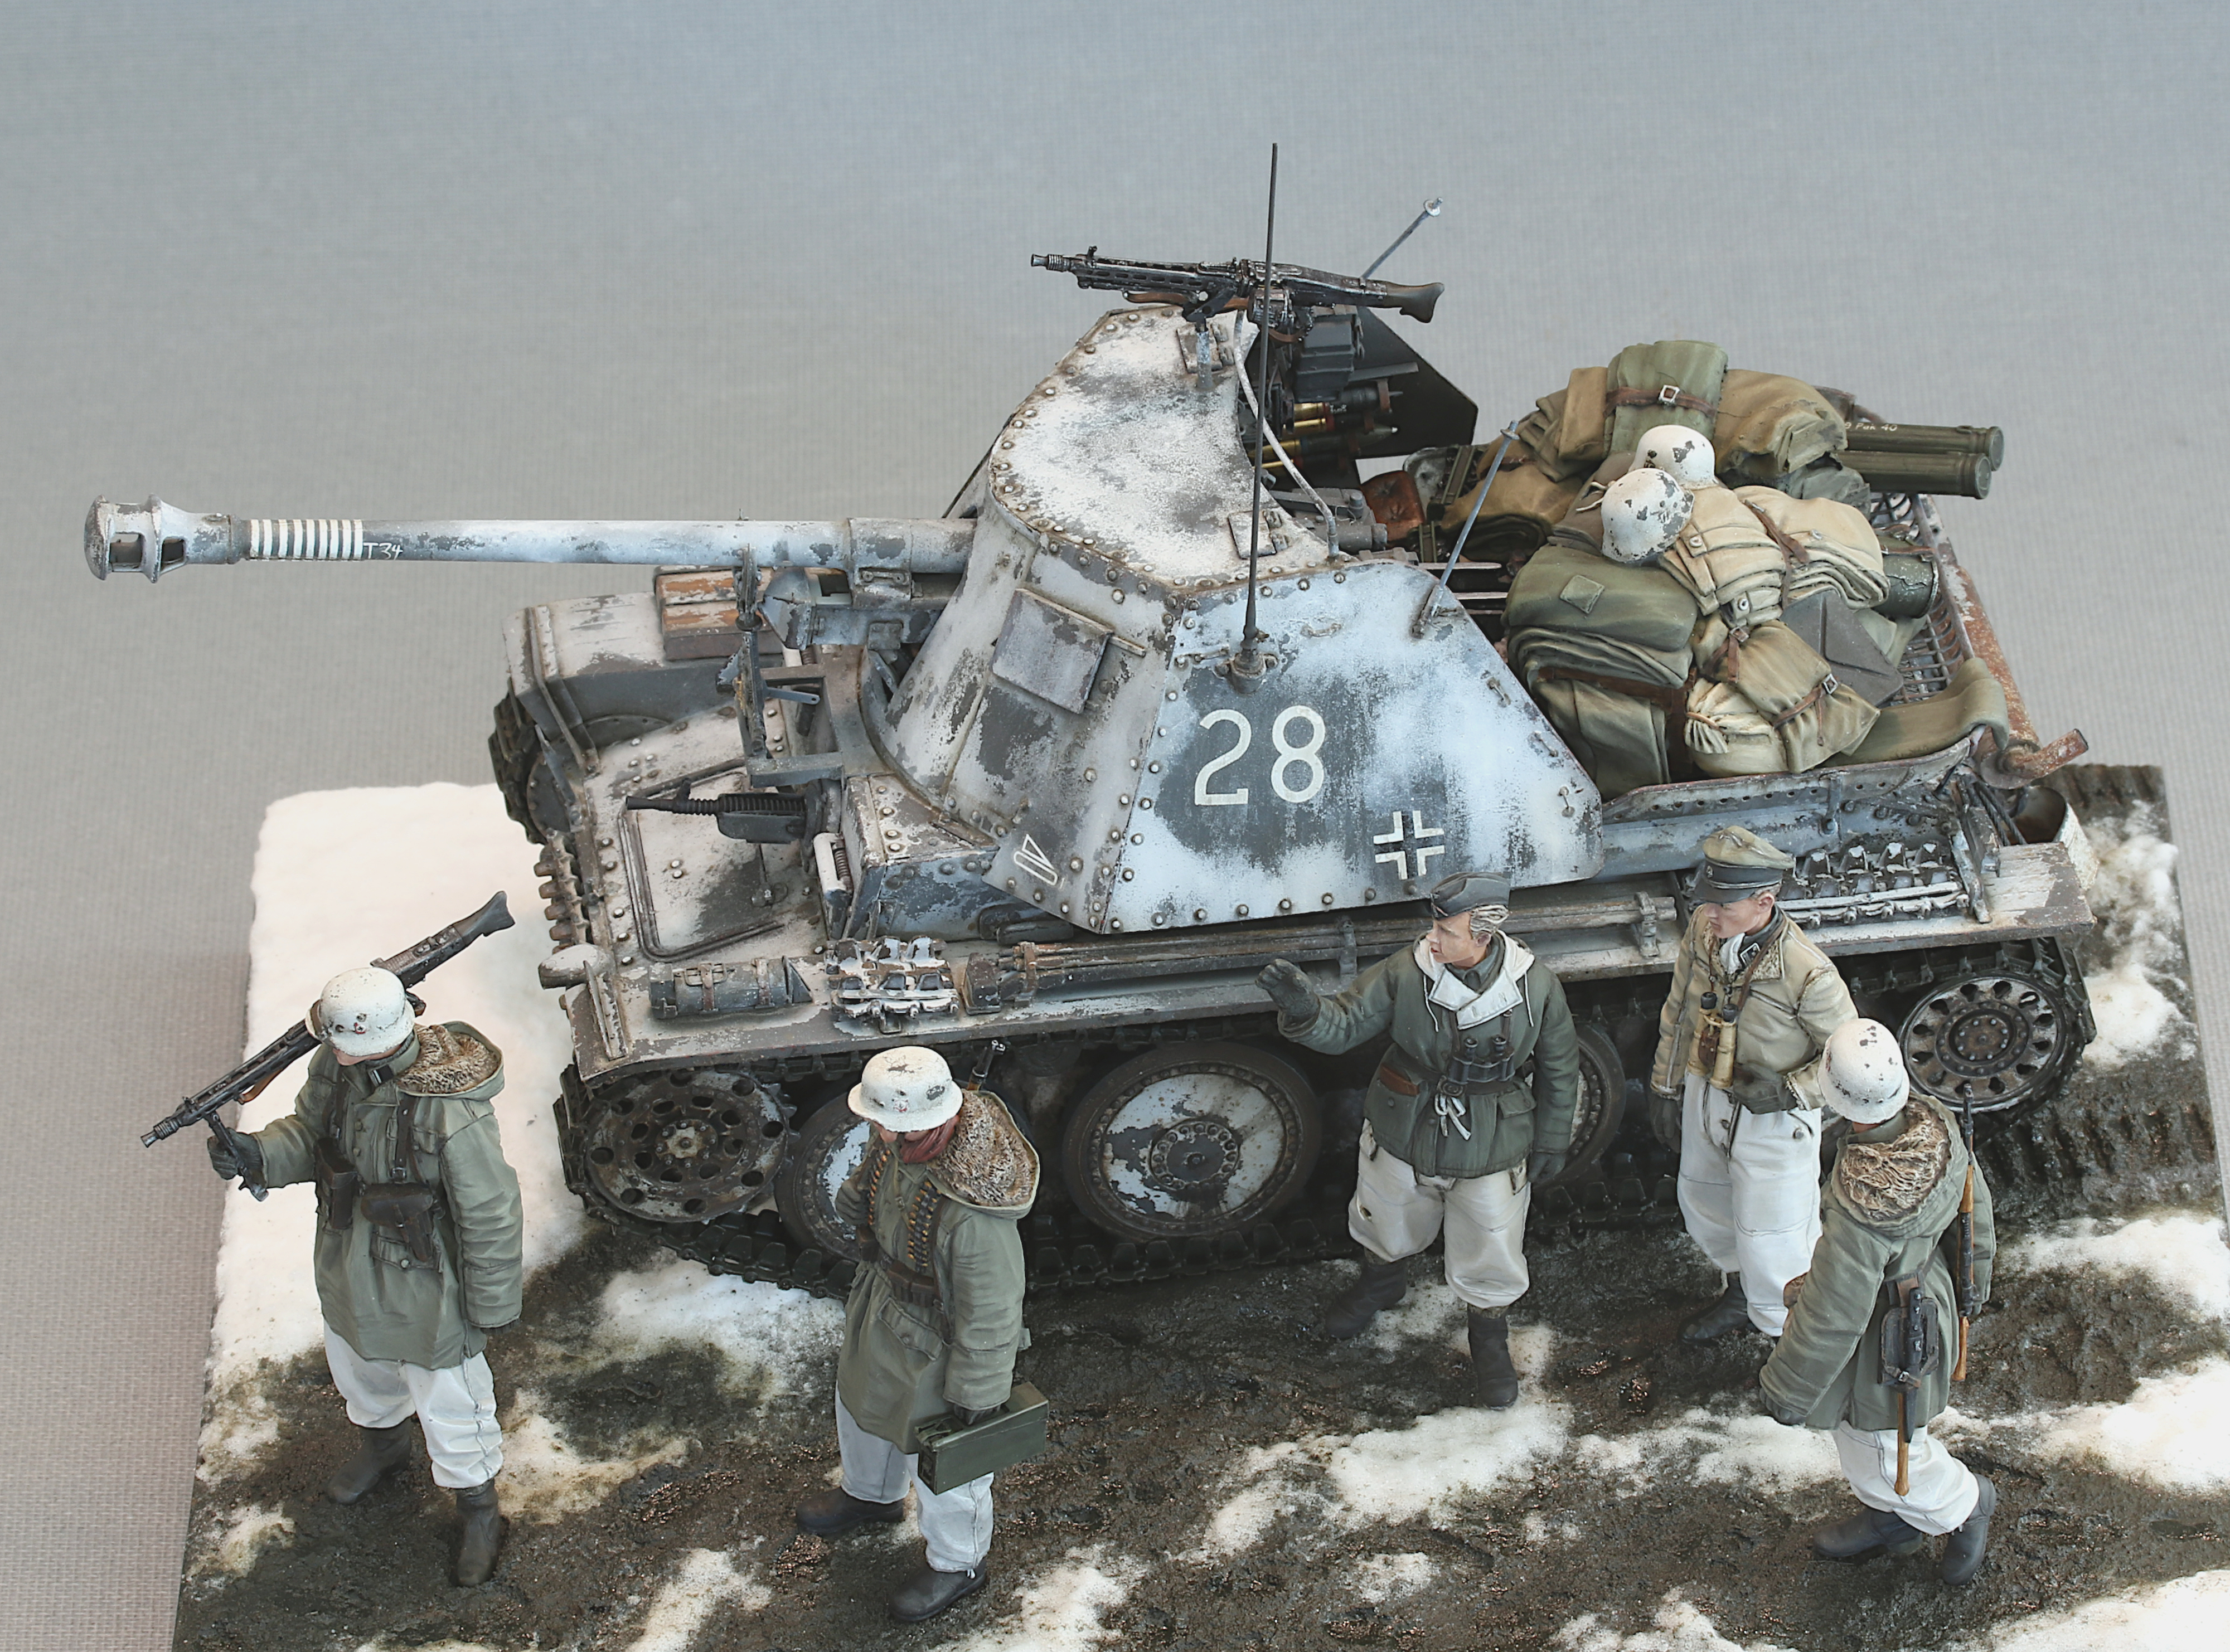
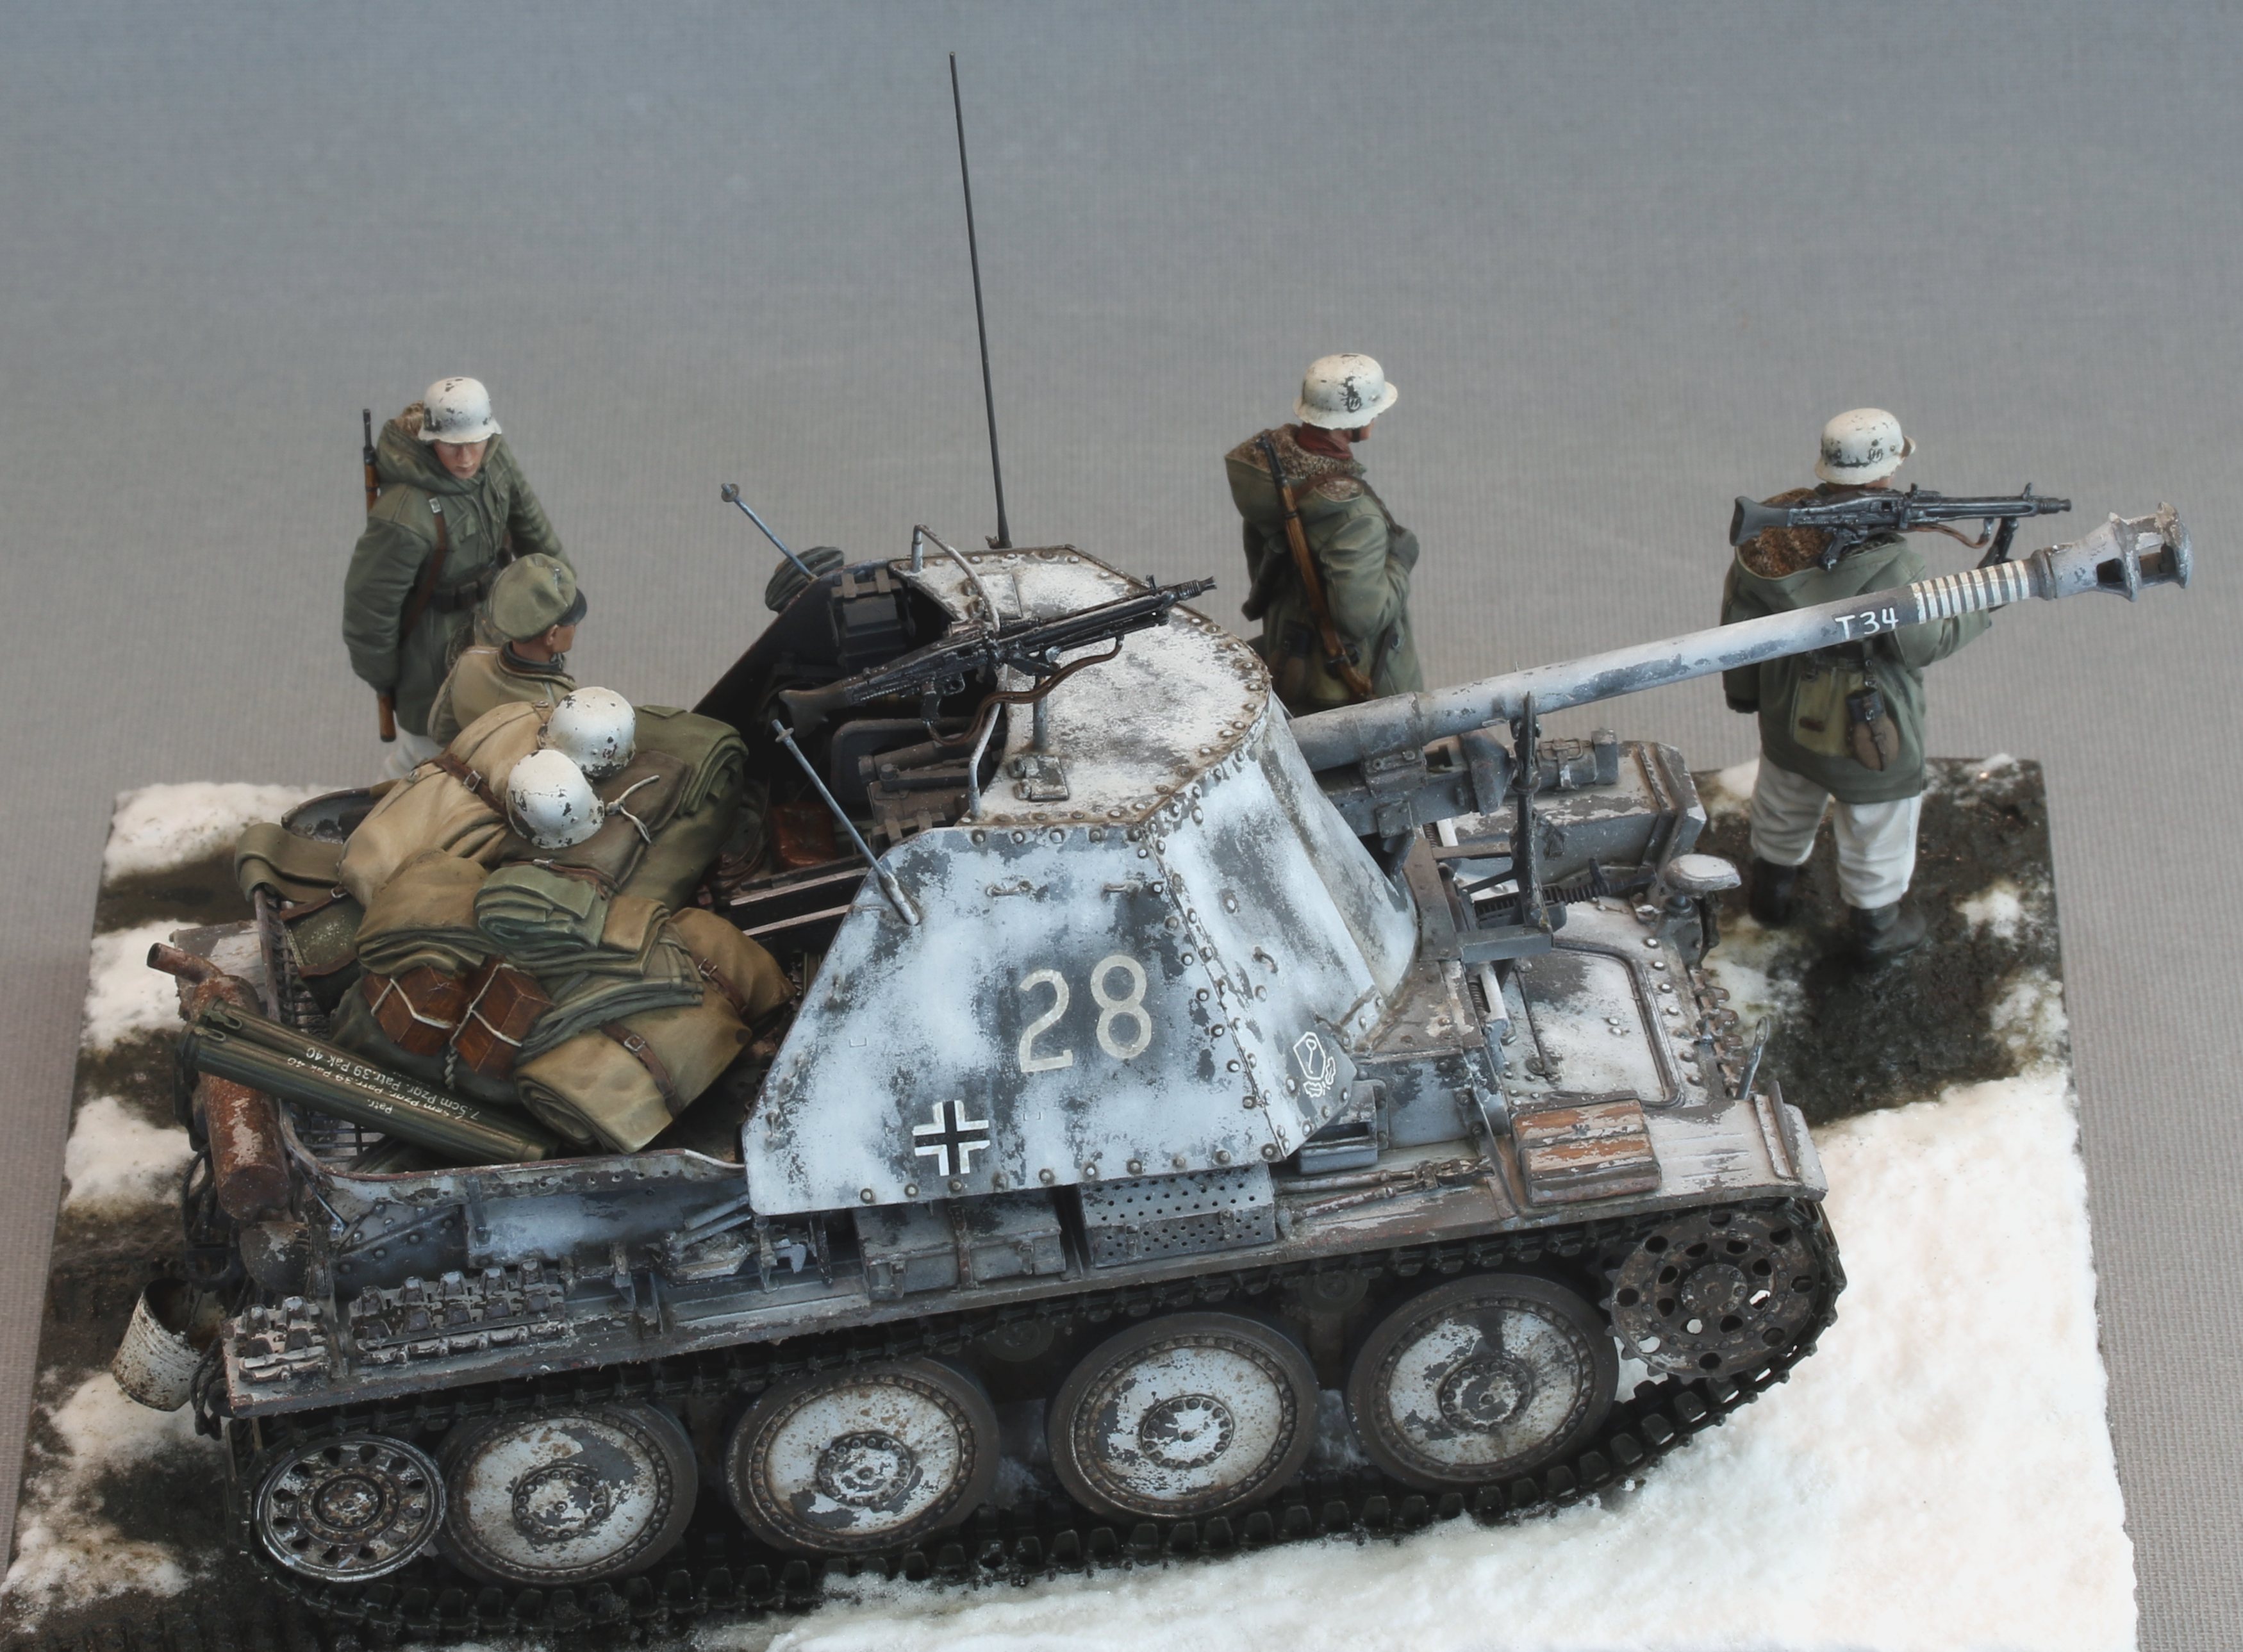
Now I finished the last of my three Marder kits. It depicts a Marder III H from Leibstandarte at Charkow in early 1943. I got inspired from a picture showing a vehicle from that unit there with a lot of personal items stowed on it, so I tried to replicate this. I also added quite a few figures from Alpine.
The kit was from Dragon, with added PE parts from Voyager.
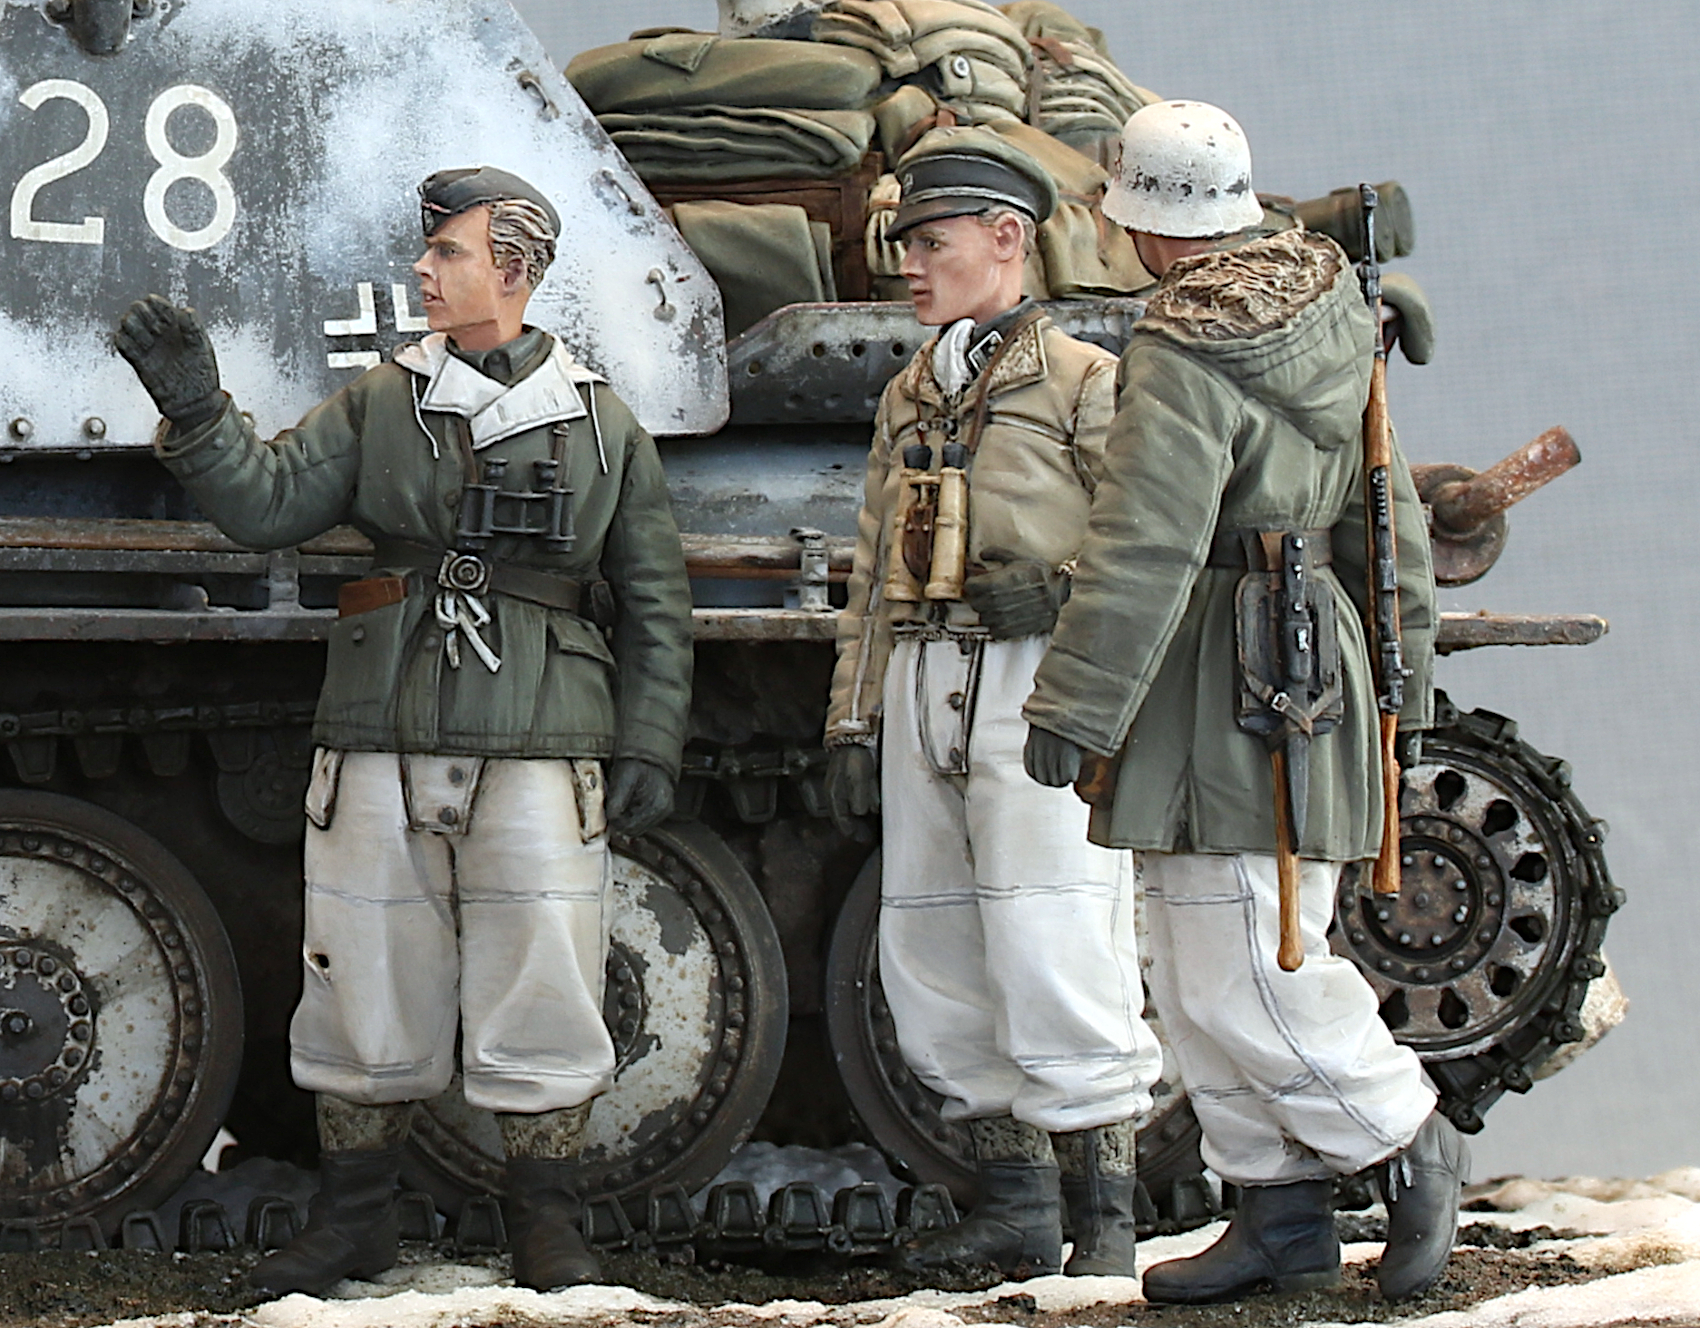
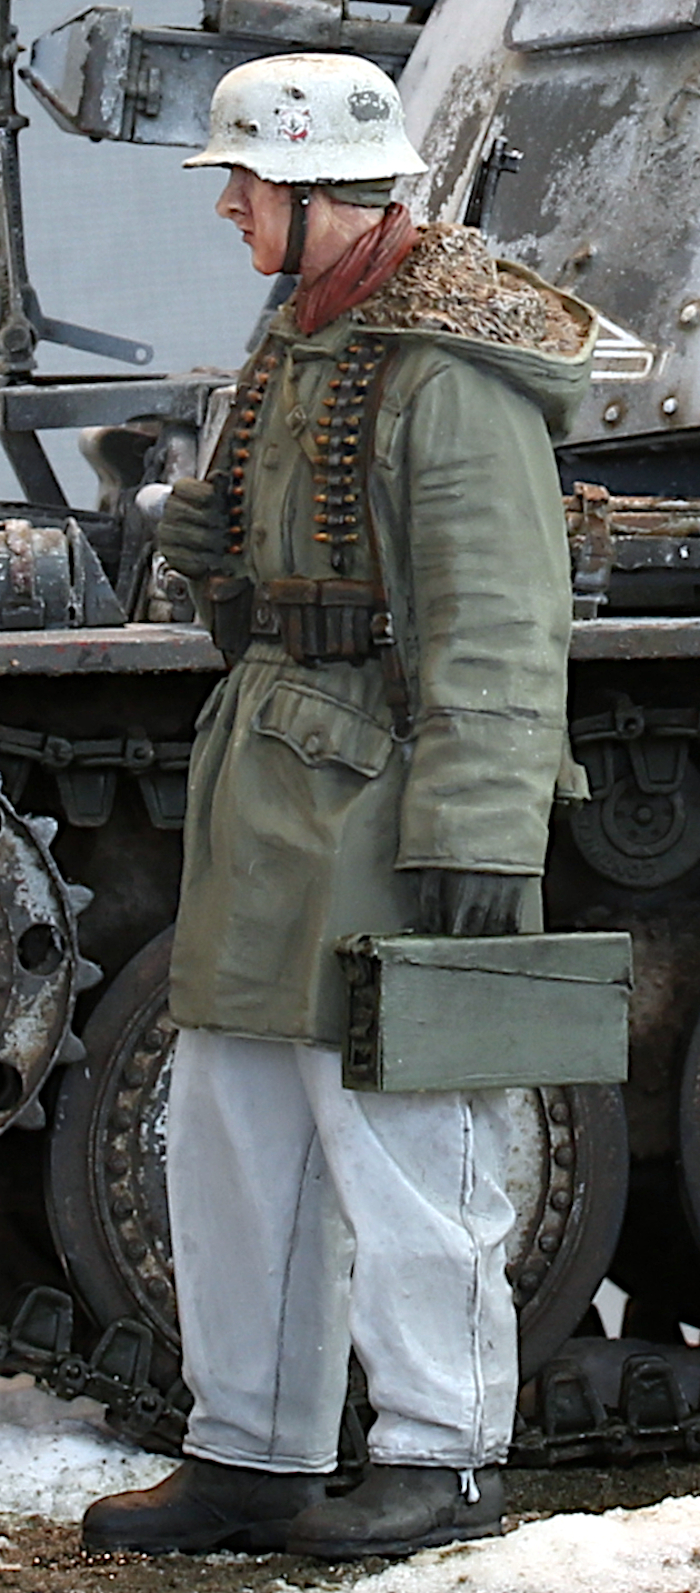
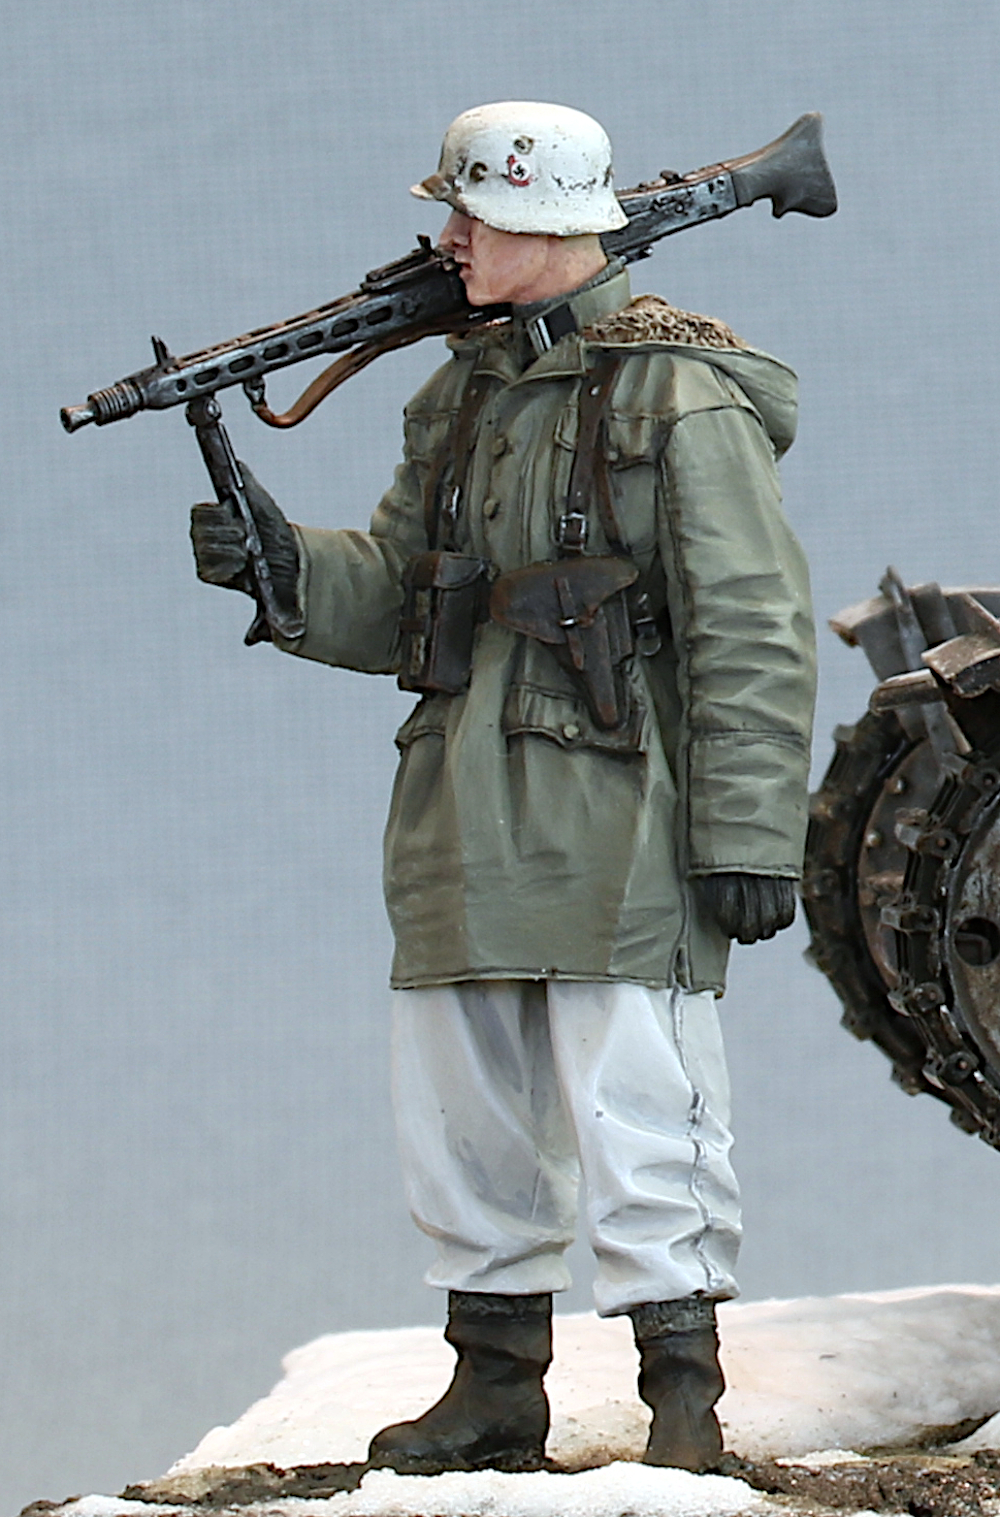
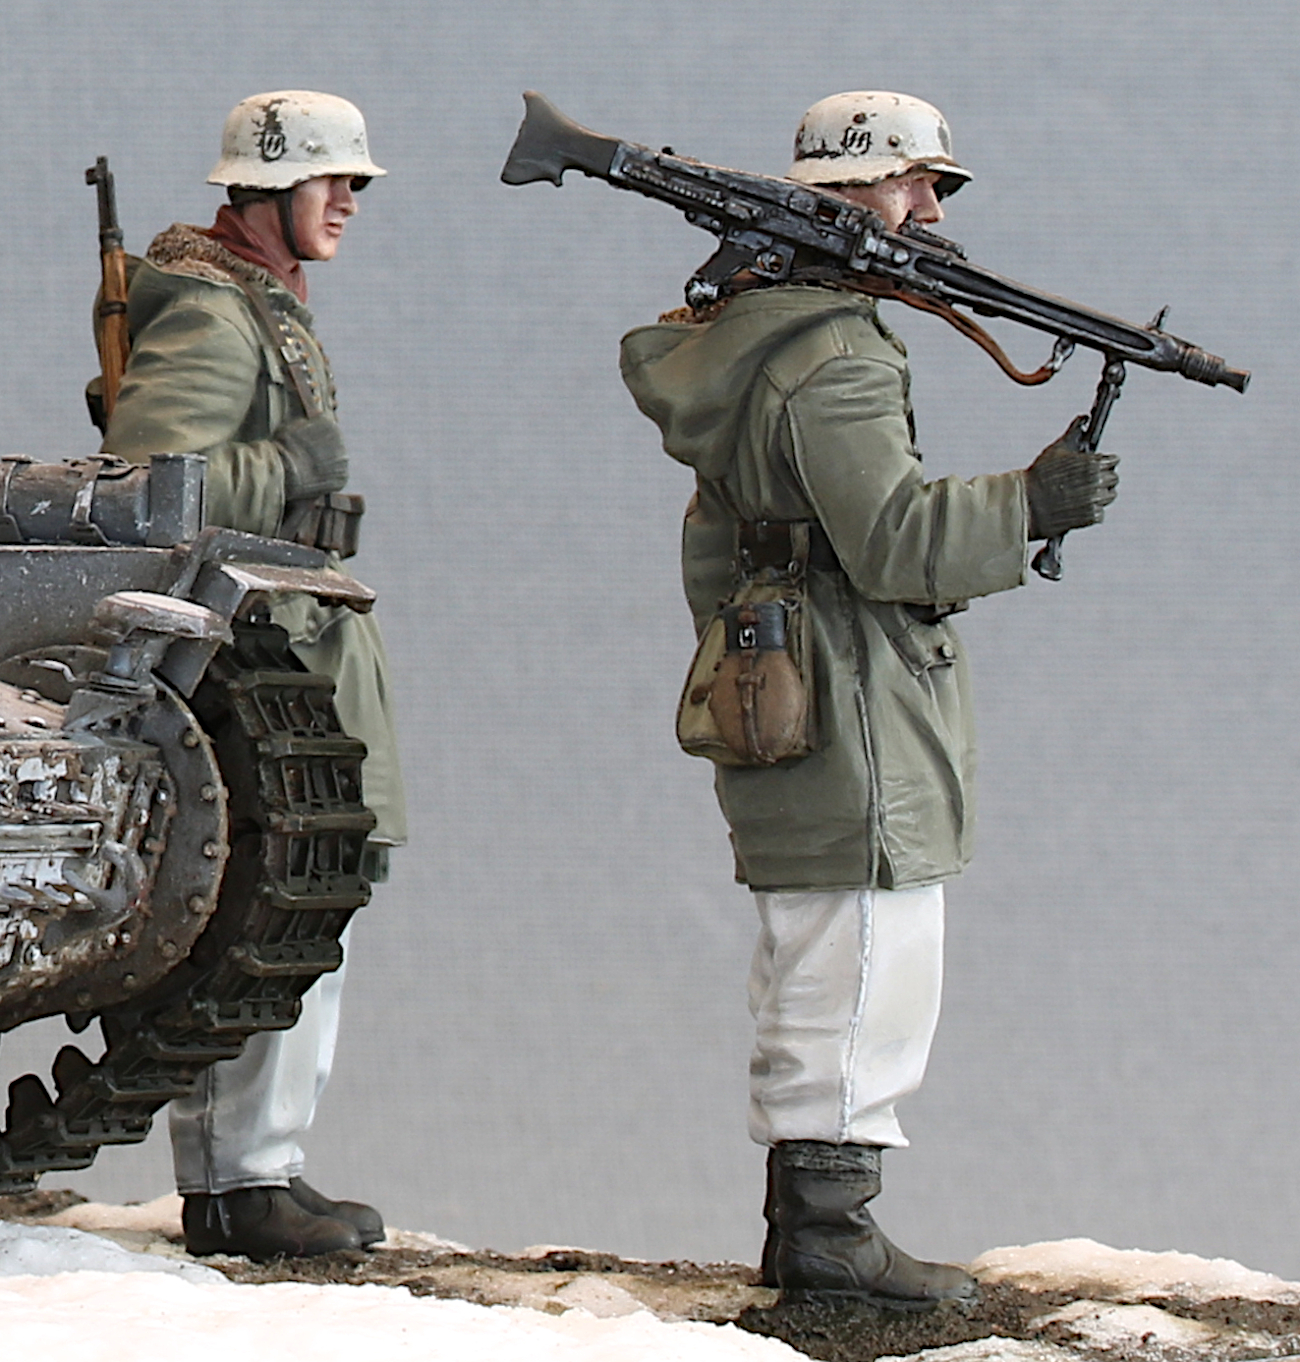
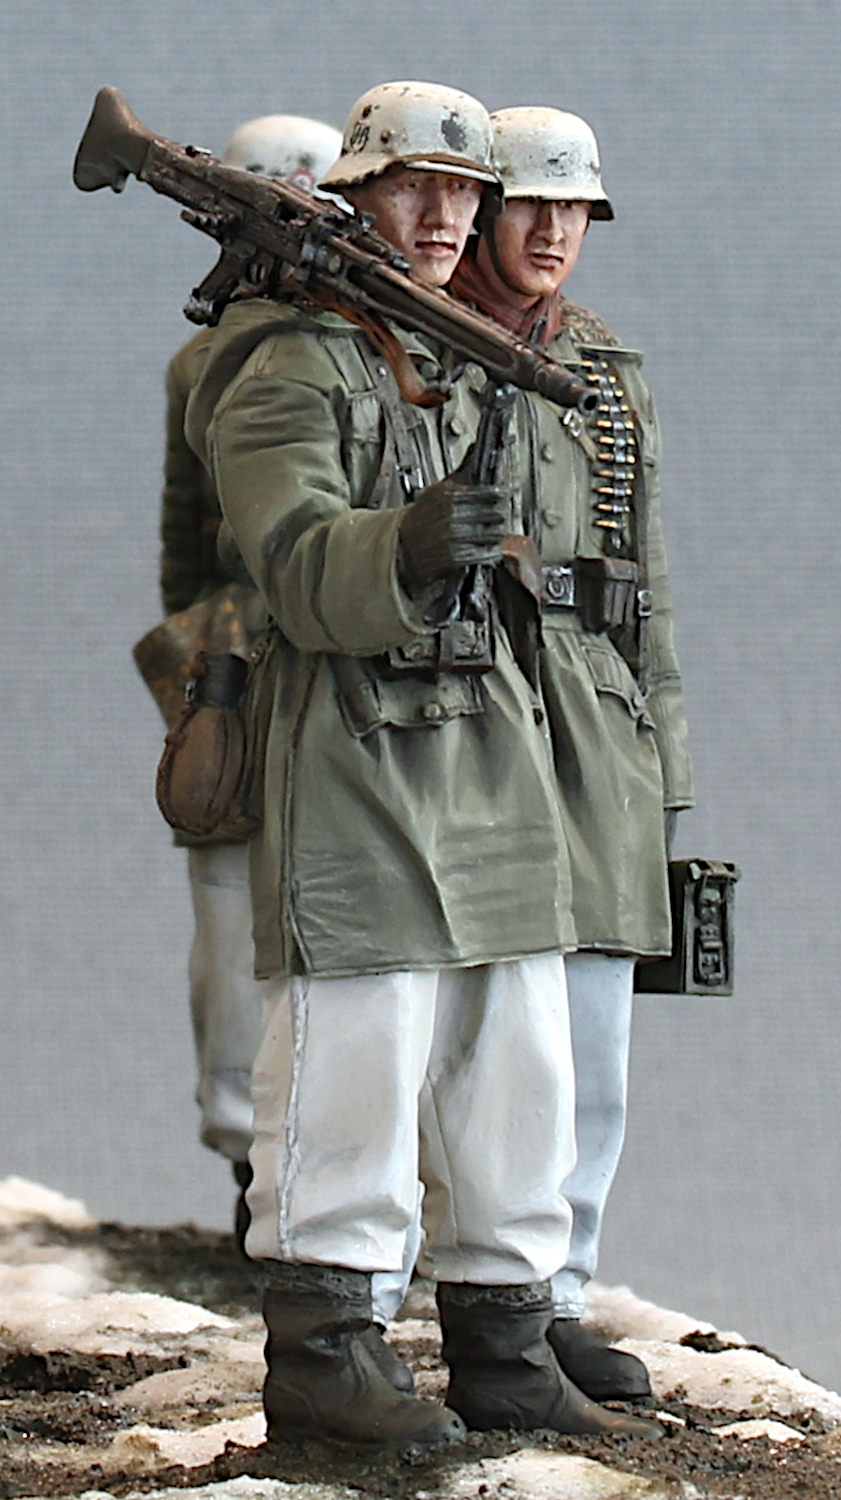

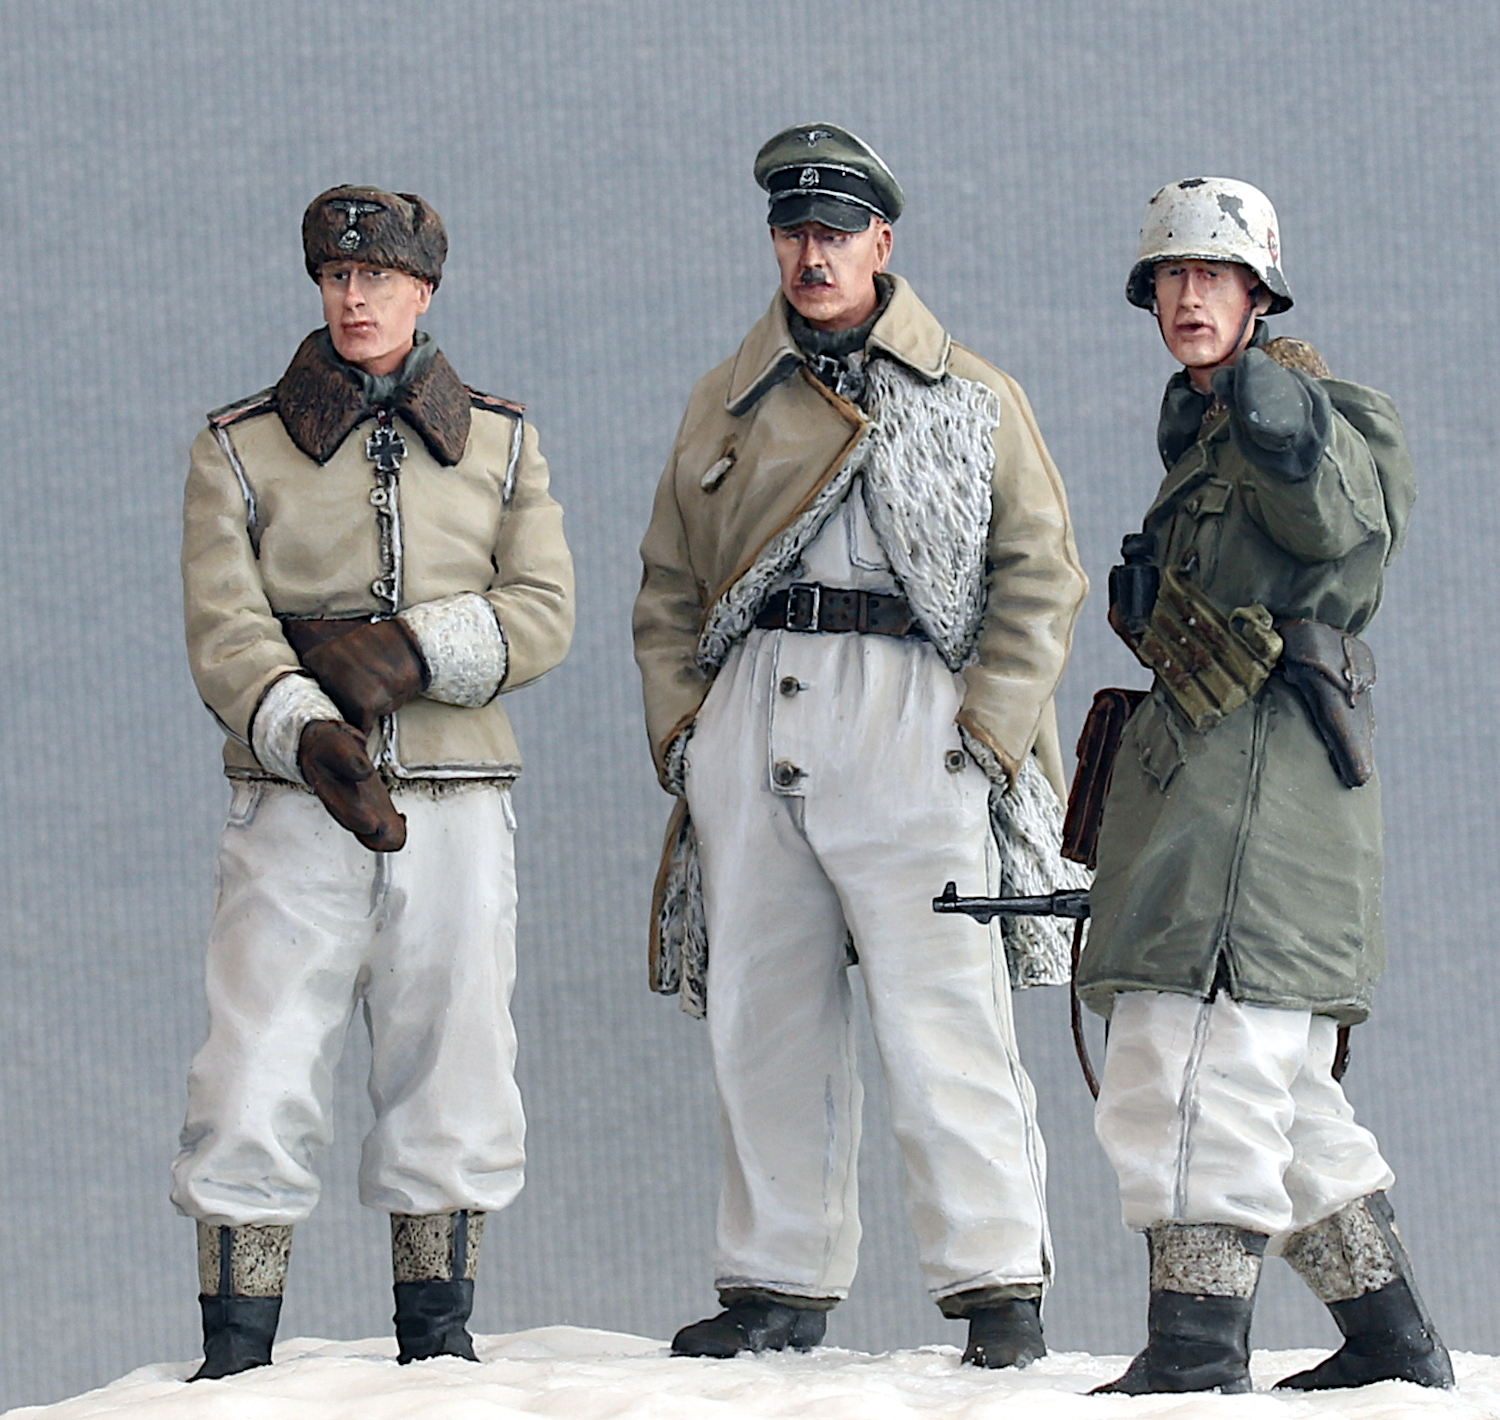
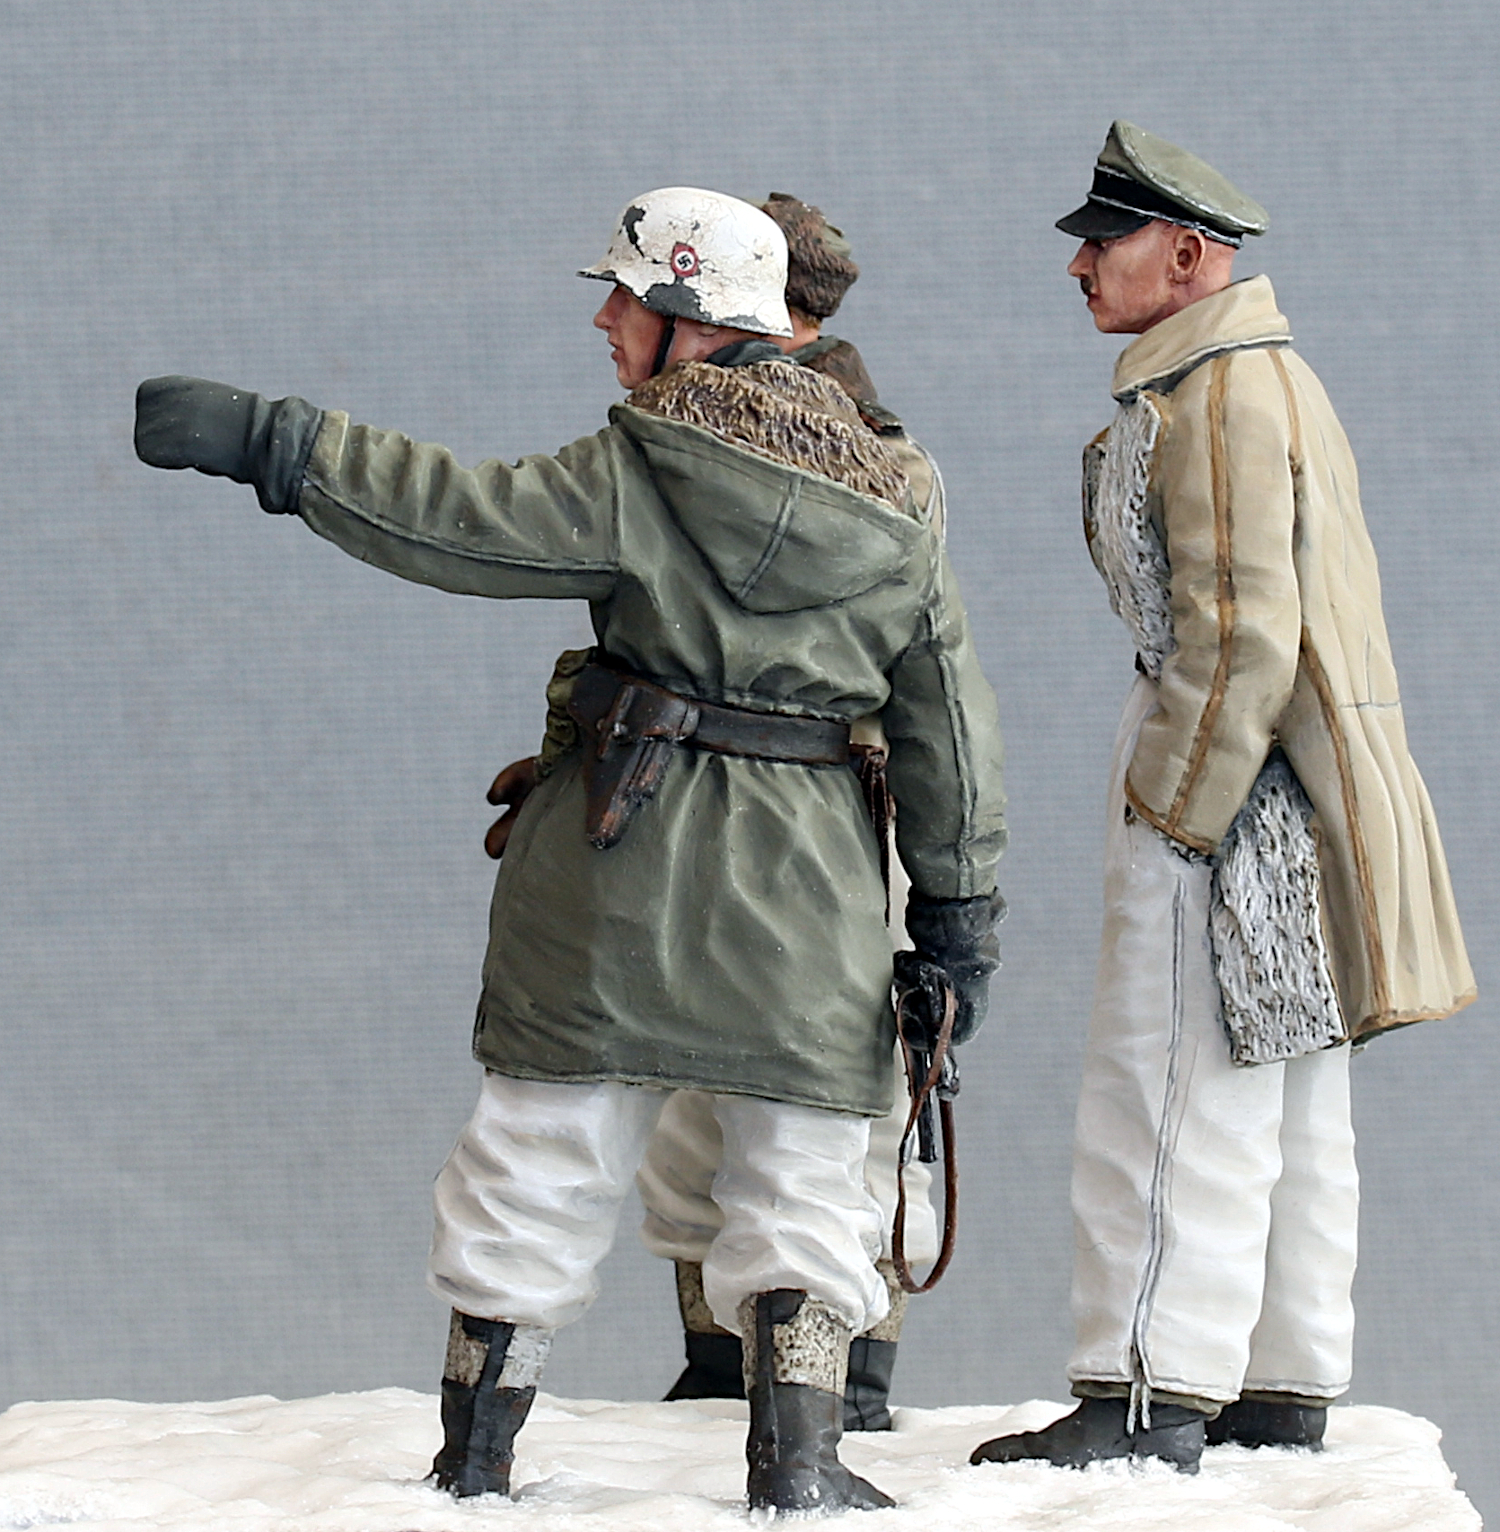
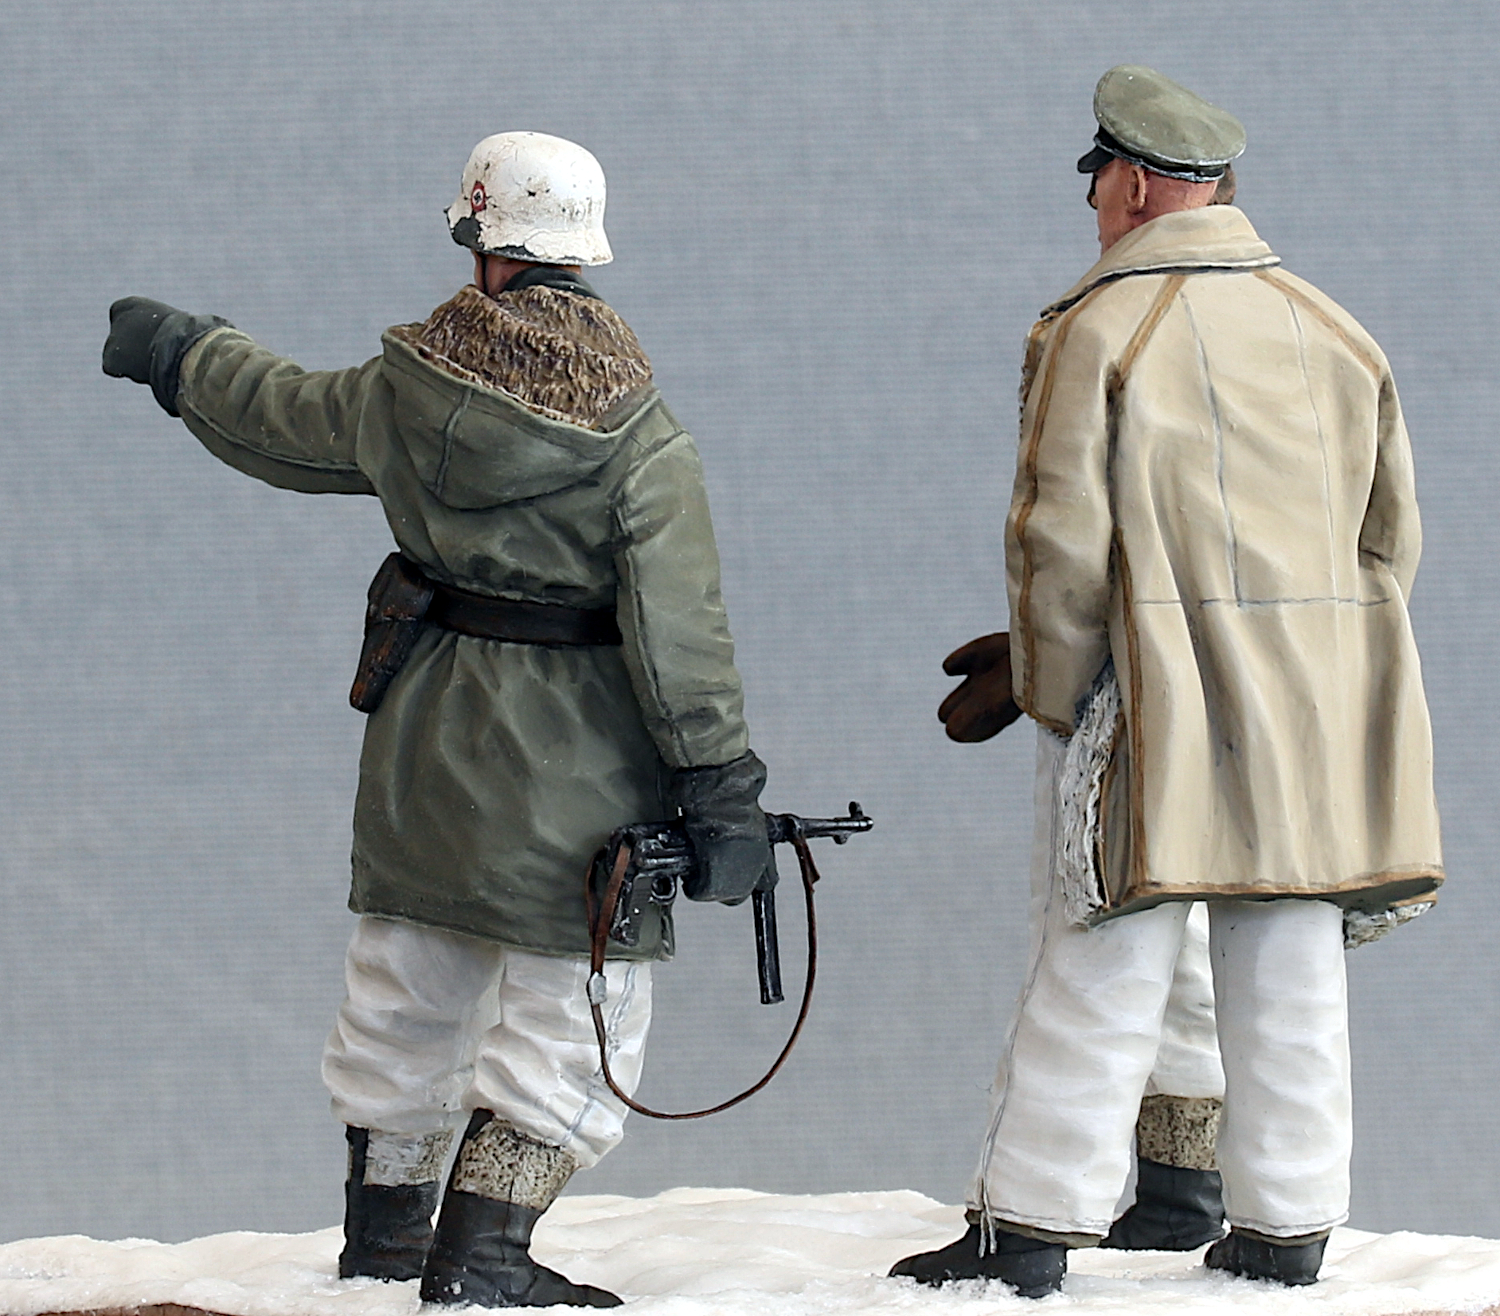
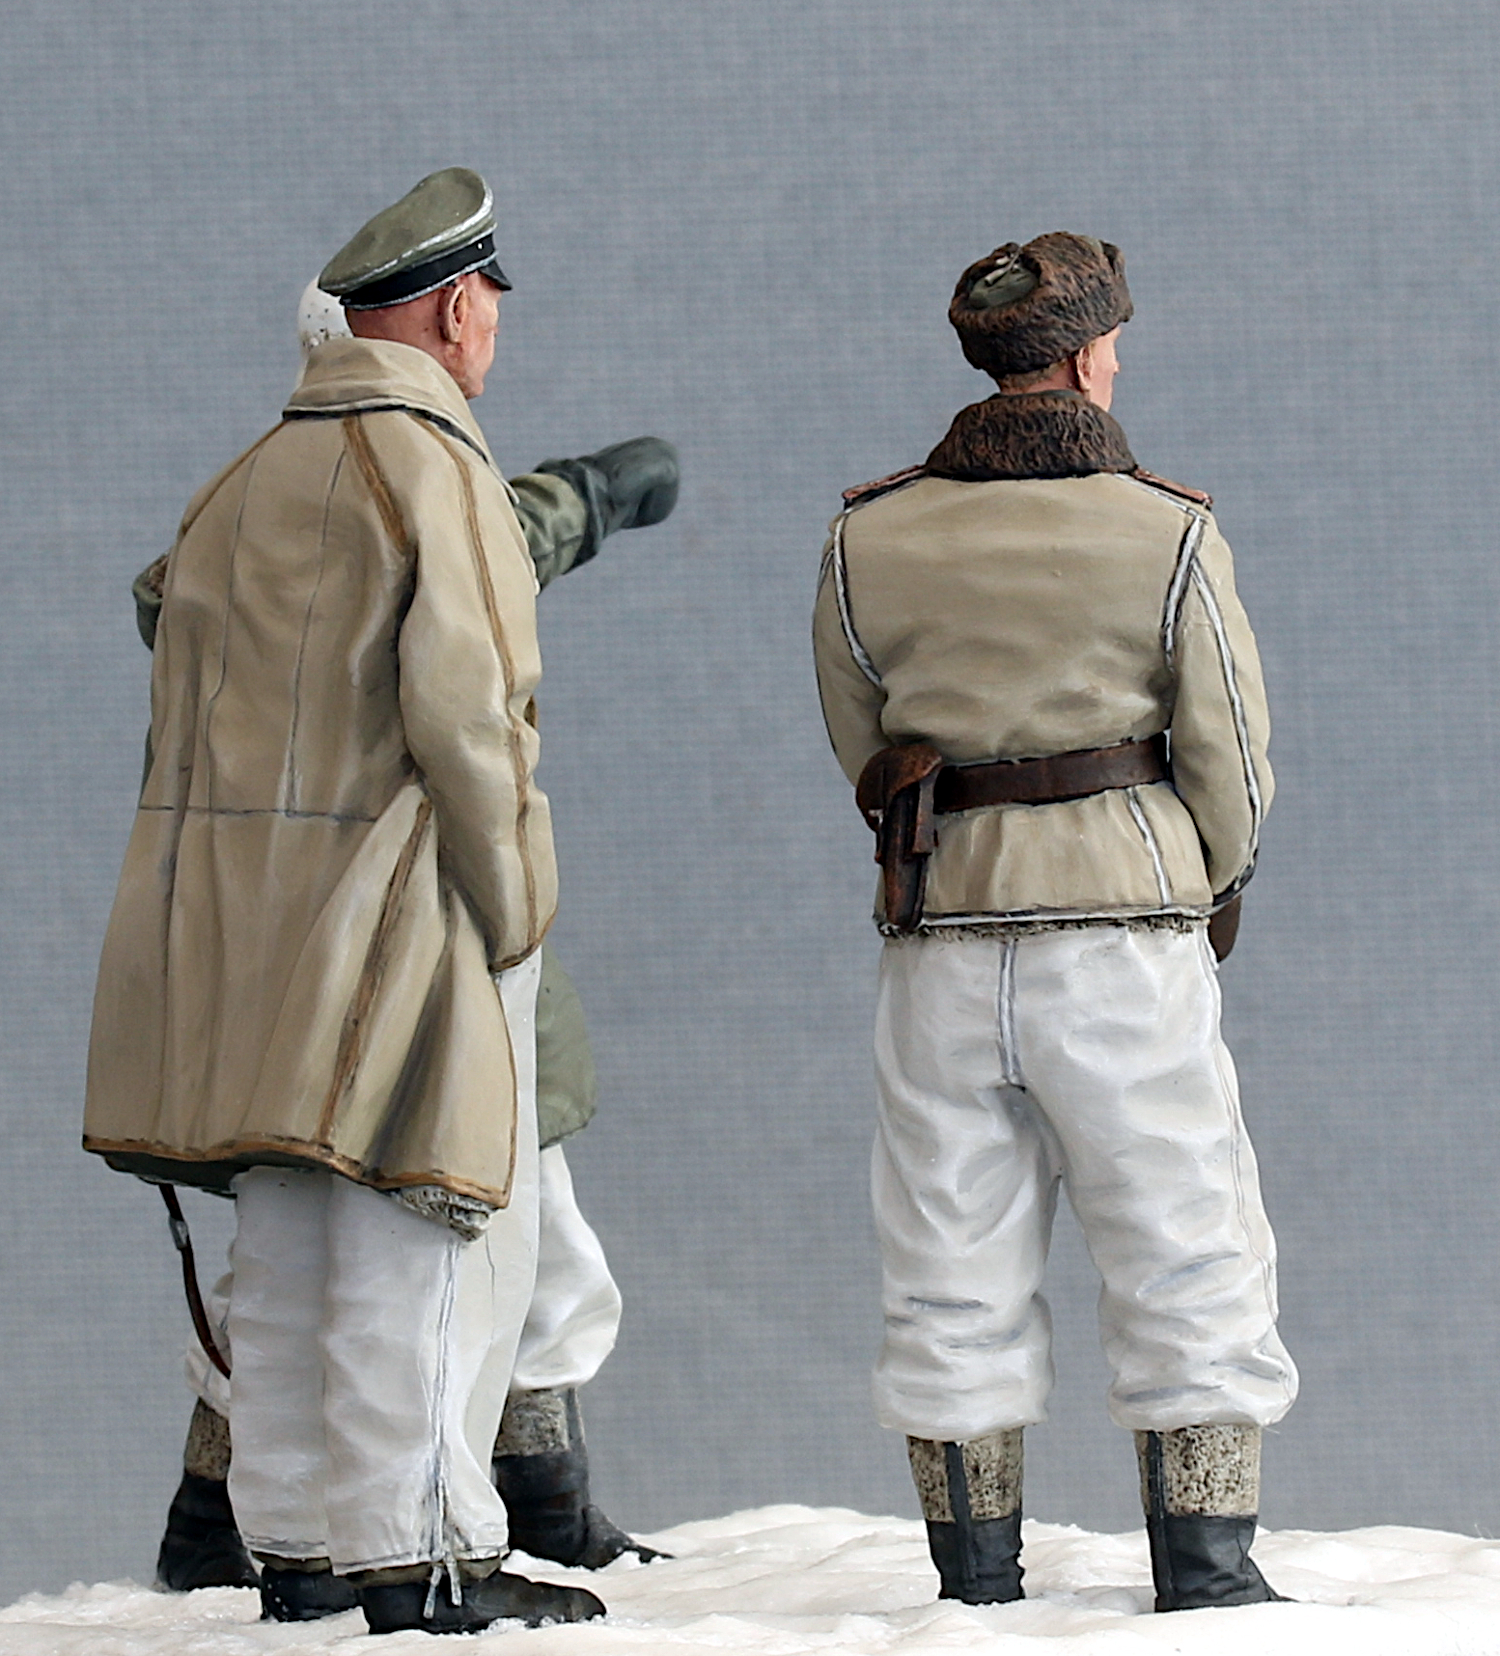
After having finished the vehicles, I started to paint the figures for the scene. The first three are stock Alpine offerings, with a slight modification on the guy with the Stug 44:


These figures will be placed on the road, marching into the direction the Maultier is going.
Following these, I will add another three Alpine figures, one from a Charkov set, that will be converted slightly. They will be grouped at the back of the Schwimmwagen, depicting some gathering.
I finally finished the Kharkov winter scene. Enjoy!


The very last figure to add to the scene will be a SS tanker that is sitting on the scout car. I will use a figure from Alpine for this one, which has to be slightly converted:


The first picture shows the original figure that is standing upright.
I cut off the legs right under the uniform jacket, and also cut off the lower parts of the legs, so that I can reuse the boots and the lower part of the legs. Then I inserted an armature made from copper wire into the parts, that resembles the pelvis, the legs and a part of the spine.
The last picture then shows the legs bent into their position on the car.
Following that, I fixed the pose by adding putty to the wire armature. Not nice, but it works:


Finally, I added the new trousers legs and details like the flaps, and the braces. Now the figure is ready for painting:


And that is how the finished figure looks like:


Now I finished the gun mount with the 2cm gun. I added some scratch built details, like the foot rests. Now I will continue painting the gun mount:


Now I painted the gun mount, added a whitewash and weathering, and now it is also ready to be mounted onto the scout car:


I made quite some progress with the scout car. After priming and airbrushing the body of the car with Tamiya German Grey, I added some sponge chippings with red primer, which were then refined using a black brown acrylic color. Then I did some whitewash on top of that, using the hair spray chipping technique:


Finally, I added a pin wash, followed by some refinements using oils, pigments under the mud guards and some dark washes on the lower hull. I also lightened up the chipped whitewash using white enamel color (this is called mapping by Michael Rinaldi), which adds some nice contrast. The last picture then shows the wheels fitted with snow chains.
The hair spray chipping worked out quite well, as I practiced quite a lot using an old cheap kit.
Now I also finished the wheels, added snow made from soda and white glue to the lower parts of the hull and the wheels, and fixed the scout car to the base:


The body of the scout car is now built together and ready to be painted. After that and the weathering stage, it will be fixed to the base. Then the turret with the gun will also be built and added.
And that is how it looks like now:


Now the last soldier that will be standing in the snow is finished and fixed to the base. The head is only preliminary fitted, and will be finally glued in place after the scout car and the very last figure (which will be seating on the scout car) is also added:


I finished building the interior of the SdKfz 222, so that I can start to paint it now, before gluing the hull together. I also sprayed the undercarriage with panzer grey, and fixed the engine to it:


The red primer looks quite ugly, but it will not be visible after the hull is closed. The other parts are sprayed with a slightly down toned white, and then chipped with a sponge. Then I added some brown – ochre wash and started to paint the details of the fitted gear, bearing in mind that a lot will not be visible later on.
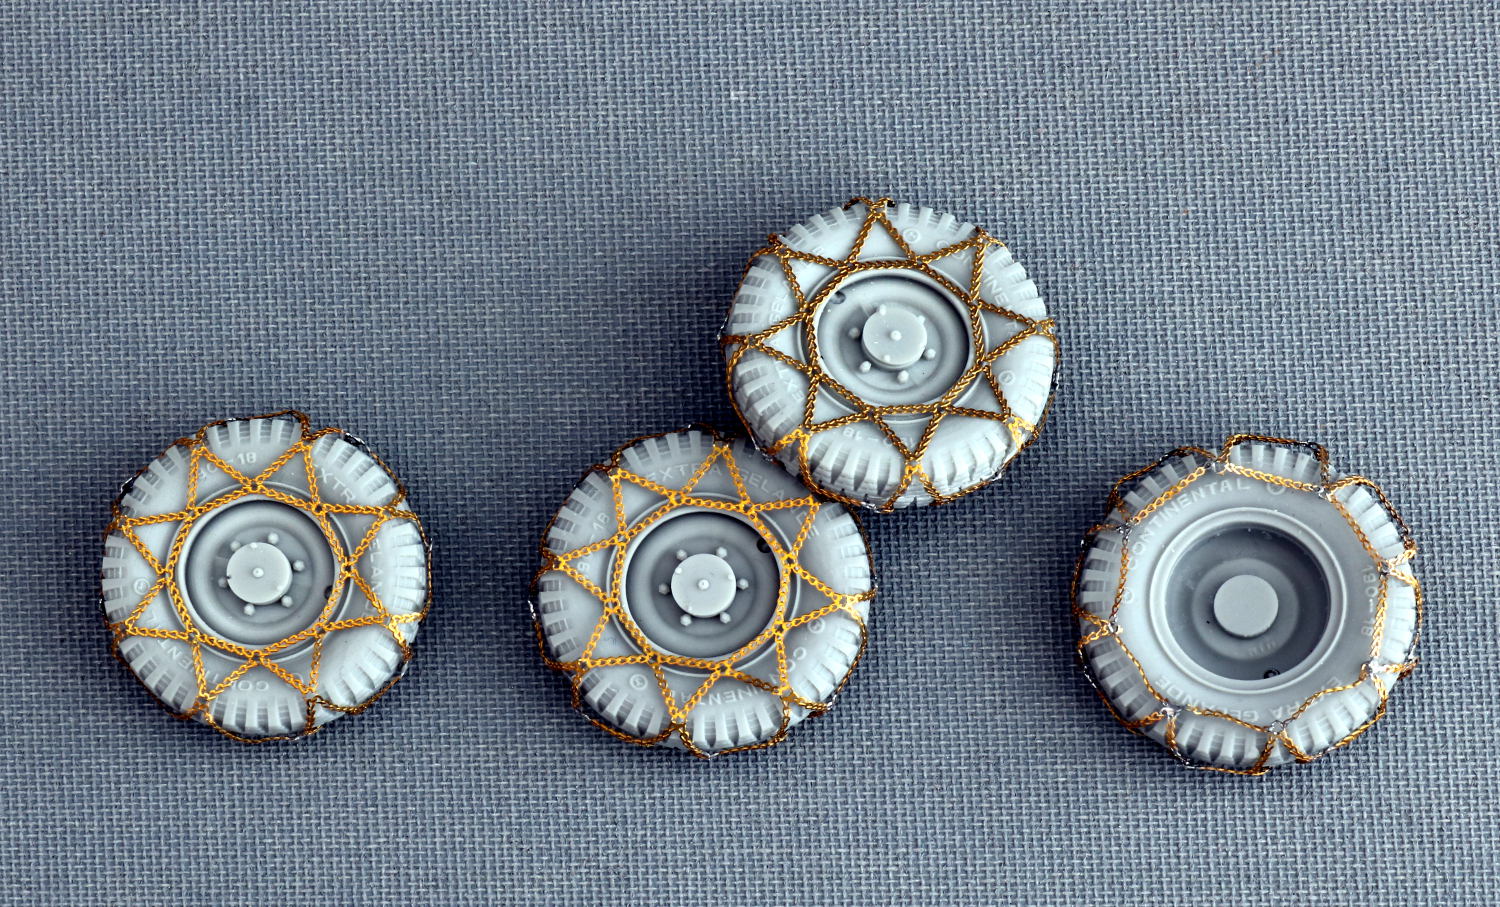
I also fixed snow chains (from Minor, a Spanish company) to the resin wheels I bought separately. Soldering works well, and the joints are soldered together fast enough not to leave any damage on the wheels:
Now I finished painting the interior, glued the lower part of the body to the undercarriage and added the radiator:


As next step I will glue the body together, and continue to build the vehicle.
