The third soldier is now also almost finished, and I started to sculpt the coat of the fourth guy that will be sitting in the trailer:


Now I have finished the last figure:


The third soldier is now also almost finished, and I started to sculpt the coat of the fourth guy that will be sitting in the trailer:
Now I have finished the last figure:
In the meantime I finished the first two figures that will be sitting on the bench in the back of the Kettenkrad:


With the third figure, that will sit on top of the other two, I am currently working on the coat. I just realized that the belt is sitting way to high up, so there will be some corrections to be made. Work on the fourth figure (sitting in the trailer) has just started:


Based on my experience from scultping the PaK crew, I think that is really important to shape the body proportions accurately. Doing so, sculpting the clothing is much easier, as there is no need to correct the shape of the body, and full attention can be paid to get the clothing right.
I also noticed that it is so much easier to sculpt clothing from putty that has already started to cure. It is less sticky, holds the shapes much better and there is almost no danger of leaving fingerprints on items made from rolled out putty when applying them to the figure.
Bearing these findings in mind, I continued to work on the two soldiers that will sit on the back seat of the Kettenkrad. The pictures show them at a stage where the trousers are shaped, and the lower parts of the coats are also put into place. You can also see the much more defined upper parts of the body.


After I added the final details, the three figures are now primed and ready to be painted:


I continued to add further details, like the equipment, collars, uniform pouches etc. So the figures are now on the way to get finished, with some details left to be sculpted, like the gas tarpaulins. The heads are also already prepared.


Now I have started to sculpt the uniform jackets. I started with the parts above the belt, adding front and back separately. Then I added the belts. After that, I started to model the pouches:


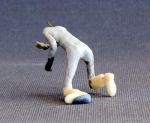
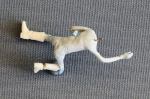
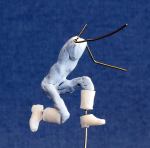
The next step is to refine the body proportions by sanding and adding more Magic Sculp. I also started to rework the resin boots in the areas where they have been cut to allow for flexible poses, and to sculpt the trousers:


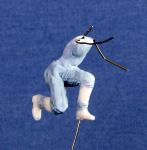
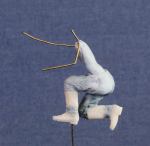
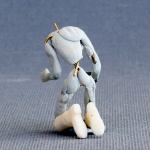
Now Magic Sculp is added to the wires to stabilize the poses, and to provide a basis for further refinement of the body proportions. It does not have to be nice, only stick to the wires…
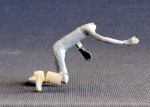
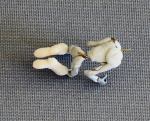

Now I cut back arms and legs of the wire armatures to their respective length, and added resin boots to all three figures. I bent the wires into the desired poses and started to add hands:


I just started to redo the figures that go with the Panzer I and the PaK 37. Here, I would like to show how I build up my figures.
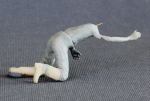
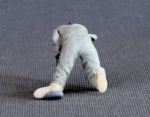
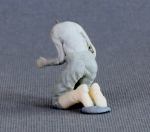
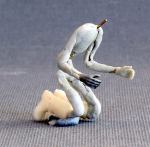
I start with building an armature from wire. I take two pieces of wire (e. g. brass, 0.6mm), and twist them together to form the “spine” (pictures 1 and 2). I then bend the arms and legs (picture 3), and add a “neck” made from a short piece of wire to the spine (picture 4). Finally, I partially fix the armature by adding a “pelvis” and a “chest” from Magicsculp (picture 5):


To get the size of the armature right, I searched on Google for a skeleton picture used by artists to help in painting humans. This was then scaled to 1/35 scale and printed. So I can check the appropriate size of my armature by simply placing it on the printout.
