Armatures for scale figure sculpting

I just started to redo the figures that go with the Panzer I and the PaK 37. Here, I would like to show how I build up my figures.

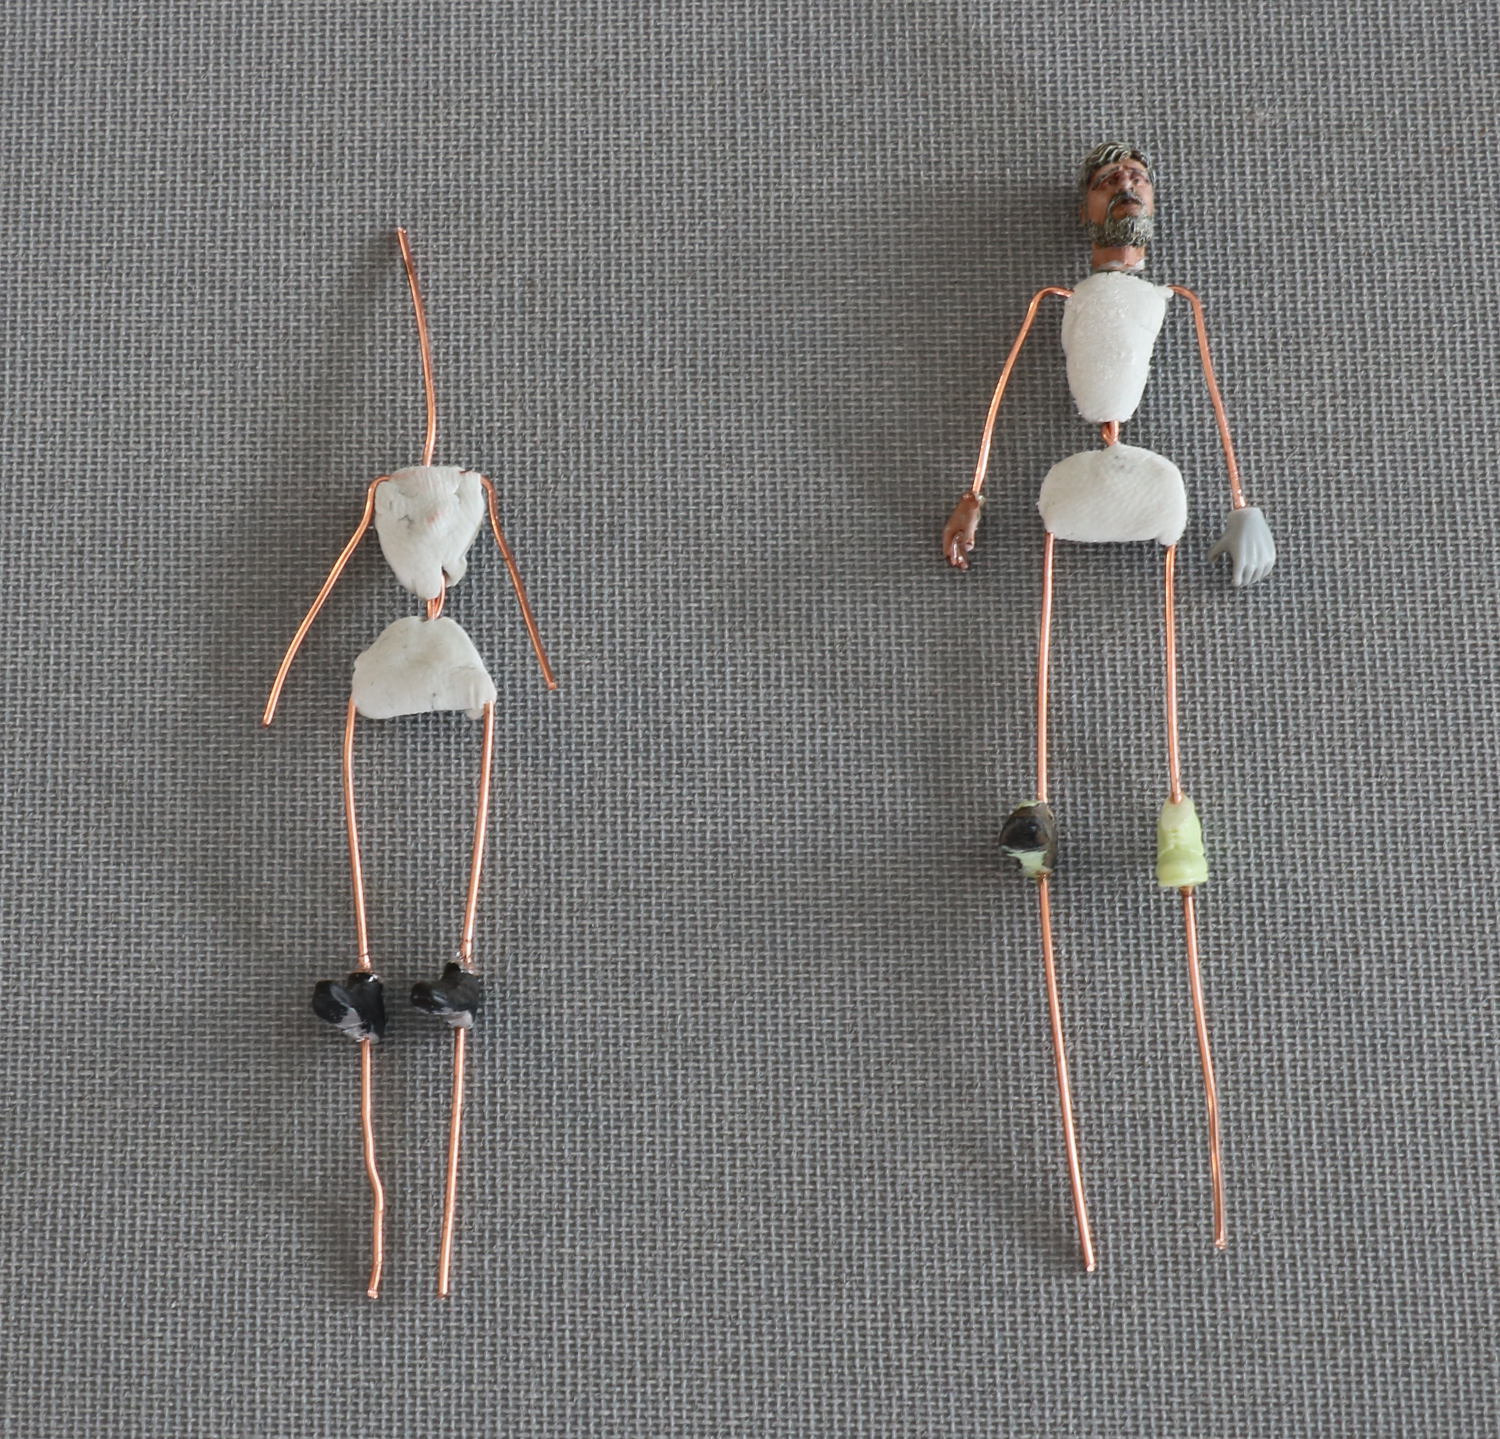
I start with building an armature from wire. I take two pieces of wire (e. g. brass, 0.6mm), and twist them together to form the “spine” (pictures 1 and 2). I then bend the arms and legs (picture 3), and add a “neck” made from a short piece of wire to the spine (picture 4). Finally, I partially fix the armature by adding a “pelvis” and a “chest” from Magicsculp (picture 5):

To get the size of the armature right, I searched on Google for a skeleton picture used by artists to help in painting humans. This was then scaled to 1/35 scale and printed. So I can check the appropriate size of my armature by simply placing it on the printout.

Converting a SS soldier

The very last figure to add to the scene will be a SS tanker that is sitting on the scout car. I will use a figure from Alpine for this one, which has to be slightly converted:

The first picture shows the original figure that is standing upright.

I cut off the legs right under the uniform jacket, and also cut off the lower parts of the legs, so that I can reuse the boots and the lower part of the legs. Then I inserted an armature made from copper wire into the parts, that resembles the pelvis, the legs and a part of the spine.

The last picture then shows the legs bent into their position on the car.

Following that, I fixed the pose by adding putty to the wire armature. Not nice, but it works:

Finally, I added the new trousers legs and details like the flaps, and the braces. Now the figure is ready for painting:

And that is how the finished figure looks like:

Russian peasants

Looking back at my sculpted figures, I realized that I have to practice and to refine my skills there much more. I browsed through some war gamer sculpting web sites, looking at the different techniques used.

Then I decided to redo the Russian peasant couple from the Panzerbefehlswagen I scene. I started creating armatures using two pieces of intertwined copper wire, that was then strenghtened using putty  at the chest and the pelvis region. Then I added shoes and also a head (only temporary):

sculpting-armatures

I then bent the armatures to their respective poses, and fixed these by adding putty to the wires. It looks quite ugly, but it does the trick.

Then I added again some putty to build up the body proportions, and started with the clothing. The peasant has his trousers added, and to the female figure I added the upper part of  her dress, as well as some stockings (as far as the will be visible below the dress:

Now I have finished the two figures, but unfortunately I did not take any pictures while I was sculpting. So these are the finished figures:

Both were sculpted based on historical pictures, like the original figures I made. The guy got a cap, as I did not really like his original hair style. I also changed the legs of the peasant figure, as I had two nice legs available from another conversion project.

Now the figures are painted:

Continued to work on the pak crew

In the meantime, I made further progress with the crew for the anti tank gun. The first figure is finished, and already fixed to the base:

Sculpting on the second figure is also finished, and painting is on its way:

The face only received a first layer of color, with the eyes added. The insignia on the helmet are Archer transfers, which are perfectly applicable using their wet transfer paper.

The last figure is still in the sculpting stage:

Now I also finished the second figure:

And another figure…

As I enjoyed sculpting the other guys so much, I could not resist to add another figure that will be pushing on the Opel Blitz truck:

On the bread bag the canteen and the water bottle will be placed, as well as a Kar98 rifle over the shoulder.

Update: Now the figure is painted and fixed to the base: