I now started painting the tank. I primed the model using Gunze Mr Surfacer, and then applied Tamiya German grey on top of it. Weathering was then done using pigments for dirt, and oils and enamels for dust and everything else. The tank is almost finished now:
Warsaw street fighting
The Panzer I is on its way
I also worked on the Panzer I, and I almost finished the build (apart from the towing cable and the headlights). I added a very nice brass upper hull from Aber, which involved a lot of soldering, but building it was actually some real fun. So that is the tank right now:
So it is almost ready to get painted.
Continued to work on the pak crew
In the meantime, I made further progress with the crew for the anti tank gun. The first figure is finished, and already fixed to the base:
Sculpting on the second figure is also finished, and painting is on its way:
The face only received a first layer of color, with the eyes added. The insignia on the helmet are Archer transfers, which are perfectly applicable using their wet transfer paper.
The last figure is still in the sculpting stage:
Now I also finished the second figure:
Finished the running gear of the Panzer I
I also continued to work on the little Panzer I. I added the road wheels, and I am currently glueing the single link tracks together. They are removable (together with the drive sprocket). The wheels are also moveable to faciliate easier painting later on:
I used different brass parts from an Aber PE set, together with styrene sheet leaf springs. The interior will be totally invisible later on, I added it for fun anf to provide more stability.
The gun crew
Started painting the pak gun
In the meantime I started to paint the pak. I started with primin using Gunze Resin Primer, and then coating the gun with a layer of Tamiya German Grey. This was followed by some subtle sponge chipping, showing red primer marks. These spots were then occasionally painted with a black brown color simulating bare metal.
Then I added a filer using a beige brown oil mixture, followed by a black brown pin wash. To ease painting, I still keep the upper part of the gun separate from the base:
For the pictures, the gun was put together on the base.
Update: Now the gun is finished, and I fixed it to the base. Currently I am still working on the grenade cases. Then the gun crew will be sculpted…
update on the Pak
PaK 35/36
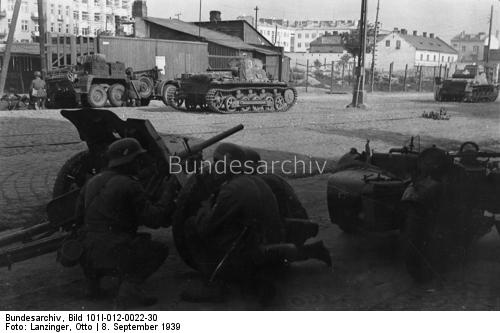
The Warsaw street fighting scene will feature also a PaK 35/36 anti – tank gun together with the Panzer I. I have a spare one from a Dragon kit, and I bought the old Tamiya kit as well, as I like to convert the figures included to fit this scene. I added a turned barrel from Aber, and a PE set from Eduard.
Both kits are similar, the Tamiya gun has crisper details (but fewer), whereas the Dragon gun features more details, but the moulding is less crisp. The PE set is disappointing. Only a few parts can be used, and Eduard really missed the opportunity to add much more nice details.
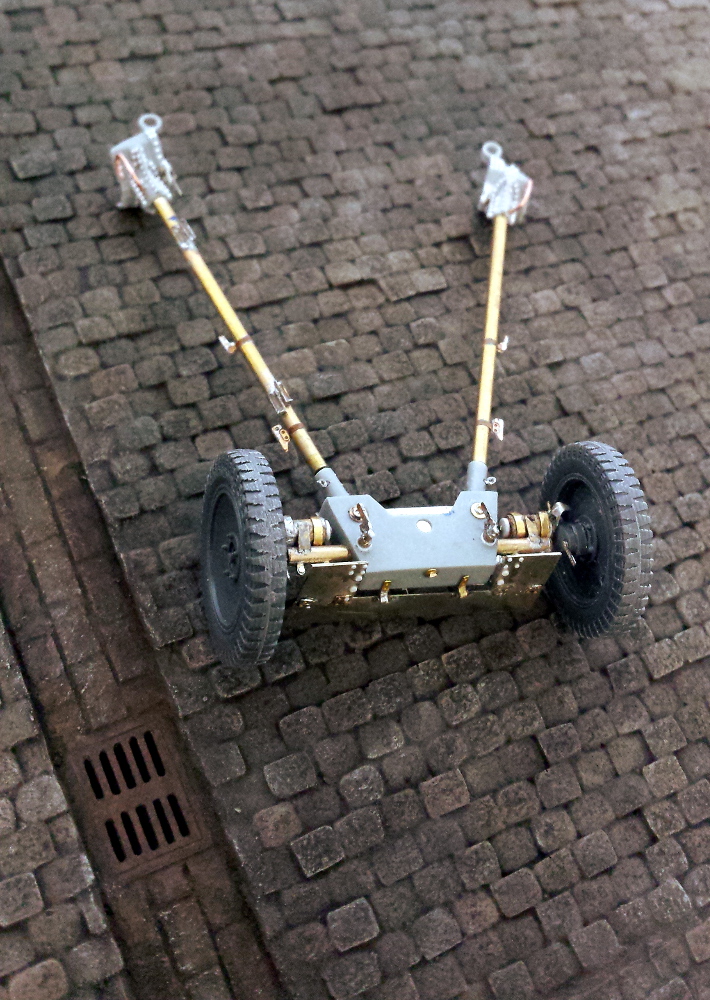
As I have quite some reference pictures available, I will scratchbuild a lot of the missing details by myself. I started with the base of the gun:
In the meantime I continued working on the Pak, and I have also finished the construction of the base, which is now ready for painting:
The lower part of the Pak is now ready to be painted, and the base is also finished:
Another new project – Warsaw street fighting
As the SdKfz 250 is on hold, I embarked on a new project. Inspired by a historical picture and a left over 3.7cm Pak, I decided to depict a little scene featuring a Panzer I and the Pak. This is the reference:
The Panzer I kit is from Tristar, I also bought myself some PE sets from Aber (basic details, fenders, upper hull). The Pak is from a Dragon kit, and will also be amended with a turned barrel and a PE set from Eduard. The figures will be based upon the crew from the old Tamiya 3.7cm Pak.
I already started building the tank. What a nice little vehicle it is…
In the meantime, I built the lower part of the hull, and detailed the suspension of the first road wheel a little bit, replacing the molded part. The interior I added only for fun, as it won’t be visible at all:

